



Special Days let you create custom schedules for your employees that override their regular working hours. Unlike regular working hours, these schedules apply only to specific dates or date ranges, and won't repeat daily or weekly.
Video Version
Adding Special Days for Your Employee
To add a special day for an employee, navigate to the Employees section in Trafft, click the three-dots menu next to the employee, and select Edit Employee. The Special Days tab is available under the employee's settings, as shown below.
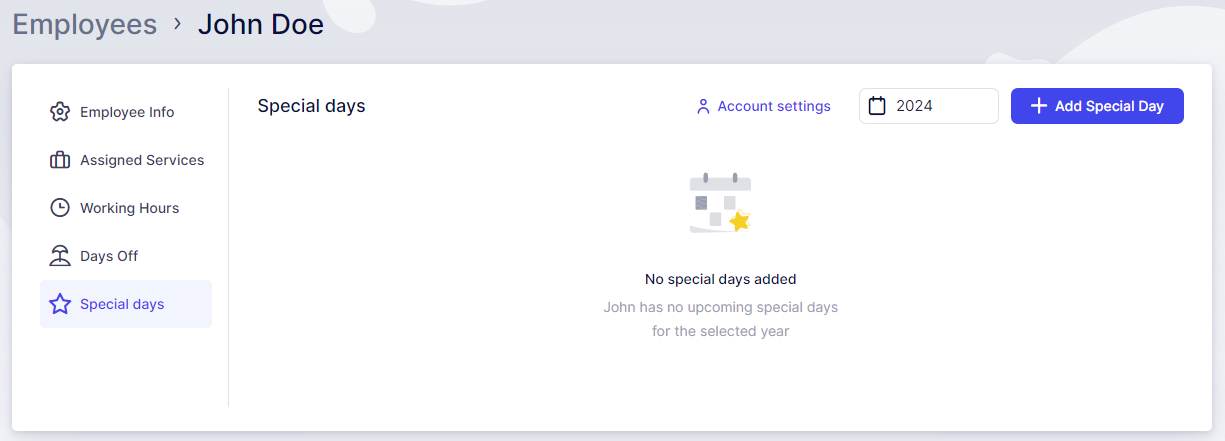
After accessing the "Special Days" tab, proceed by clicking on the "+ Add Special Day" button located in the upper right corner. This action will prompt a pop-up window to appear, as illustrated in the image below:
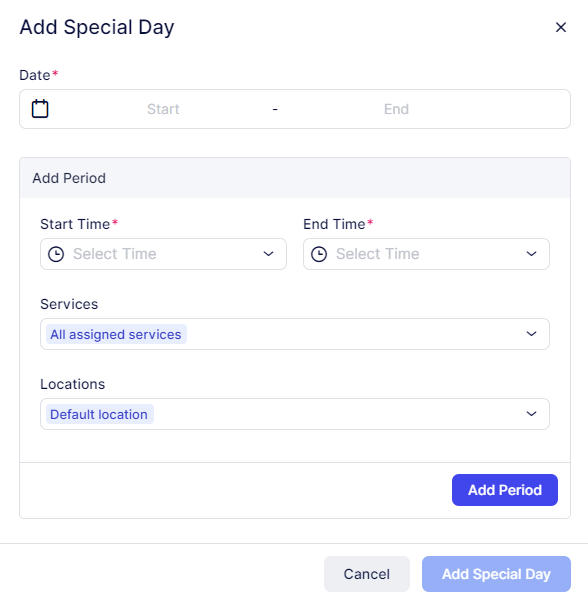
To create a special schedule for an employee, start by setting the date range for which the special schedule will be in effect. You can select a single date by double-clicking on it, or choose a date range by clicking on the start date followed by the end date.
Periods must be created in chronological order, starting with the earliest. Once a period is added, you can't add another one that starts before it. To adjust the order, edit the start time of the first period, then edit any periods after it.
Next, choose which services the employee will provide during this special schedule using the "Services" dropdown, and which locations they'll work at using the "Locations" dropdown. If you leave these blank, Trafft defaults to "All Assigned Services" and the employee's "Default Location."
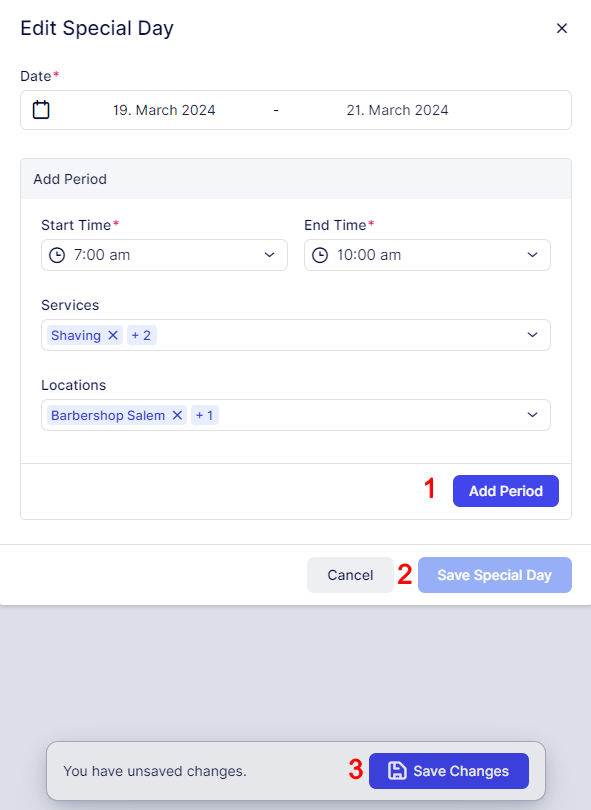
After defining the date range, time, services, and locations for the special schedule, click "Add Period" (1) to save the period to the Special Day. From here, you have two options to proceed:
- If you're creating a single period, after adding it, click "Add Special Day" (2) and then select "Save Changes" (3) which appears at the bottom of the page.
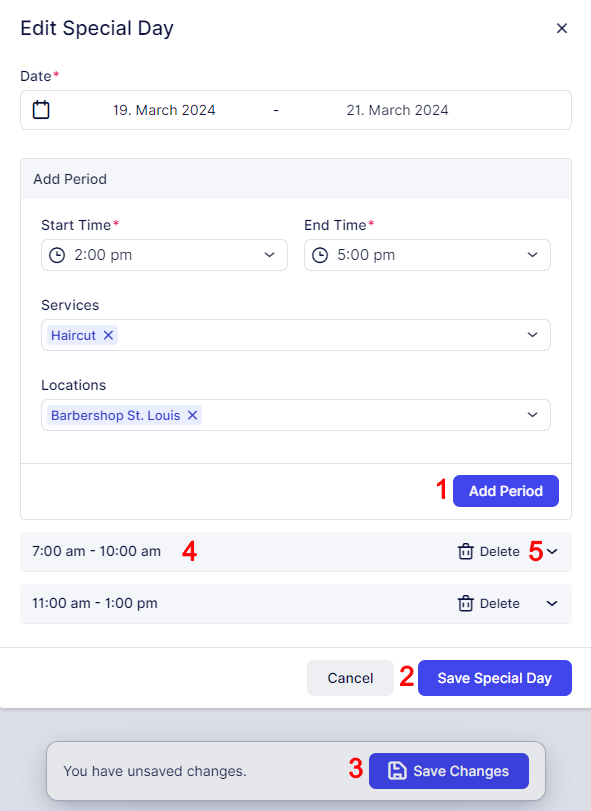
- If you're creating multiple periods, each added period will be displayed at the bottom of the Special Day popup (4), allowing you to add consecutive periods to the same Special Day (you can always click on the down-arrow next to each added period to expand it and edit it (5)). Continue defining and adding periods as needed. Once all periods are defined, click "Add Special Day" (2) and then select "Save Changes" (3) at the bottom of the page.
Special Days are useful for holidays, special events, or temporary changes in working hours. For example, if an employee needs to visit the dentist during work hours, you can create a special day covering their working hours with a blank period for when they'll be out. You can also use Special Days to change an employee's location for certain days, or assign them to multiple locations.
Have more questions
If you face an issue, and cannot find an answer in the documentation, feel free to submit a support ticket!
Contact us