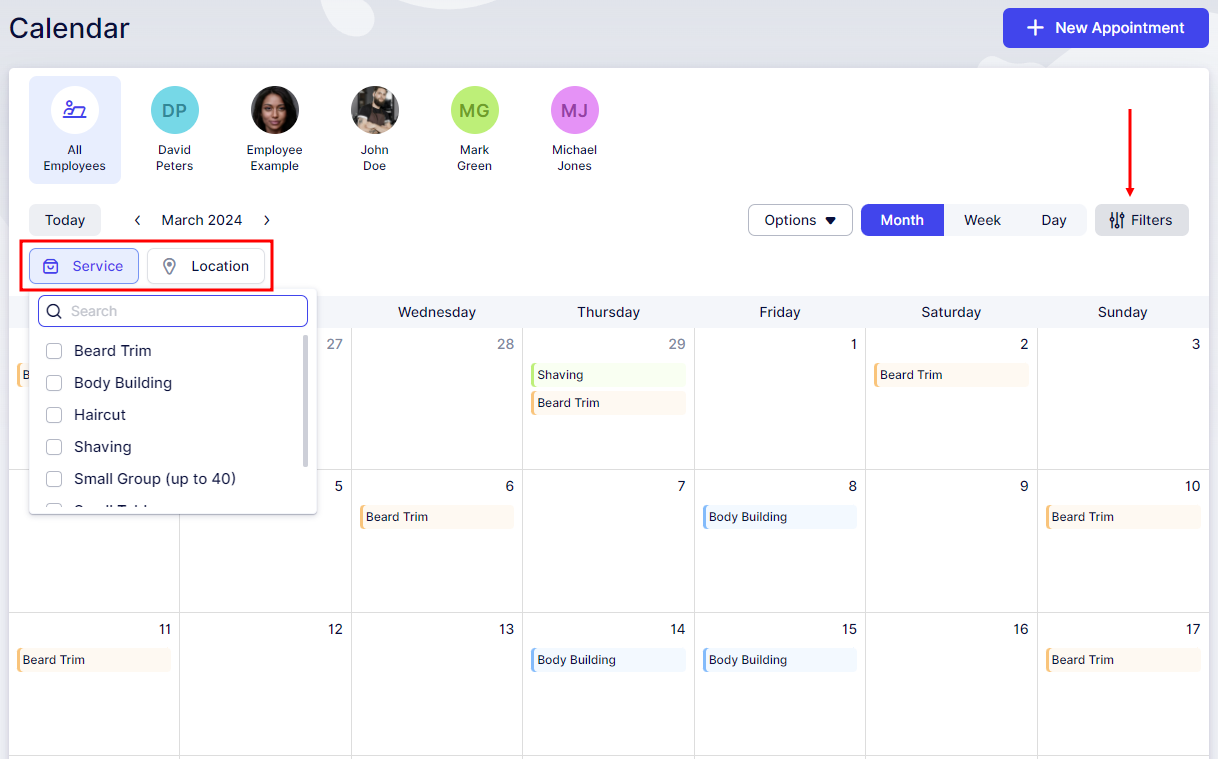
On the Calendar page, you can monitor scheduled appointments for each or all employees in a monthly, weekly, or daily calendar view. By default, all employees' appointments are displayed, but you can easily filter to view appointments assigned to a specific employee, or a certain number of employees by clicking on their picture(s) at the top of the calendar.

By clicking on "Filters" in the upper right corner, options to filter per "Service" and "Location" will appear.
Selecting one or more services or locations, your calendar will list the appointments associated with those selections. This feature enhances visibility and makes it easier to check your appointments for the day, week, or month.
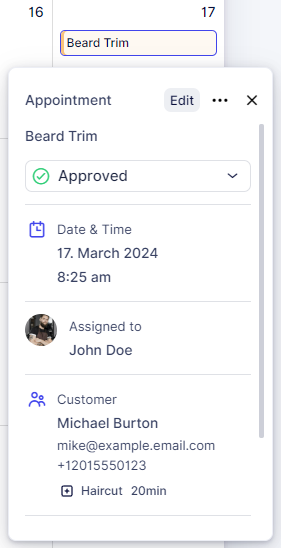
On the Calendar page, you have the ability to adjust the status of appointments as needed. When you click on a specific appointment in the calendar, a popover will display essential details including the service name, options to change the status, date and time, customer name, employee name, and customer details. This functionality streamlines the process of managing your appointment statuses.
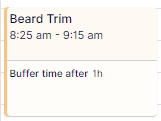
Once an appointment is booked, it will be displayed on the calendar. If the service has buffer times before and/or after, these times will be highlighted with a specific color and label on the calendar, indicating it as buffer time. This feature is crucial for understanding the actual availability of an employee. Sometimes an appointment might be scheduled for 1 hour, but with buffer time, the employee could be unavailable for a longer period. This ensures you can accurately assess an employee's availability before and after each appointment. It's particularly helpful to avoid confusion when attempting to schedule additional appointments during these times.
The time slots displayed on the calendar are based on the Default Time Slot Step selected in the General Settings, with the default set to 30 minutes.
When viewing an appointment card on the calendar, you'll see the customer's full name, the service name, and the start and end times of the appointment, including any additional extras and the selected duration.
Clicking on an appointment in the calendar will open a popup through which you can click on the "Edit" button and edit the appointment. Clicking on the three-dots menu will provide you with the options to duplicate or delete the appointment, while the card itself expands below these two options, providing more details:
- Service name
- Status
- Appointment start date & time
- Employee's picture and full name
- Customer's full name, email, and phone number (if provided) along with any Extras booked
- Payments
- Custom Fields

Apart from viewing appointment details on the calendar, you can navigate to different dates by changing the month, week, or day to view appointments accordingly. Clicking "Today" will quickly bring you back to the current week, ensuring you stay updated.
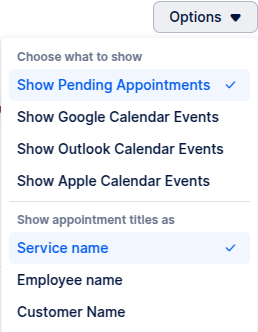
Under "Options," you have the ability to customize which events are displayed on your calendar:
- Show Pending Appointments: Enabling this option will display appointments with the "Pending" status on your calendar. If disabled, only appointments with the "Approved" status will be shown.
- Show Google Calendar Events: This option allows events from your Google Calendar to be displayed on your Trafft calendar, aiding in determining employee availability.
- Show Outlook Calendar Events: Enabling this option will show events from your Outlook Calendar, providing additional visibility into employee availability outside of Trafft appointments.
- Show Apple Calendar Events: Enabling this option will display events from your Apple Calendar, helping you to assess employee availability.
Additionally, you can choose whether your calendar displays the Service name, Employee Name or the Customer Name for each appointment. This customization allows you to tailor the calendar view to your preferences.
Have more questions
If you face an issue, and cannot find an answer in the documentation, feel free to submit a support ticket!
Contact us