To seamlessly integrate your Trafft Agency account with Google Calendar and achieve full white-labeling, devoid of any mention of Trafft, you’ll need to acquire a Client ID and Client Secret from the Google Developer Console. This involves creating a project and setting up OAuth 2.0 credentials. These credentials are vital for authenticating and authorizing your Agency account to interact with the Google Calendar API.
Here’s a step-by-step summary of what you need to do:
- Log in to your agency account at https://signup.trafft.com/login.
- Navigate to the Settings/White Label section.
- Click on ‘Set Up’ to start the process.
- Follow the provided documentation carefully to obtain your Client ID and Client Secret required for Google Calendar Integration.
- If you encounter any difficulties or have questions during the process, contact the support team.
Creating a Client ID and Client Secret for Google Calendar Integration
Ensure you have a Google account to access the Google Cloud Platform. If you don’t have one yet, you can create a Google account by visiting https://accounts.google.com/signup.
1. Access the Google Cloud Platform
Once you’re logged in, your dashboard will be displayed. From there, you can navigate to the Google Cloud Console to create a new project.

2. Create a New Project
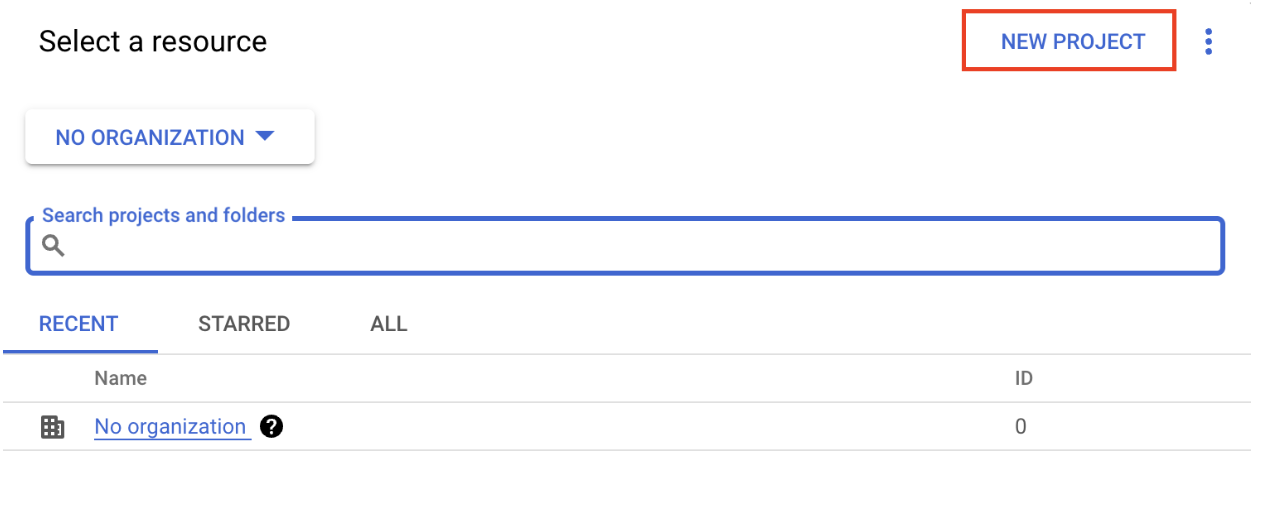
Within the navigation menu, you’ll find a ‘Select a project’ button. Clicking on this button will provide you with the option to either create a new project or select an existing one. It is recommended to create a new project for new integrations, ensuring clear separation and organization of your projects within the Google Cloud Platform.

Select the “New Project” option.
We recommend adding the name of your agency as the project name. This helps in identifying the project easily within your Google Cloud Platform dashboard.
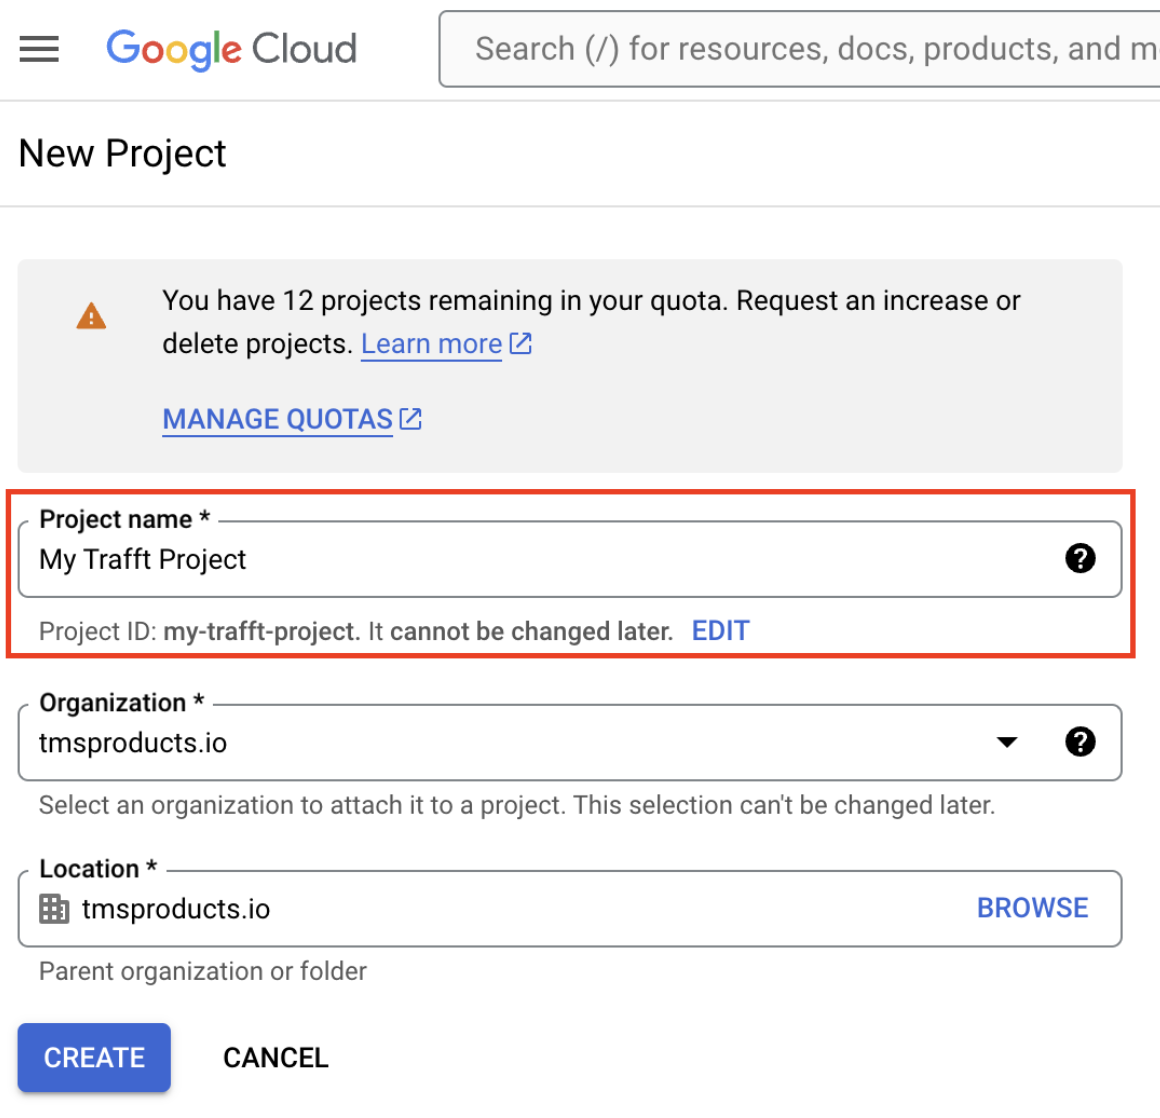
Hold on for a moment until the project is successfully created. This may take a few seconds.
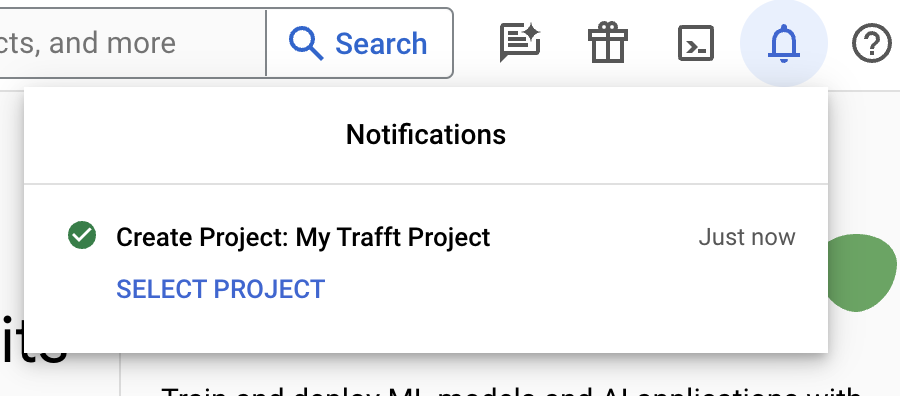
Once the project is created, you can click on the “SELECT PROJECT” button within the tab that appears in the top right corner (shown in the screenshot above). Alternately, you can click on the ‘Select a project’ button again, and choose the project you have just created from the dropdown menu.

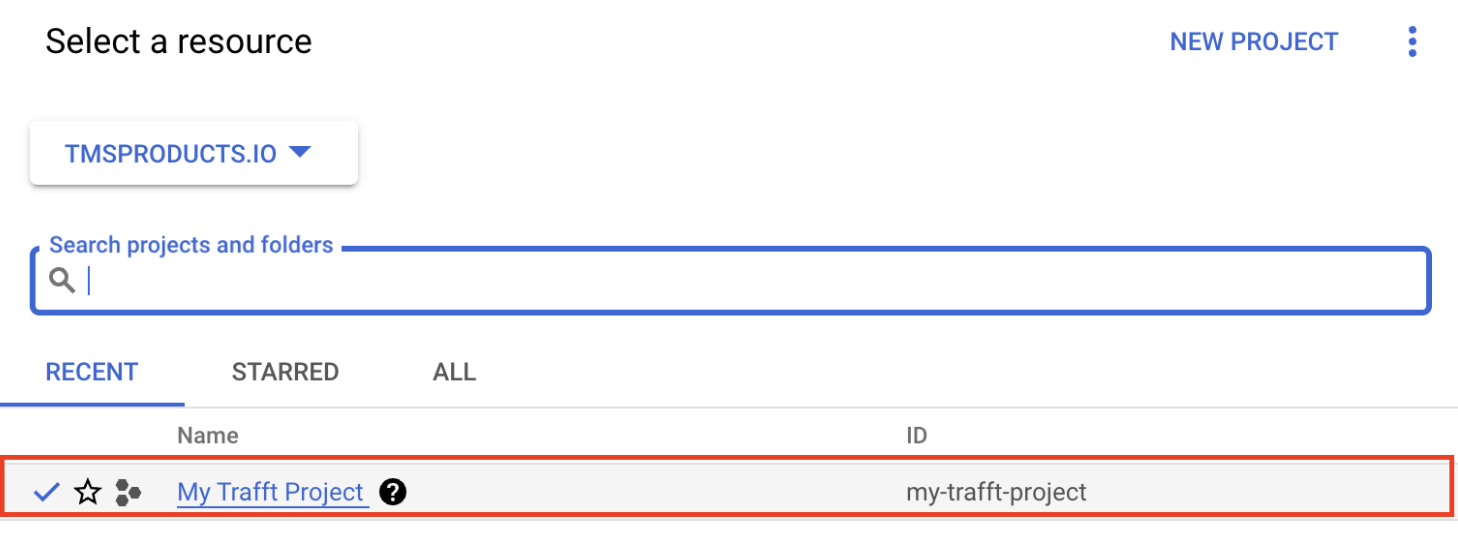
Your project is now selected and displayed in the navigation bar.

3. Enable Google Calendar API
Navigate to “APIs & Services” and then select “Library” from the dropdown menu. Here, you’ll find a list of available APIs. Scroll down or search for “Google Calendar API” and click on it.
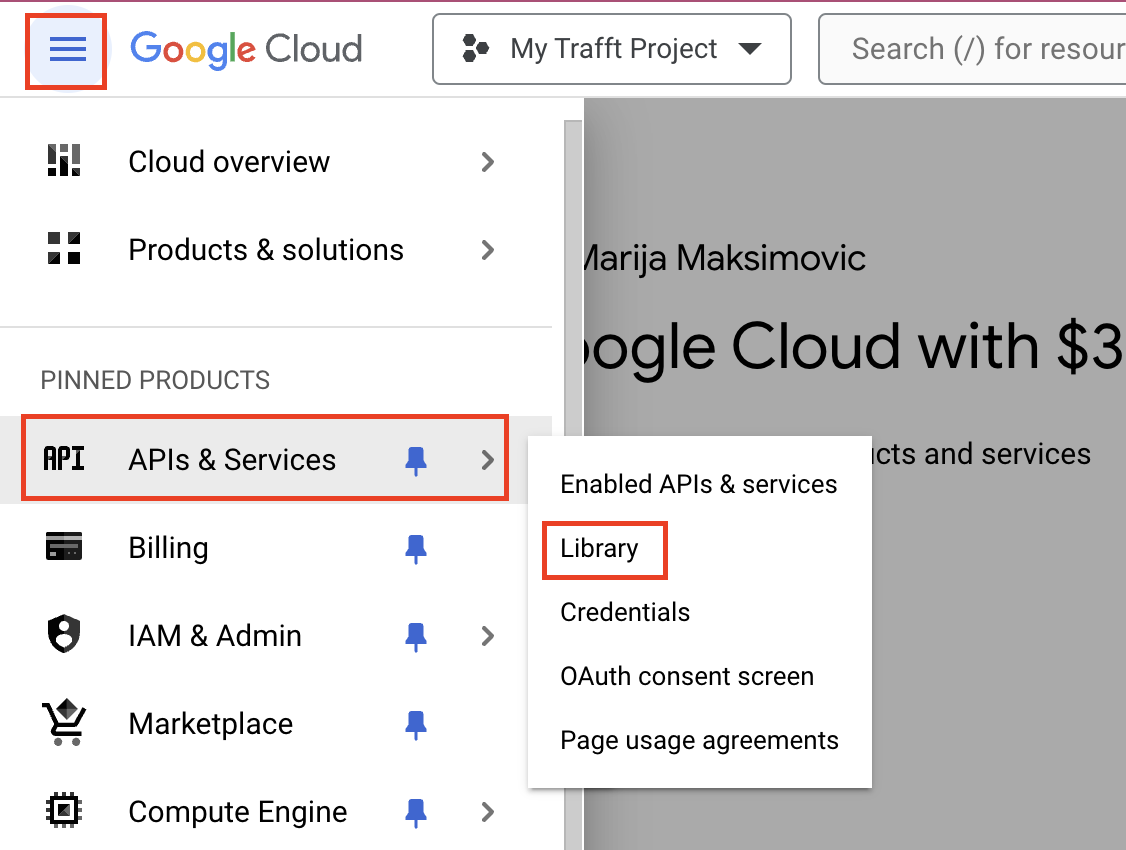
Search for “Google Calendar API” using the search bar, then click on the API when it appears in the results to select it.

Next, select the “Enable” button to activate the Google Calendar API for your project.
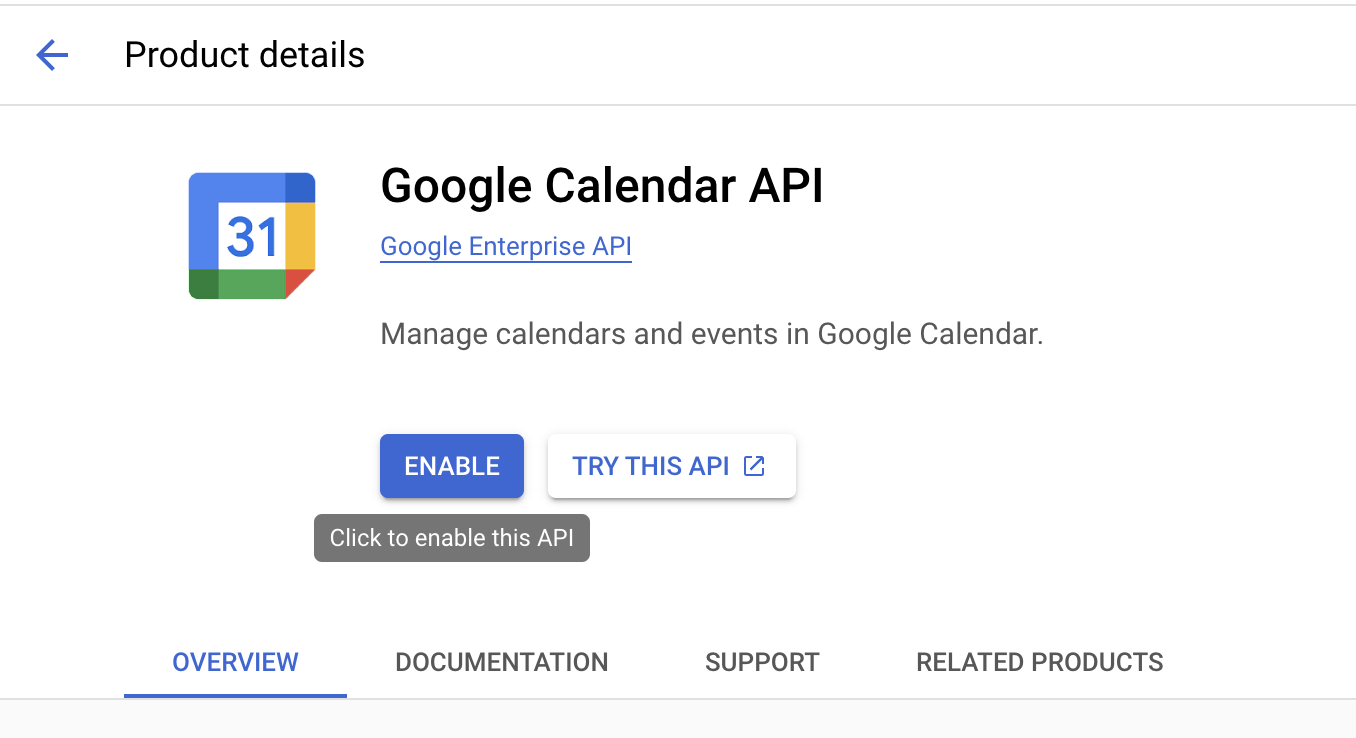
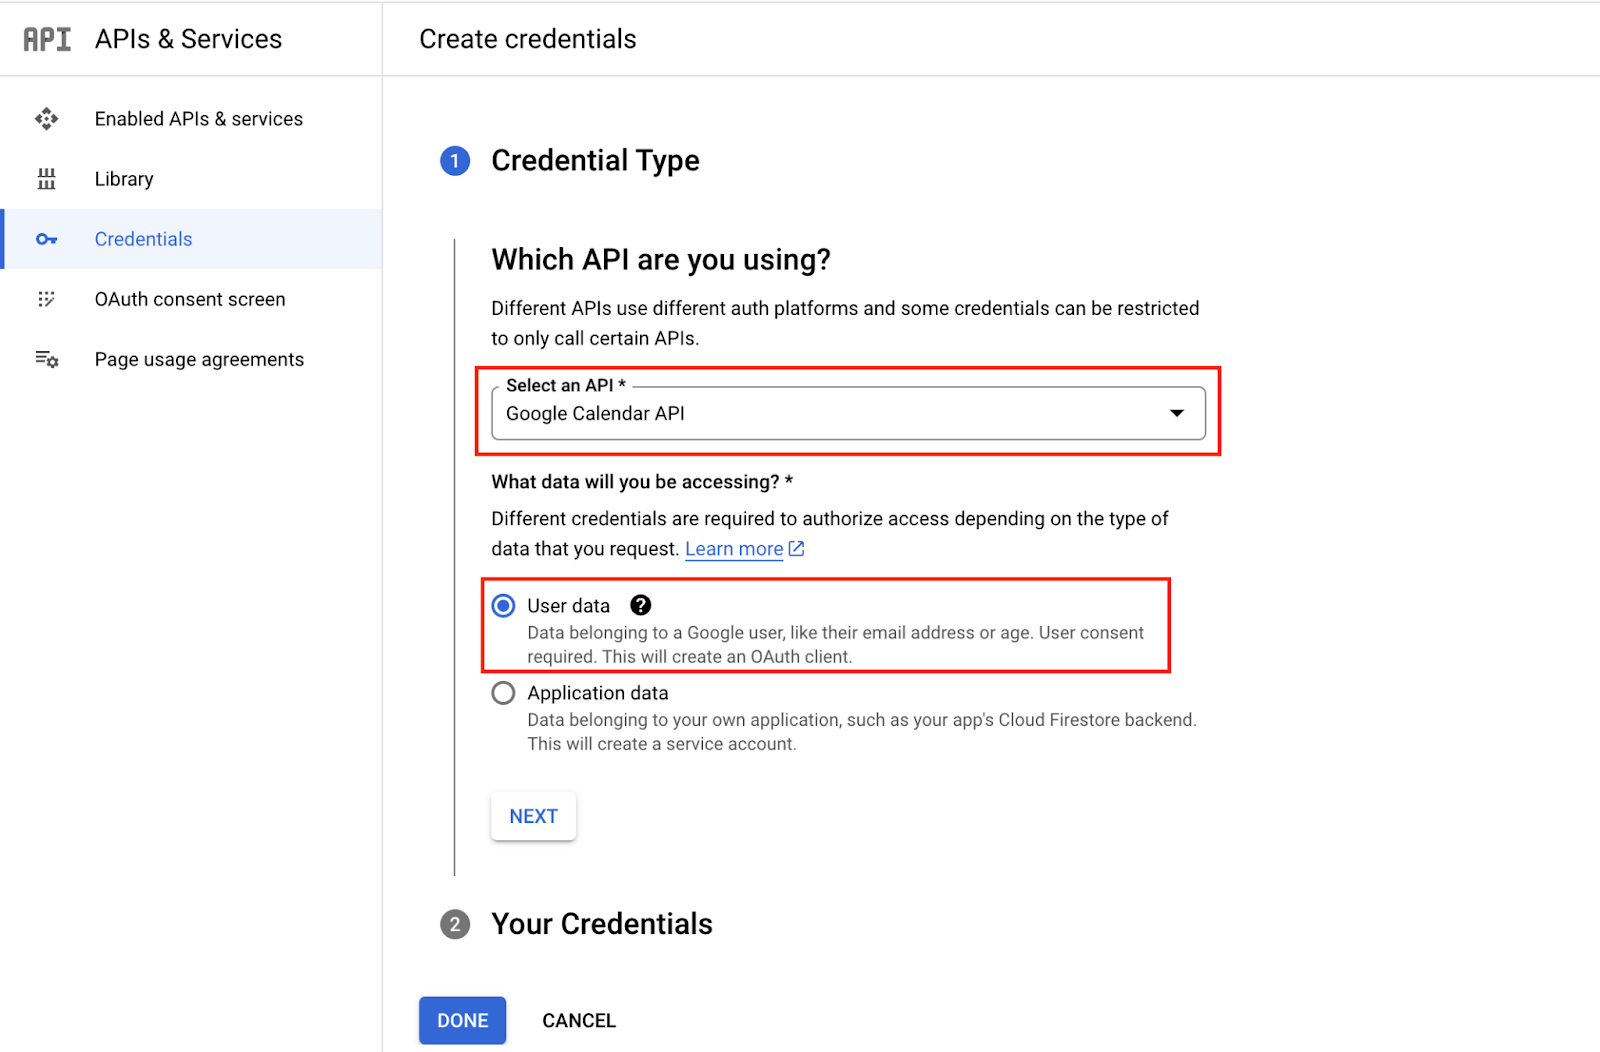
After enabling the Google Calendar API, you will be redirected to the overview page. From there, navigate to the credentials page and click on “Create credentials.”

To generate credentials, select “User data” and then click “Done”.
4. Configure OAuth Consent Screen
Before completing the credentials creation process, it’s necessary to set up the OAuth consent screen.
Click on “Configure Consent Screen”, choose the ‘External’ user type, and then click ‘Create’.
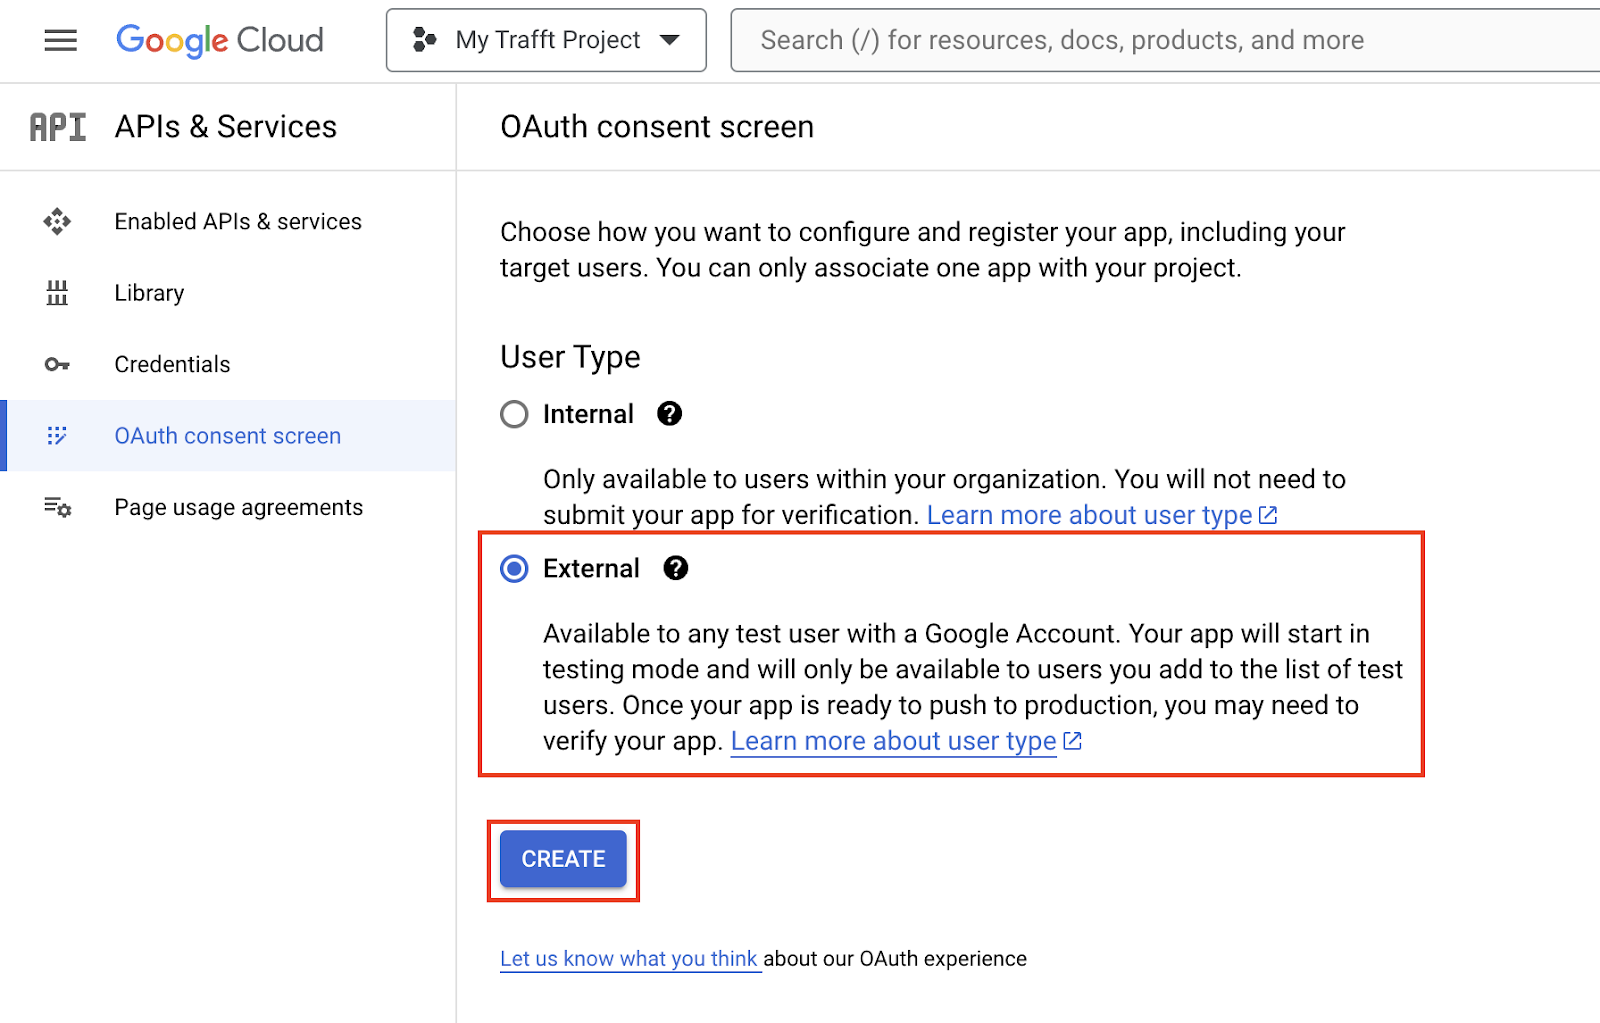
Enter the application name, user support email, and developer contact email in the required fields. Additionally, you have the option to upload your Agency logo.

Add your domain links on the ‘ADD DOMAIN’ (e.g., www.yourwebsite.com; www.yourwebsite.com/privacy, etc).
Click ‘Save and Continue’.
5. Set Scopes for API
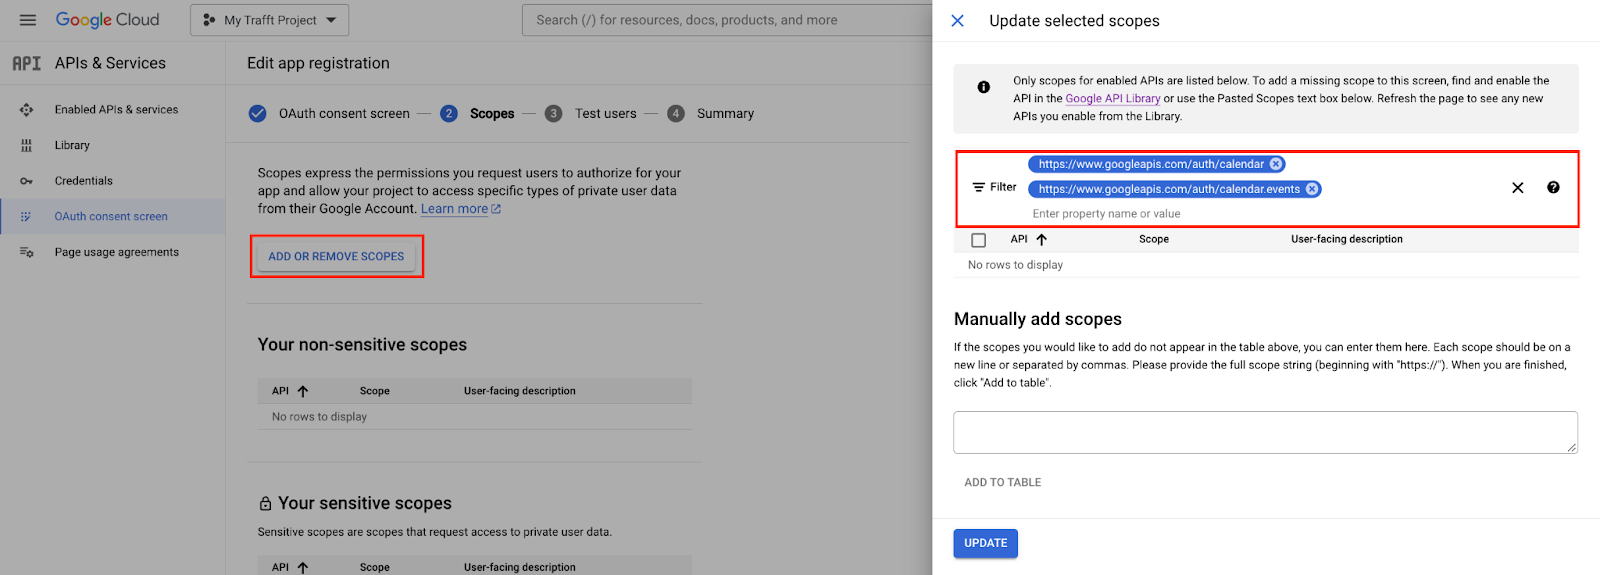
Incorporating scopes is crucial for your application, with the minimum requirements being:
- /auth/calendar.readonly
- /auth/calendar.events
Search for these two in the right bar, select them by ticking the boxes next to their names, and then click ‘Update’.
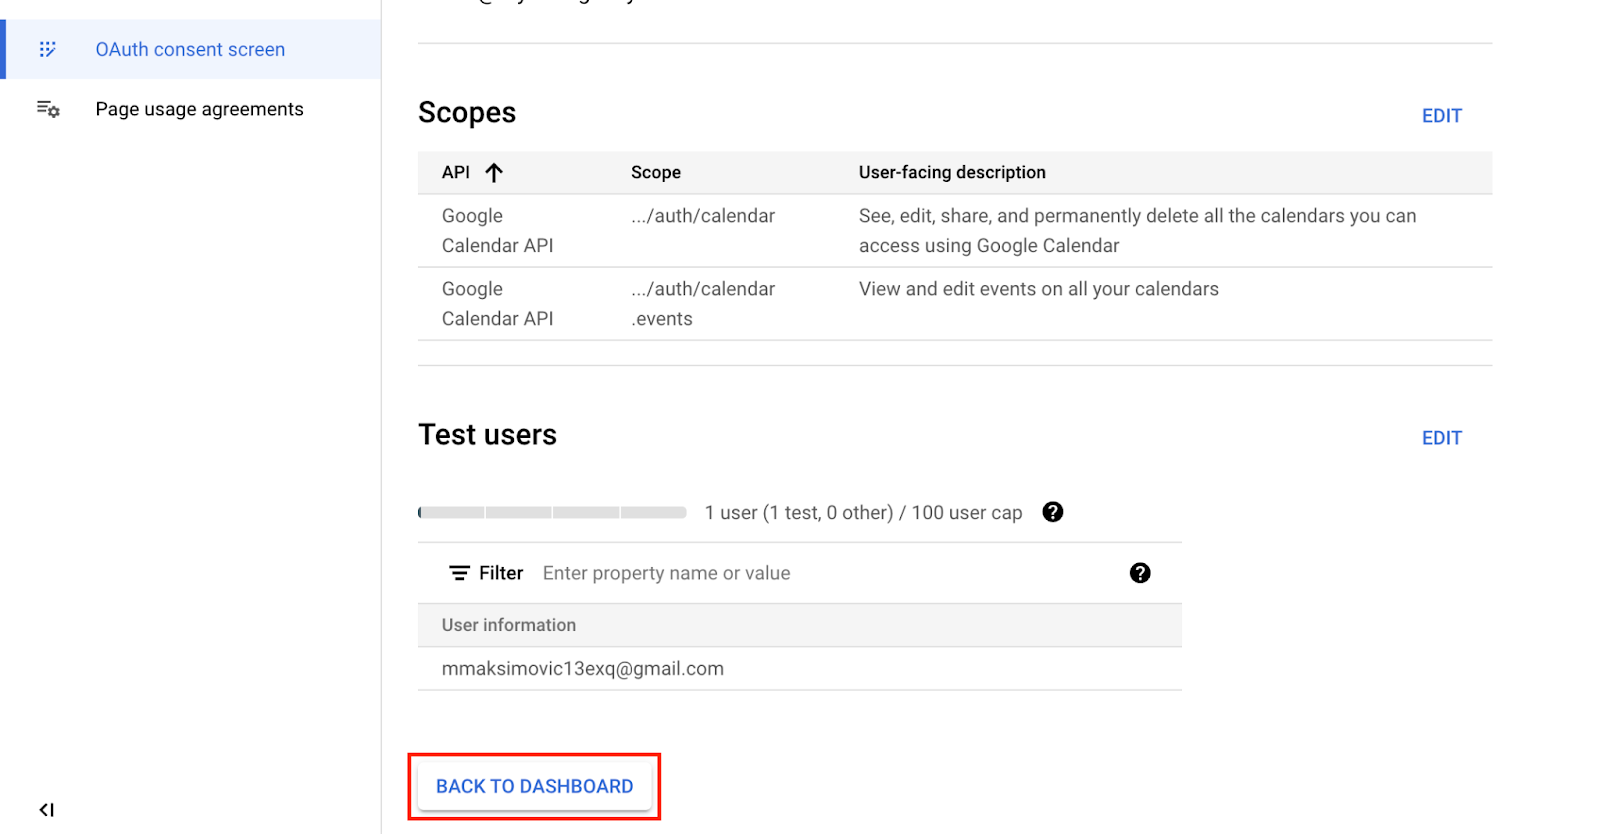
Once you’ve added these two, they will appear on the page. You can then click on ‘Save and Continue’.

6. Test Users (Optional)
To facilitate testing, you have the option to include your email as a test user. While this step is optional, it is beneficial for preliminary tests.

Select ‘Save and Continue’, then review your settings to ensure they are correct. Afterward, navigate back to the dashboard.
7. Create Credentials
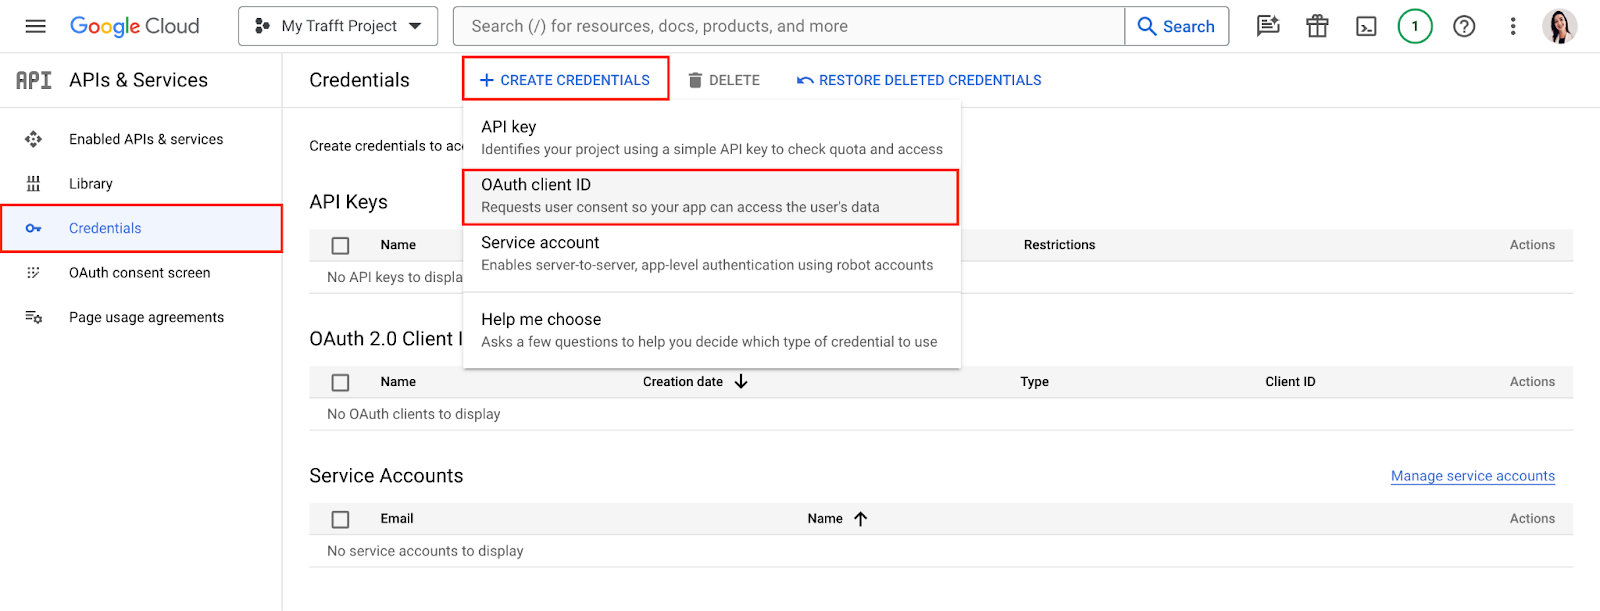
On the Credentials page, click on ‘Create Credentials’ and select “OAuth client ID”.
Select “Web application” and name your client (e.g., “My Test Client” or “Brand Design Agency”).
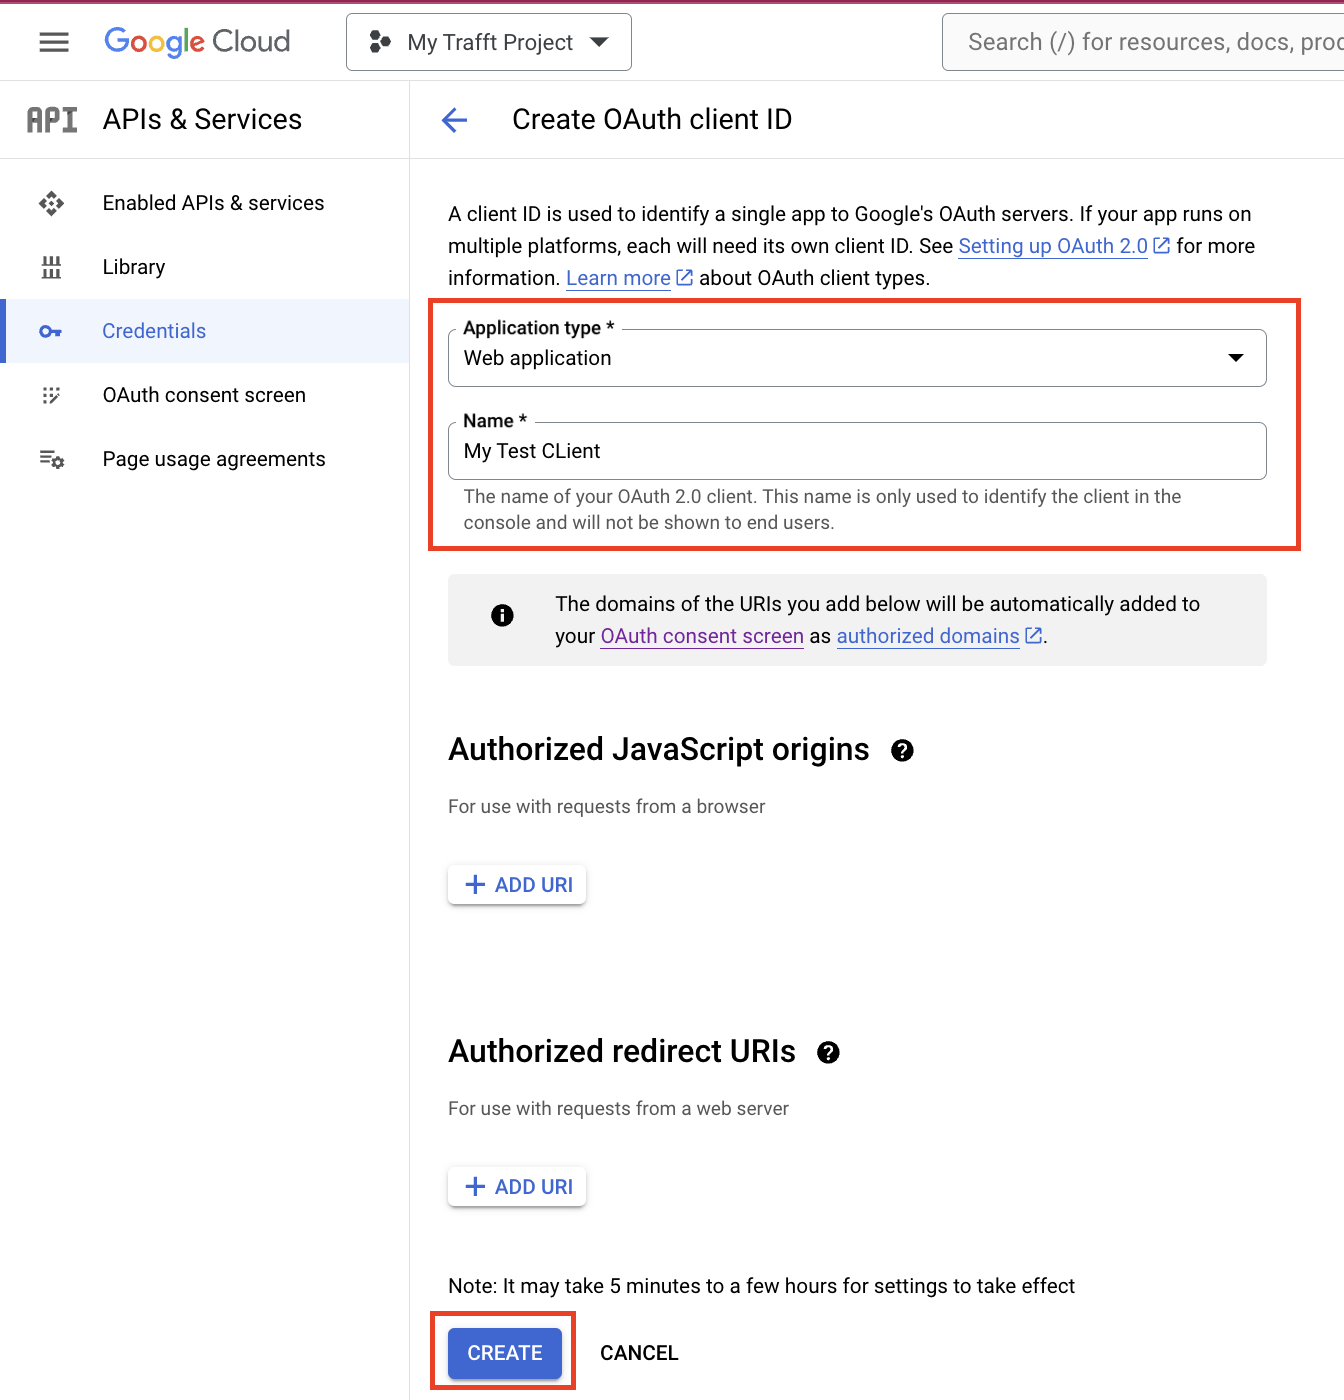
Add the following authorized redirect URIs by clicking on the ‘+ADD URI’ button:
- https://oauth.tfft.io/callback/authentication/google
- https://oauth.tfft.io/callback/authentication/integration/google-calendar
Select ‘Create’, and you will receive your Client ID and Client Secret.
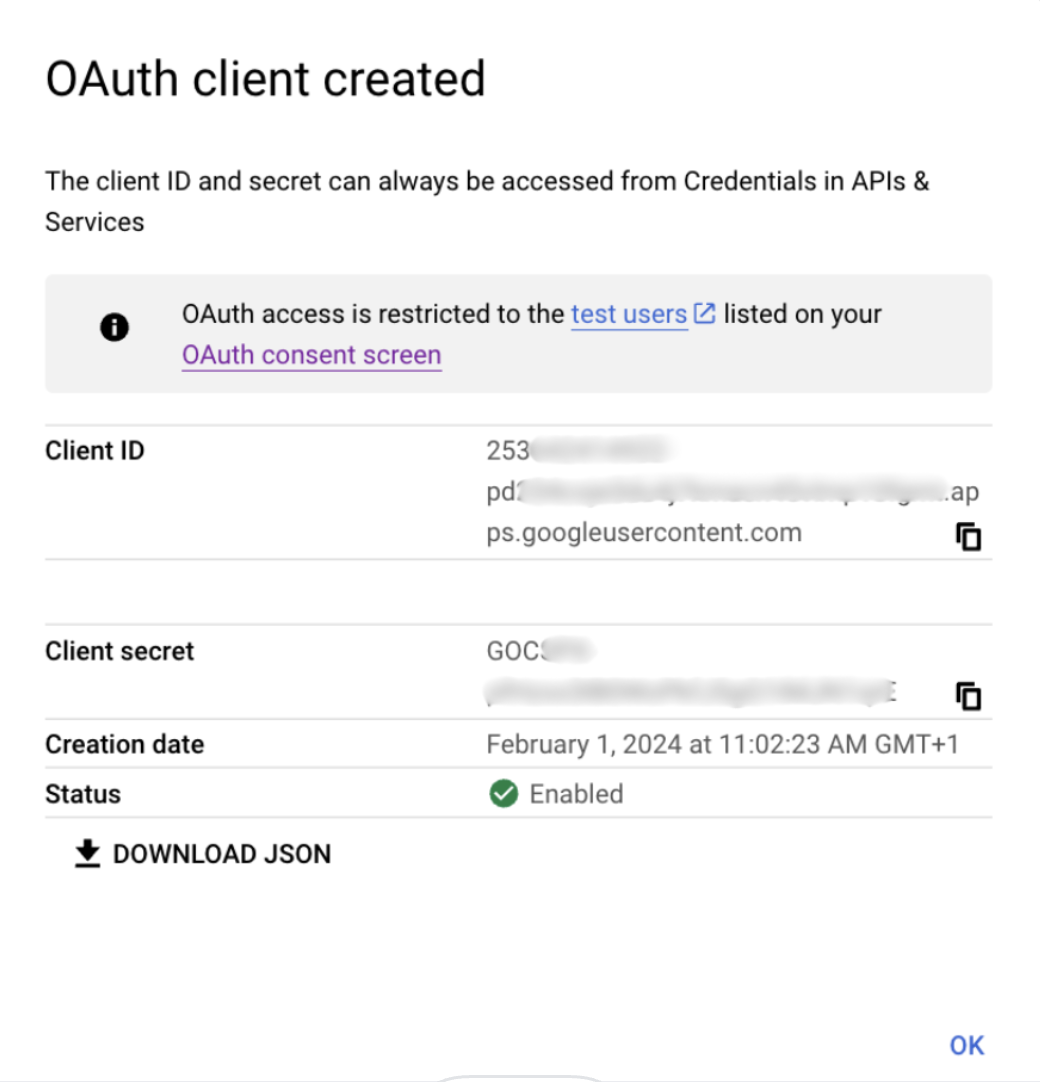
Enter your Client ID and Client Secret into the Settings/White Label page within your Agency account.
8. Secure Your Client ID and Secret
Ensure to securely copy your Client ID and Client Secret and store them in a safe location, as they are required for authenticating your application with Google Calendar.
9. Secure Your Client ID and Secret
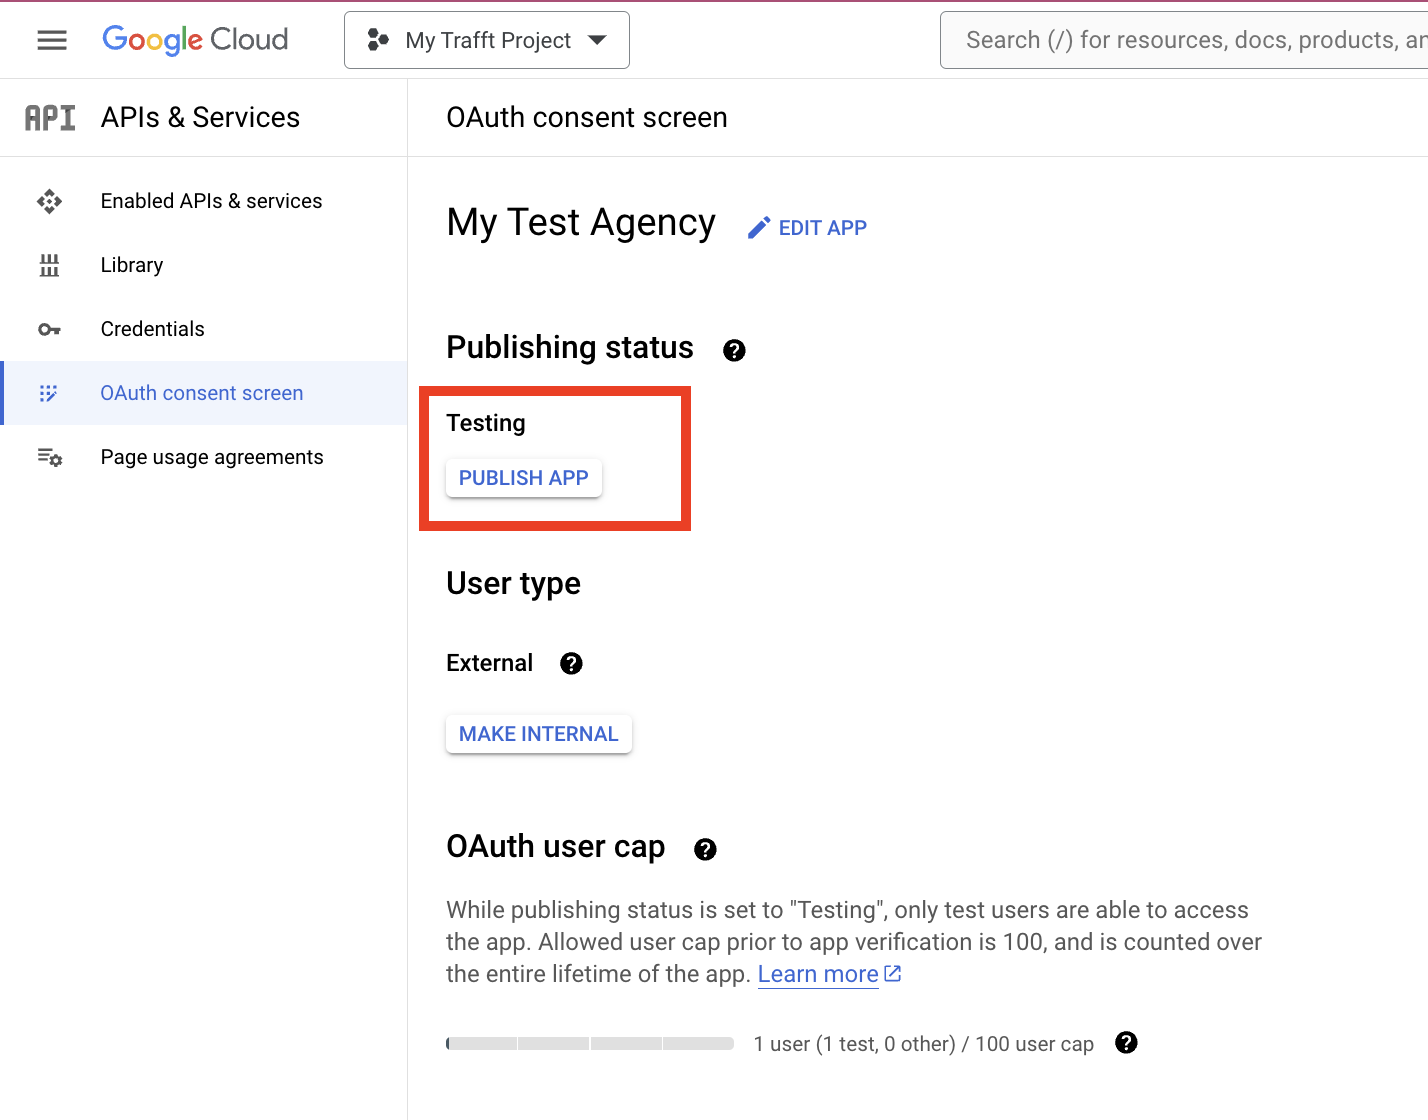
After obtaining your credentials, be sure to click the “PUBLISH APP” button on the OAuth consent page.
10. Pending verification
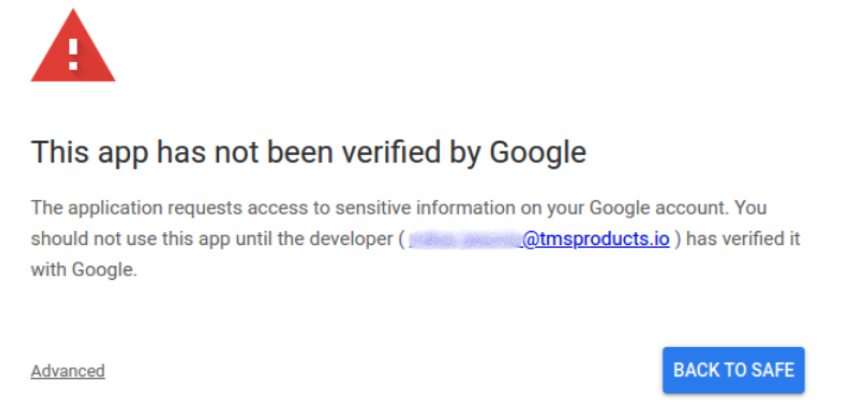
If your clients have already linked their Google Calendars, they will be disconnected automatically and must reconnect. Upon attempting to reconnect, they will encounter a warning indicating that your app is in the midst of a verification process. Nonetheless, they have the option to select “Advanced” and continue with the calendar connection. This message will remain visible only until Google completes the verification of your application.
11. Google Justification and video
Here is an example of the justification that can be used:
“We utilize the Google Calendar API to develop a white-label application that enables agencies to offer a fully integrated calendar management solution for their clients. The calendar data is used to schedule and manage bookings, appointments, and events. Our system accesses only the necessary data to ensure functionality. We guarantee that all data is processed in accordance with Google’s security guidelines, and no user data is shared with third parties.”
This is an example of a video:
It is important to replicate the same steps using your account and record your own video.
Support
Have more questions?
If you face an issue, and cannot find an answer in the documentation, feel free to submit a support ticket!


