Custom Fields are valuable for gathering necessary customer information before appointments and are also known as Extra Form Fields or Intake Forms. You have the option to create questions or inputs that will be incorporated into the final stage of the booking form.
Video Version
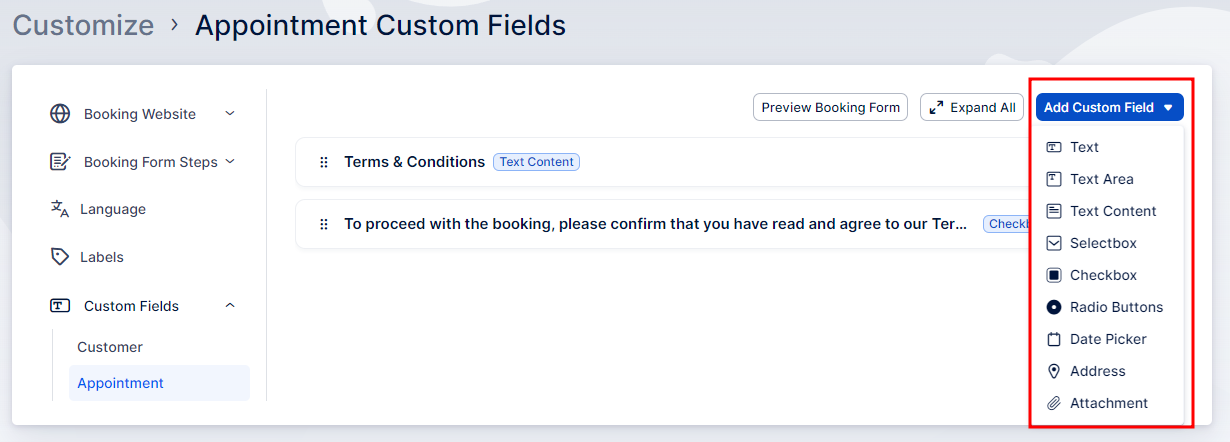
You can choose between several types of inputs:
- Text - a short text field that allows your customers to enter text, such as descriptions or notes. It is limited to 255 characters.
- Text Area - similar to a text field but allows for larger amounts of text to be entered. It is limited to 1.000 characters.
- Text Content - contains the information displayed in the form. It can include text used for descriptions, instructions, messages, or any other textual information provided to users.
- Selectbox - allows users to choose an option from a predefined list. It presents a dropdown menu with a list of options, and users can select one option from the list.
- Checkbox - presents options as checkboxes. Users can select one or more checkboxes to indicate their choices.
- Radio Button - presents options as radio buttons. Users can select only one option from the list of choices presented. This type of field is commonly used when you want users to select a single option from a set of mutually exclusive choices.
- Date Picker - allows users to select a date from a calendar widget. Users can click on the field to open a calendar interface where they can choose a specific date.
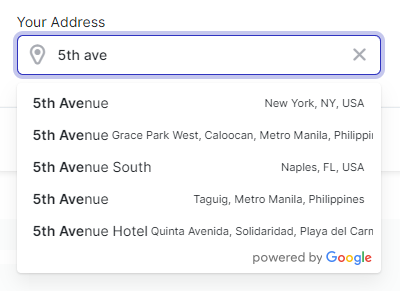
- Address - a specialized field that integrates with Google Maps to assist users in inputting addresses accurately. When users start typing an address, the field utilizes Google Maps' autocomplete feature, providing suggestions in a dropdown menu based on the entered text.
- Attachment - allows users to upload and attach files to their booking or appointment. This feature enables users to provide additional documents, images, or files related to their booking.
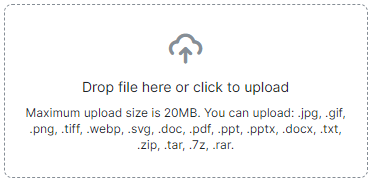
When adding the Attachment custom field, you will notice the 'Add upload requirements' slider that appears next to the 'Required' field. Enabling this option, you will present the upload requirements to the customer:
Maximum upload size is 20MB. You can upload: .jpg, .gif, .png, .tiff, .webp, .svg, .doc, .pdf, .ppt, .pptx, .docx, .txt, .zip, .tar, .7z, .rar.
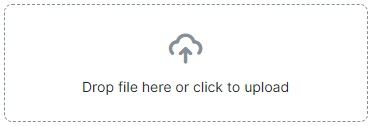
Disabling this option will exclude this information, as shown in the screenshot on the right, below:
How to enable custom fields
As for all custom features, you need to access the Features & Integrations section, scroll down, and locate the Custom Fields. You need to click on "Enable" in order to use it.

After enabling this feature, you can click on the "Set Up" button that appears on the same card, or you can access them through Customize/Custom Fields.
Clicking on the Custom Fields tab, it will expand and offer two options:
- Customer;
- Appointment;
The Customer-related Custom Fields are the fields whose entries will be linked to a customer while the Appointment-related Custom Fields are the fields whose entries will be linked to the appointment they are booking (and will be offered with every booking):
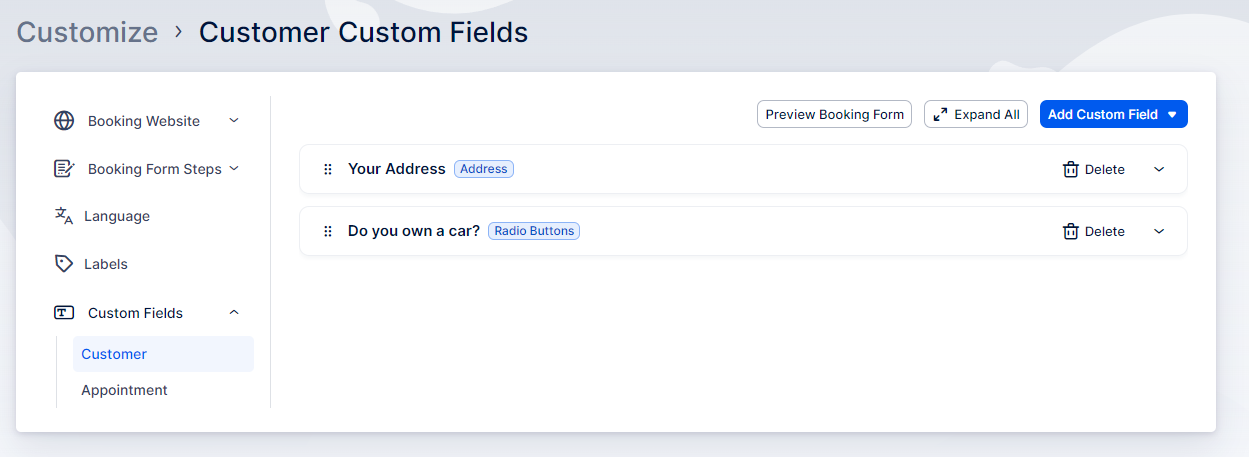
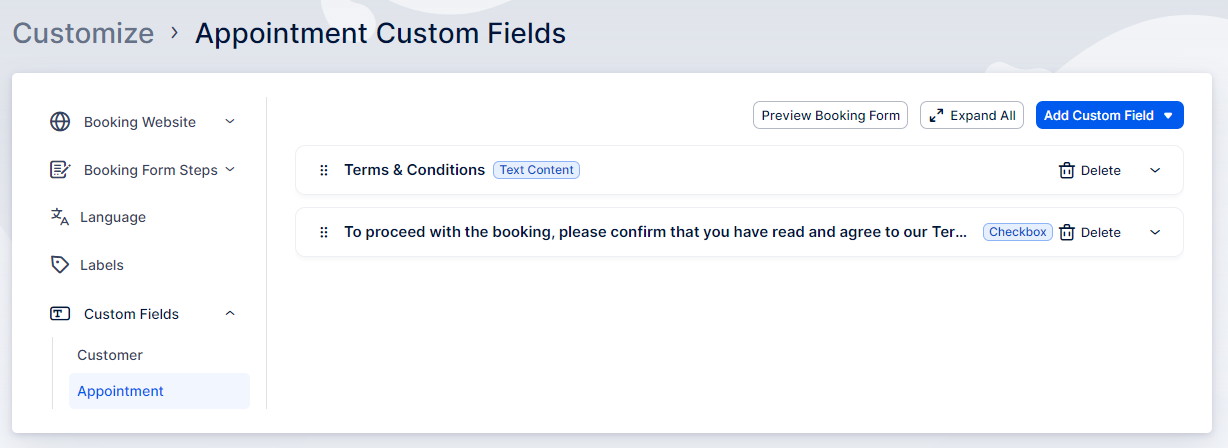
When you click on the 'Add Custom Field' button on the right, a dropdown menu with various types of custom fields will appear, allowing you to select one.
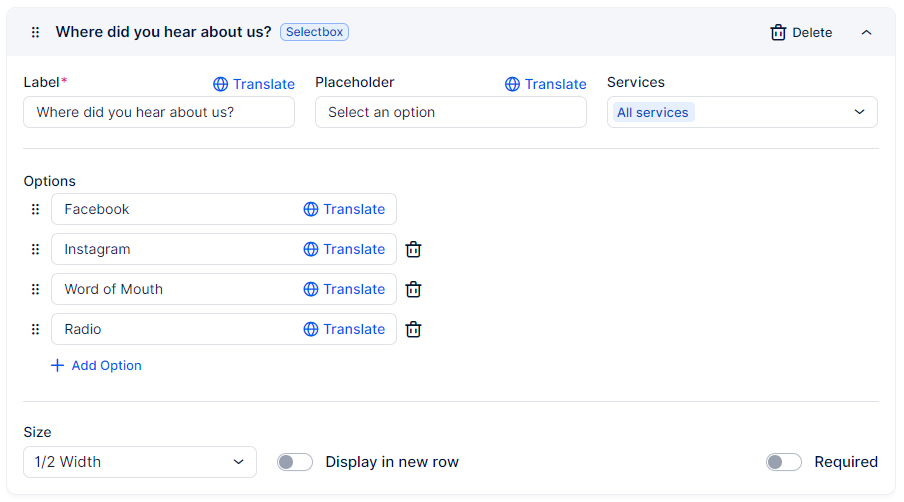
When adding appointment-related custom fields, you can define the following:
- Label: The name or title of the custom field.
- Placeholder (if applicable): Text that appears in the field before it's filled.
- Services: Select the services for which this field will appear.
- Required Toggle: Choose whether the custom field will be required or optional.
- Field Size: Determine how much space the field should occupy in the booking form.
- Display in New Row: Toggle to display the field in a new row.

If you add a custom field that provides multiple options (selectbox, checkbox, or radio button), you will also need to define the options that will be offered to the customers:
When adding customer-related custom fields, you can define pretty much the same options, and the only difference is the 'Services' option. Instead of choosing on which services the custom field will appear, you will be able to choose where the custom field will be 'Visible at':
- on All Appointments, or
- on the First Appointment only

Once you're done adding the custom fields, they will be shown on the last step of the booking form:
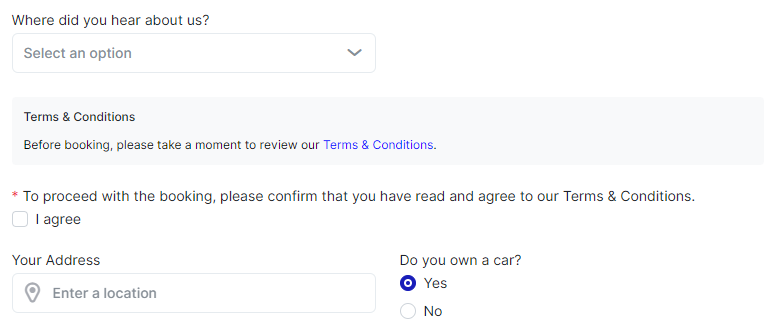
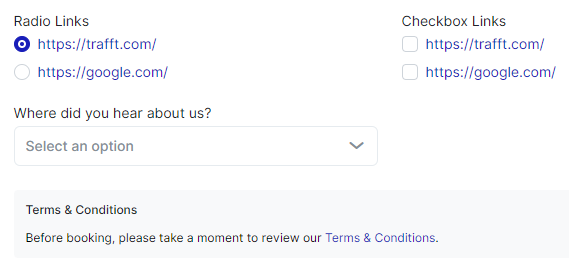
URLs added in the Radio Button, Checkbox, and Text Content custom fields will be displayed as links on your booking form, so you can also guide your customers to other pages through these links
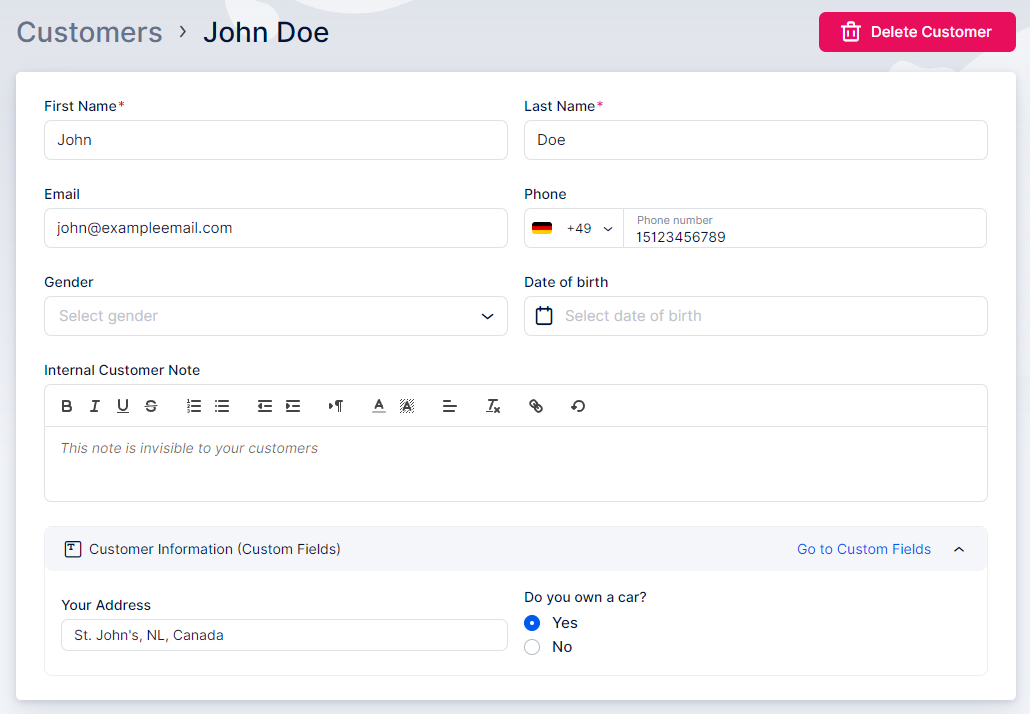
Once the customer-related custom fields are filled, they will be available in the Customers section, when you edit or view the customer:
Custom fields populated by your customers will appear on both the Calendar and Appointment pages. You can view them by clicking on an appointment or when editing the appointment details.
They can be used in notifications sent to your customers. However, it's important to note that custom fields that are not selected for all services will not be available in the default templates or the Custom Notifications you create for "all services". If you have specific custom fields that only apply to certain services and you want to include them in the templates, you will need to create templates that are specifically used for those services.
When you expand the 'Custom Fields' dropdown menu above the templates, you will see each custom field listed twice: once as 'custom_field_1' and once as 'custom_field_label_1'.
The 'custom_field_1' represents the data entered by the customer, while 'custom_field_label_1' is the label of the custom field that you defined when creating the field.

Before creating your Custom Fields, it's important to carefully consider the specific information you need from your customers during the booking process. This could include details such as their age, specific requirements, preferences, or any other pertinent information that would help you better serve their needs. By identifying these key pieces of information, you can then proceed to create your Custom Fields accordingly. These fields will allow you to gather and organize the data that is most important for your business or service, ensuring a streamlined and efficient booking process for both you and your customers.
Have more questions
If you face an issue, and cannot find an answer in the documentation, feel free to submit a support ticket!
Contact us