Trafft also offers SMS notifications, enabling you to send text messages to both your customers and employees to keep them updated about their appointments. You can review previous SMS records and adjust preferences in the SMS settings, which can be found in a separate section within the Settings page, similar to Email Notifications.
How to purchase SMS credits?
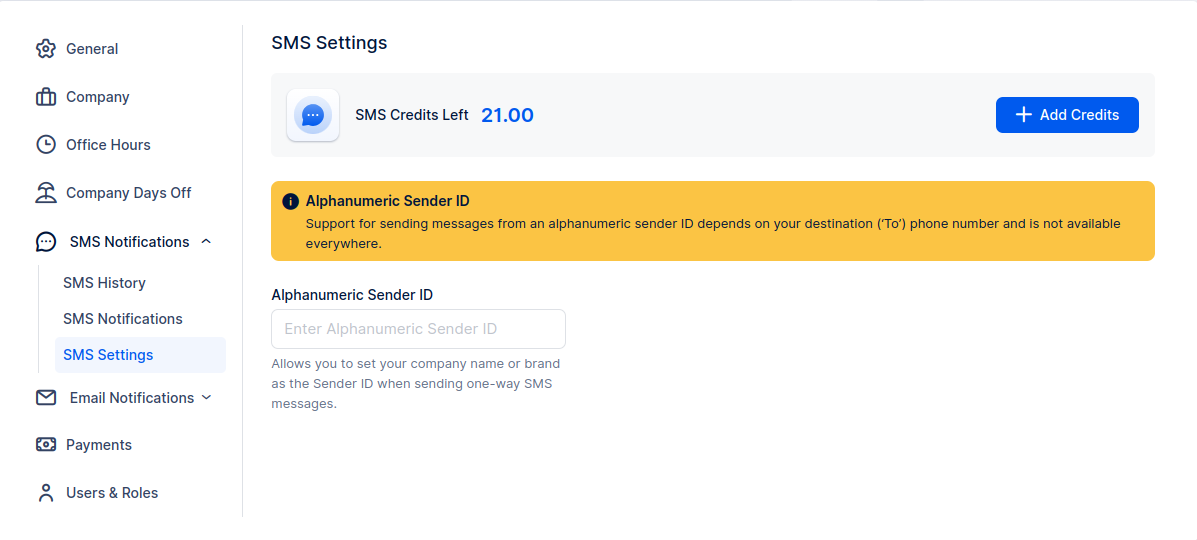
To purchase SMS credits, navigate to Settings > SMS Notifications > SMS Settings and click on the Add Credits button in the upper right corner
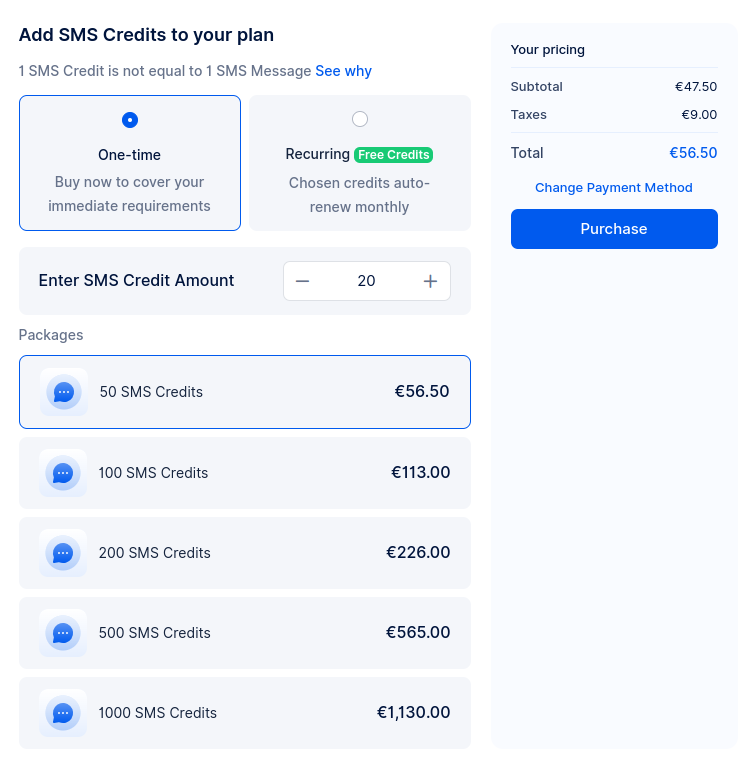
One-time purchase
One-time payment allows you to purchase credits at your own pace.
Recurring SMS purchase
This option lets you subscribe to an SMS plan that automatically recharges your credits every month. Each plan includes monthly bonus credits, with higher plans offering more bonuses. Choose the plan that fits your business needs and enjoy a seamless way to stay connected with your clients while maximizing value through added bonuses!
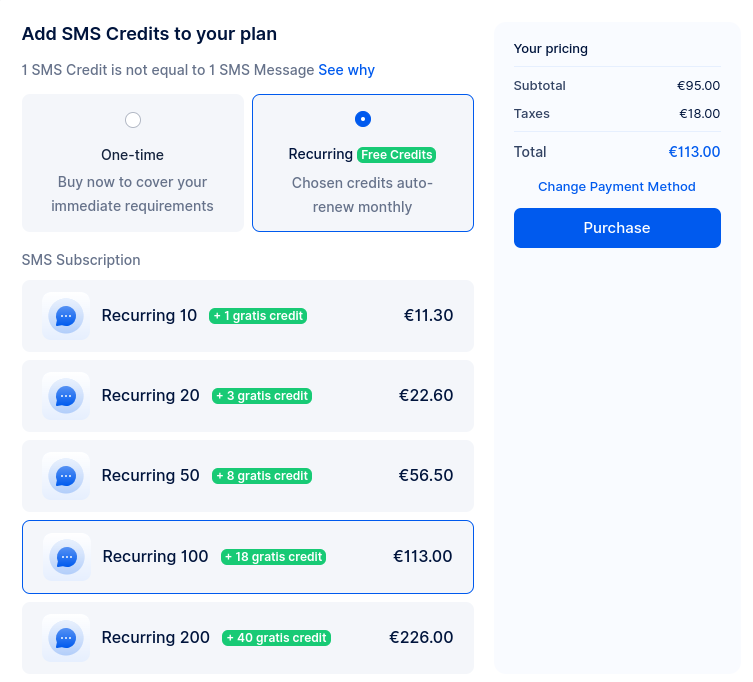
In the example above, we have selected 100 SMS credits per month. As a bonus, we will receive additional 18 SMS credits each month.
SMS options
To access SMS Notifications, navigate to Settings in the bottom left corner of your admin section and then click on "SMS Notifications". You will be presented with three options:
- SMS History
- SMS Notifications
- SMS Settings
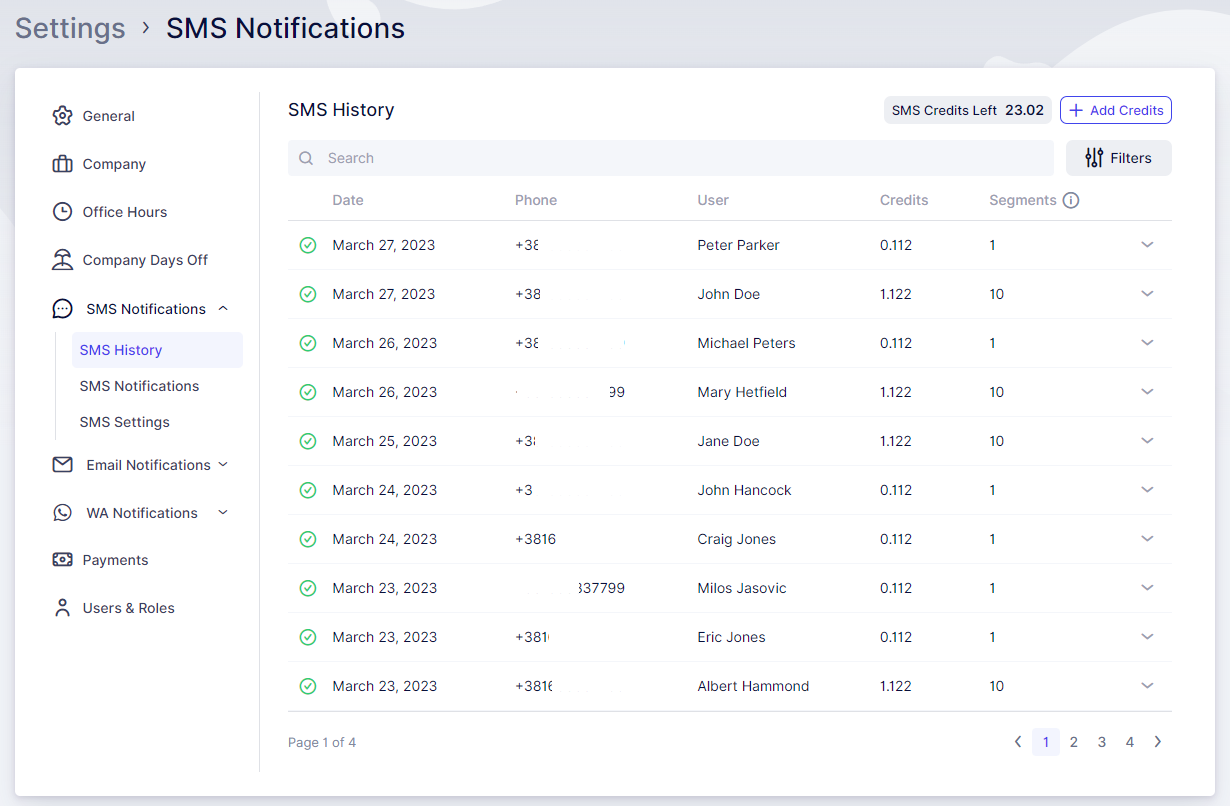
SMS History
The SMS History tab within Trafft offers a comprehensive summary of all the messages you've sent. It presents the date of each message, the recipient's name and phone number, the credit utilized for sending the message, and the number of segments into which the message was divided. The segmentation, as mentioned before, is influenced by the quantity and type of characters included in the message. Furthermore, you have the option to view the message content by clicking on the dropdown arrow. As usual, you can filter and search through your message history and check the remaining SMS credits.
SMS Notifications
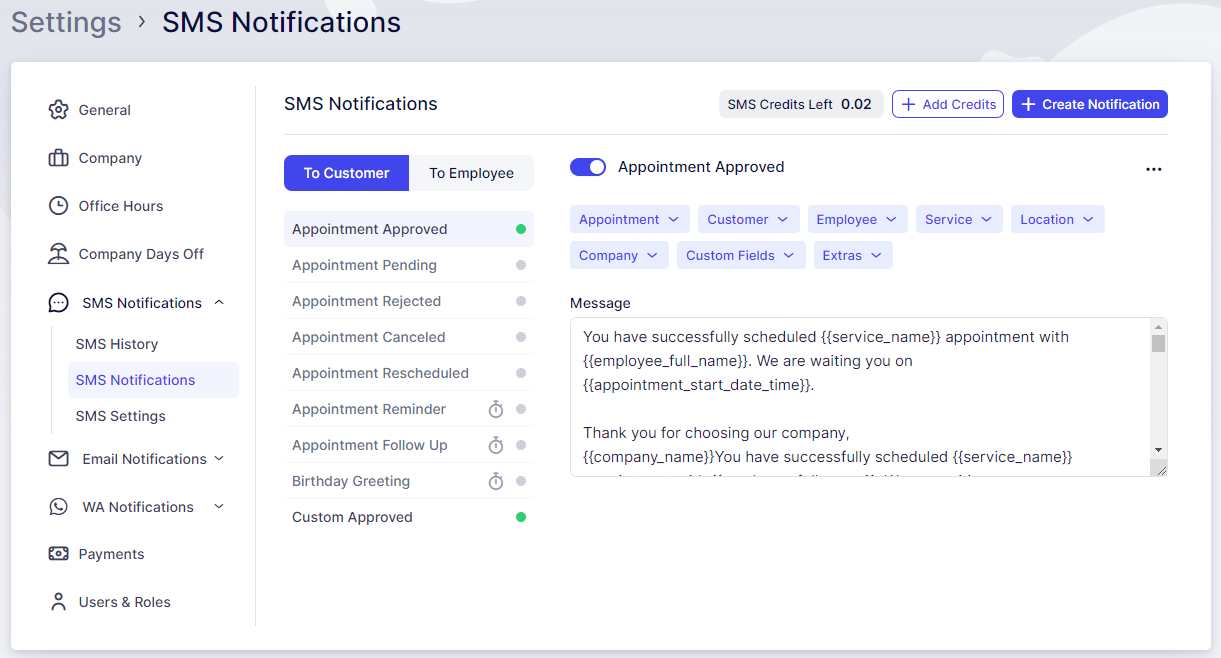
The SMS Notifications tab closely mirrors the Email Notifications tab, allowing you to customize various message types for both Customers and Employees. You can incorporate different placeholders to tailor your message content and determine the timing of your scheduled notifications.
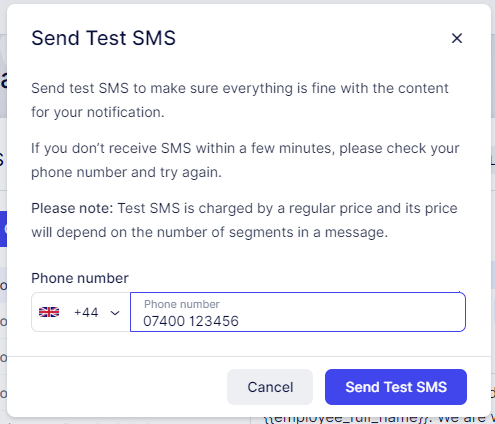
These notifications can be dispatched immediately following a specific action, at a scheduled time before or after an appointment, or at a designated time of day. There is also the "Send Test SMS" option, requiring only the entry of a designated number to receive a test notification. To access this option, click on the three-dots menu in the upper right corner of any SMS template -> "Send Test SMS".
SMS Settings
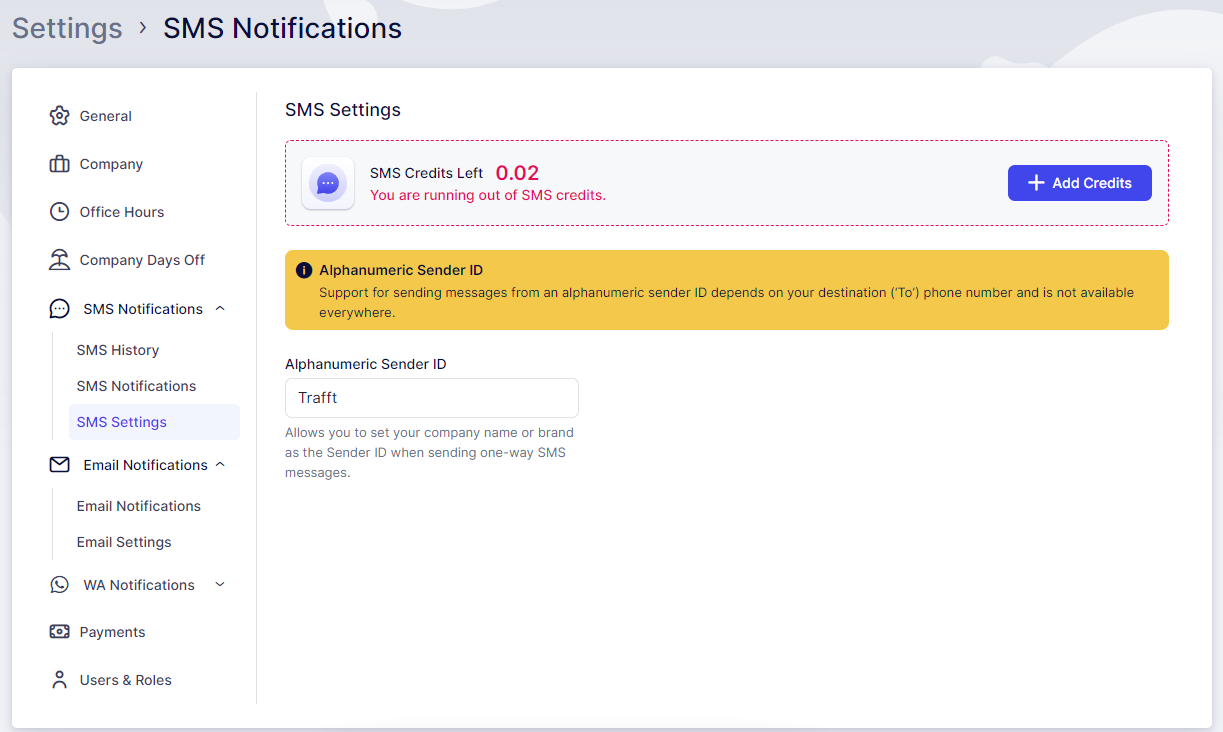
In this section, similar to all preceding sections, you have visibility of your SMS Credit and the option to add New Credit as necessary. Additionally, there's an opportunity to customize your "Alphanumeric Sender ID" contingent on the destination ('To') phone number, though this feature is not available in all countries.
This allows you to designate your company name, your name, or any preferred name to be displayed as the sender when recipients receive messages. In instances where setting a custom sender ID is not feasible for your desired destinations, an automatic ID will be appended to your messages.
Adding the Rescheduling Link in SMS Notifications
Your customers can conveniently reschedule appointments directly from the notifications they receive by incorporating the "Reschedule Link" placeholder.
This placeholder is available in the Appointment dropdown and once included, the placeholder transforms into a clickable link in your notifications, enabling customers to select a new date and time for their appointment. Subsequently, the appointment will be successfully rescheduled.
Adding the Cancelation Link in SMS Notifications
Should you wish to enable your customers to cancel appointments directly through SMS notifications, you can integrate the "Cancel Link" placeholder available in the Appointment dropdown.
This placeholder, once incorporated, transforms into a clickable link within your SMS notifications, allowing customers to cancel their appointments with a simple click. Additionally, on the Customize page, you have the option to set redirect pages.
If you enable the "Use custom appointment cancellation URL" option and provide URL links for successful and unsuccessful cancellations, customers will be redirected accordingly. If you choose not to configure these pages and leave the option disabled, customers will be directed to specific pages on your booking website confirming either a successful or unsuccessful cancellation.
Custom Notifications and WhatsApp Notifications
Custom Notifications is a custom feature that needs to be enabled in the Features & Integration section on the left-hand side menu.
Once enabled, you can click on the “Create Notification” button in the top right corner of SMS Notifications and create new (custom) notifications for specific services, specific appointment statuses, or custom scheduled notifications.
You can read more about this feature on this page.
WhatsApp integration is a custom option, that allows you to send WhatsApp notifications and serves as the third option for notifying your customers and employees about their appointment statuses and updates. You can read more about this integration here.
Have more questions
If you face an issue, and cannot find an answer in the documentation, feel free to submit a support ticket!
Contact us