This article delves into the customization options available in the "Customize" section of Trafft, allowing you to adjust the visual elements to suit your preferences. From color schemes and themes to font styles, explore these customization features to create a personalized and visually appealing user experience.
If you're looking for the Booking Options Customization, please click here.
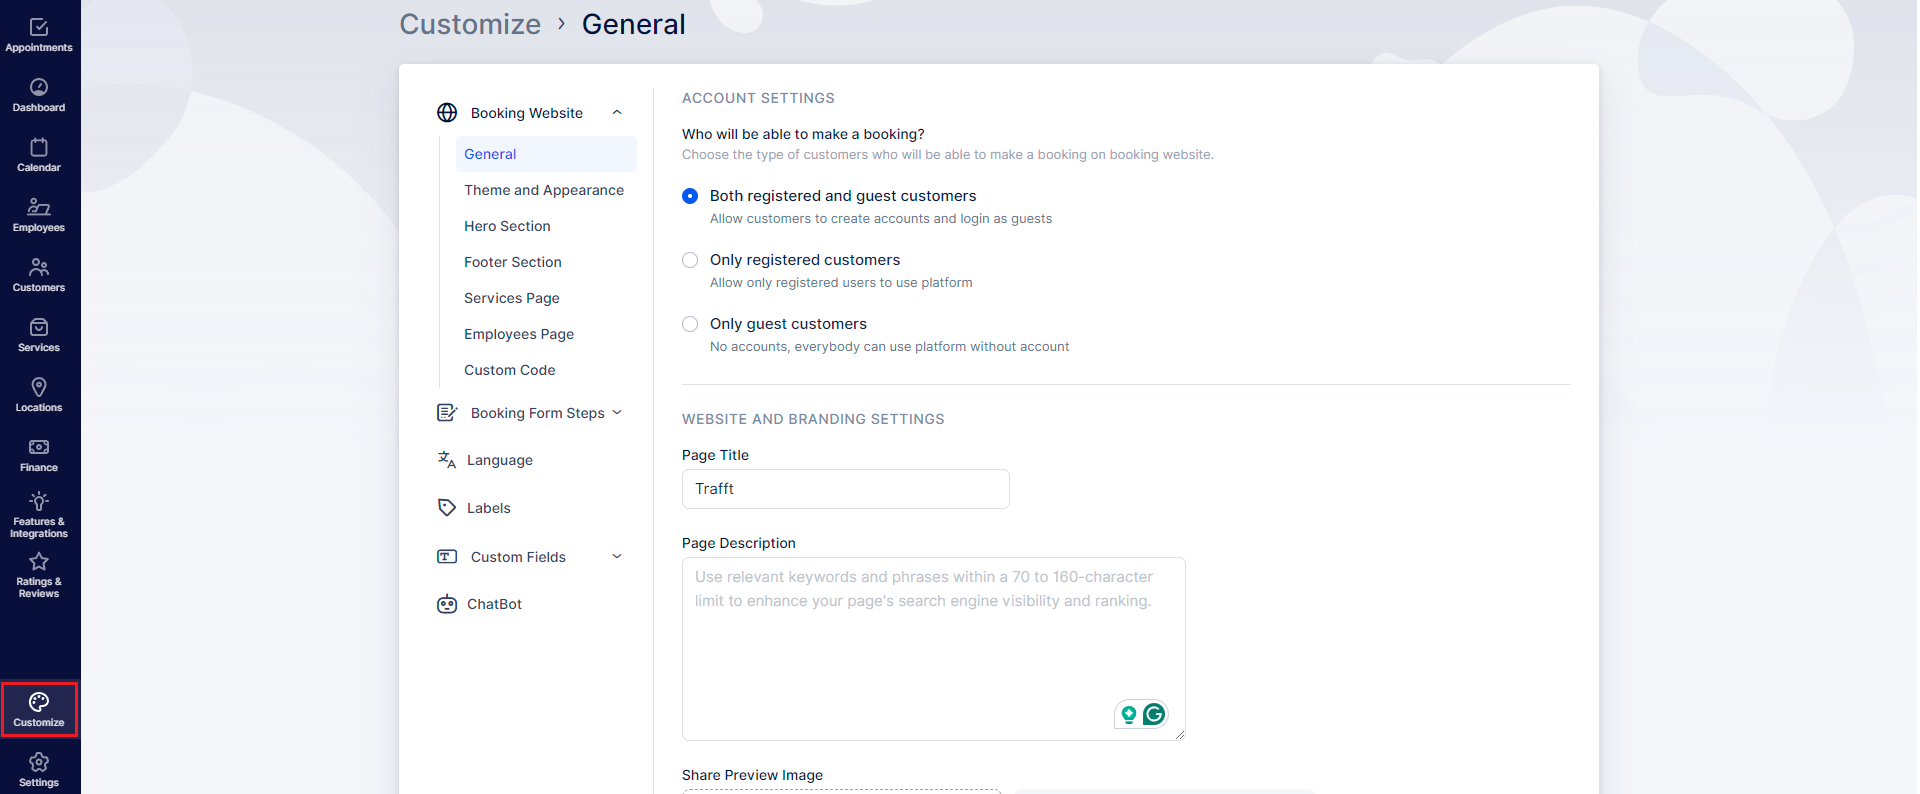
The Customize section is divided into five main sections, each with its own subcategories. The categories covered in this article are linked below. For details on other categories, please refer to this page.
- Booking Website, divided into:
- General
- Theme and Appearance
- Hero Section
- Footer Section
- Services Page
- Employees Page
- Custom Code
- Booking Form Steps, divided into:
- General
- Employees
- Customers
- Thank You Page
- Language
- Labels
- Custom Fields (please note that this section is a custom feature that needs to be enabled before it appears), divided into:
- Customer
- Appointment
Additionally, if you have enabled the ChatBot feature, its settings will also be accessible below the "Custom Fields" section, as indicated in the screenshot above.
Booking Website
Theme and Appearance
In the "Theme and Appearance" section, you have the option to select from 8 pre-defined themes, available in both Light and Dark versions for your booking website.
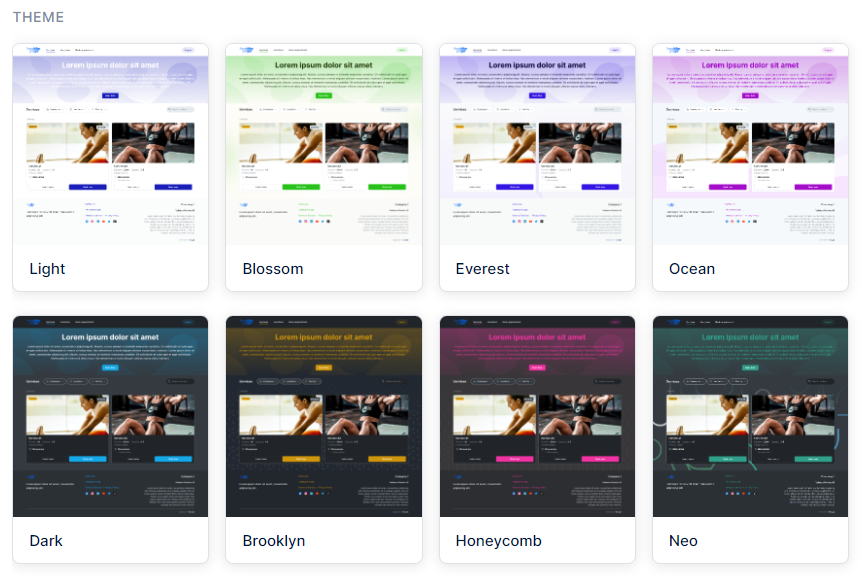
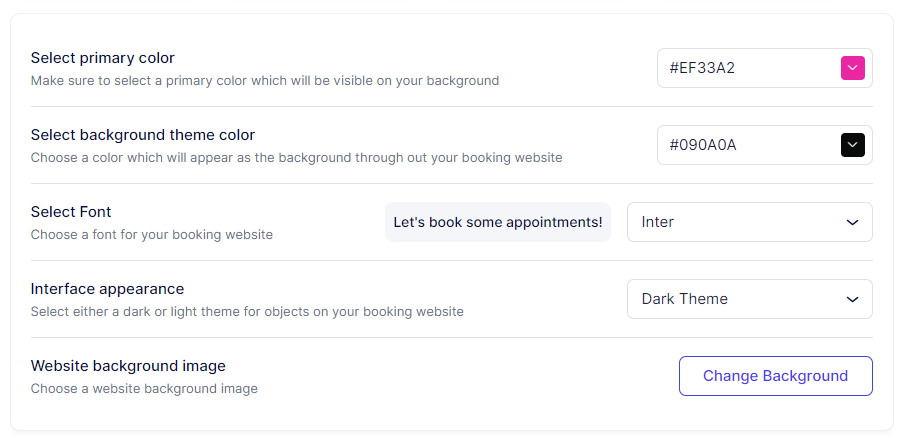
Below, you can further customize these themes to align with your business. You have the following additional options to design your booking website:
- Select Primary Color: Choose from pre-made colors or click on the color beside the HEX code to open a palette and select the desired color. You can also directly input a HEX code if you have a specific color defined in your business design.
- Select Background Theme Color: Choose the main color for the background of your website.
- Select Font: Choose from available fonts, including Inter, Roboto, Monserrat, Poppins, Archivo, Maven Pro, and Roboto Slab. Upon selection, you can preview the font immediately. Learn how to add more fonts under the Custom Code section.
- Interface Appearance: This option lets you choose the theme for objects on your booking website, such as service cards and single service page background. Opt for the light option for a lighter appearance or the dark option for a black appearance.
- Website Background Image: Change the pattern of the background with a choice of 8 different background patterns, each customizable with colors that complement your business
Hero Section
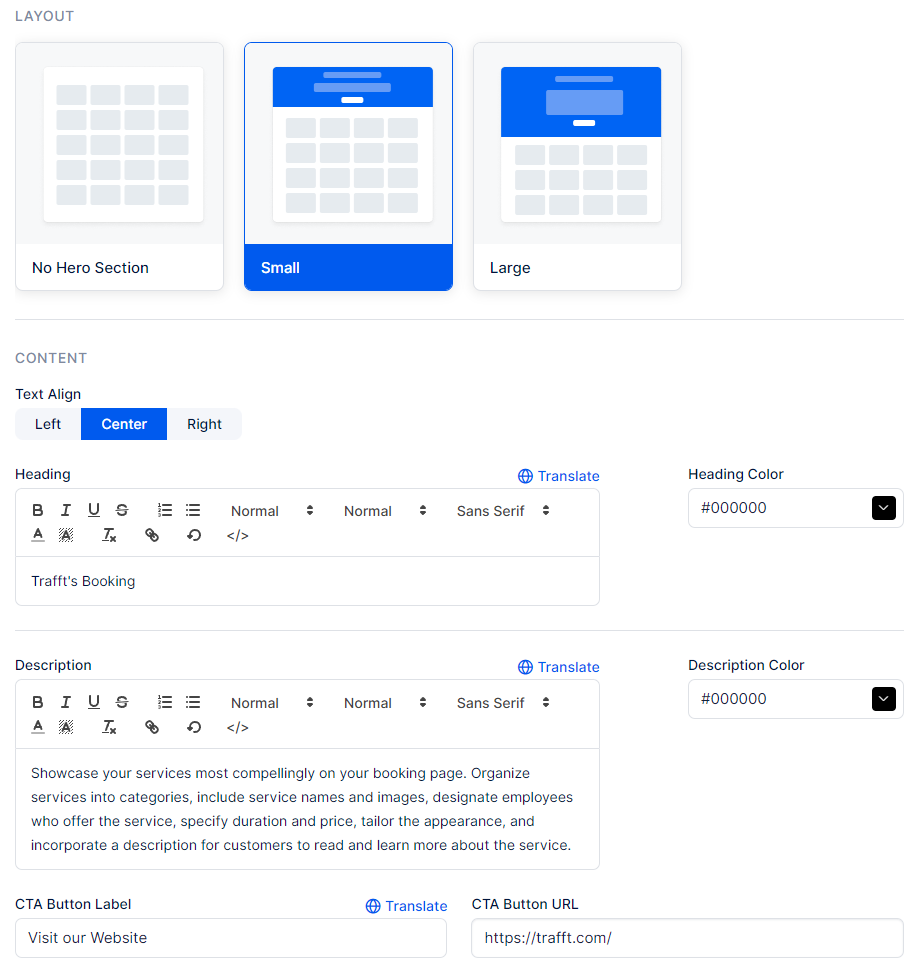
In the Hero Section, you have the opportunity to elevate the customization of your booking experience. You can choose the size of your Hero section and specify the content within it, including the heading, description, and text alignments.
The CTA Button URL can be used to redirect the customers to a different web page, specified in this field (opens in a new tab).
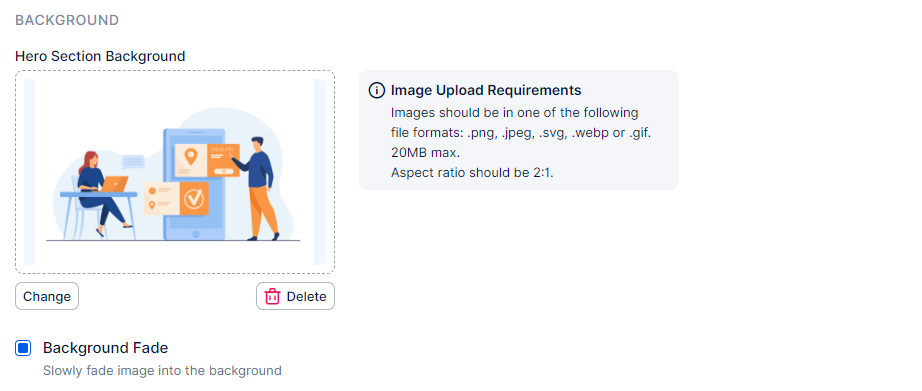
To add an image to your Hero Section, scroll down to the "Hero Section Background" section. Here, you can also apply a background fade effect.
Footer Section
We've taken the customization of the booking website a step further by offering you the option to customize your Footer Section too. Initially, you can choose the content that will appear in your Footer Section and determine whether it will be arranged in two or three columns.
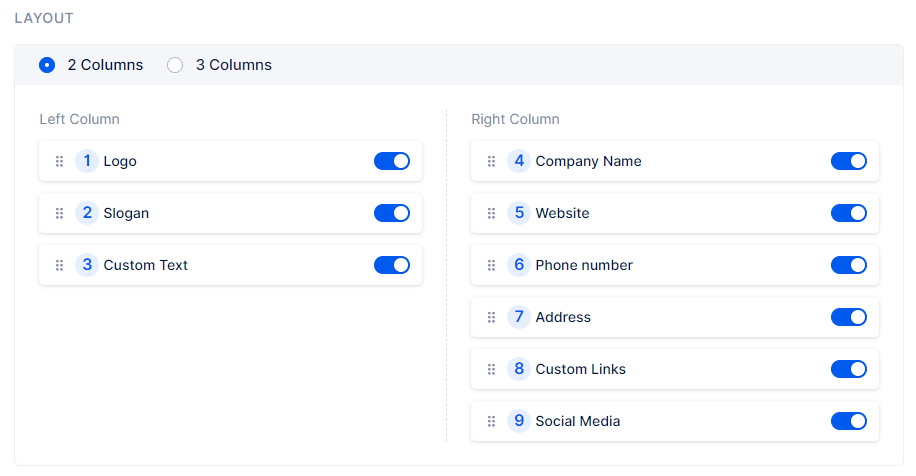
The logo you previously uploaded in the Header Section can be utilized in the footer. In the Logo segment, you can define its size, choosing between small or large.

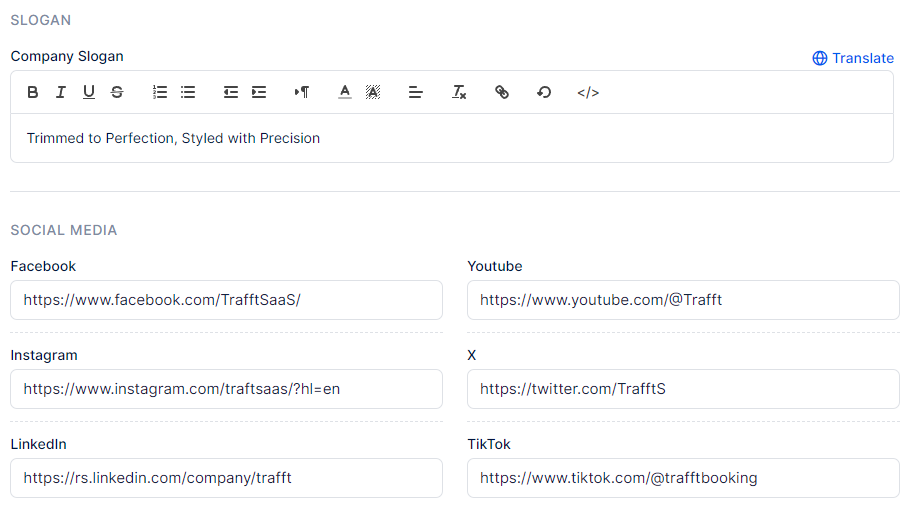
If enabled, the company Slogan, followed by links to your company’s Social Media (Facebook, YouTube, Instagram, X, LinkedIn, and TikTok) profiles will appear next. Here, you can define the slogan of your company and add links to the social media pages.
Custom Text field may be useful for your customers' user experience.

Custom Links & Policies
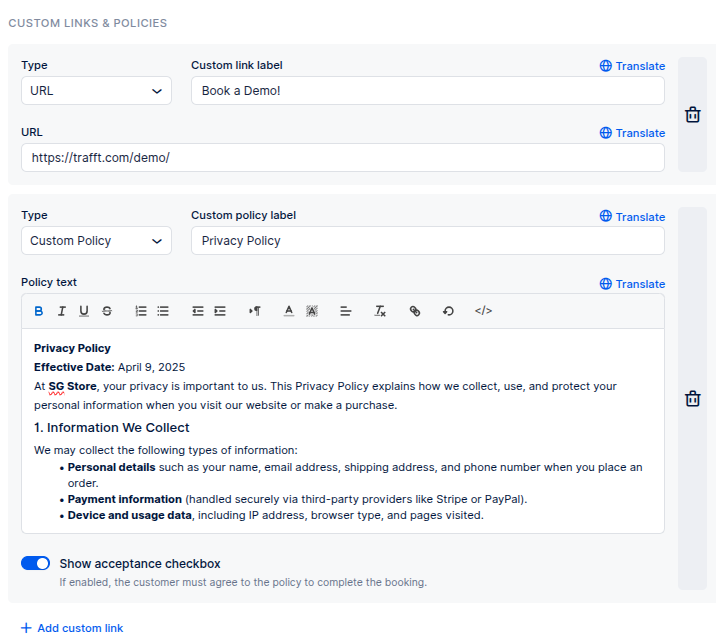
Custom Links can be used to enhance the user experience by adding additional helpful or relevant links. These links will be displayed at the bottom of the booking page, allowing you to provide quick access to external resources, terms, contact pages, or any other useful information.
Custom Policies allow you to inform your customers about important details such as liabilities, terms, or any other relevant information. These policies are displayed at the bottom of your booking page and are also shown as the final step in the booking process.
To ensure customers acknowledge the policy, you can enable the "Show acceptance checkbox" option. When this is enabled, customers will be required to accept the policy before completing their booking.
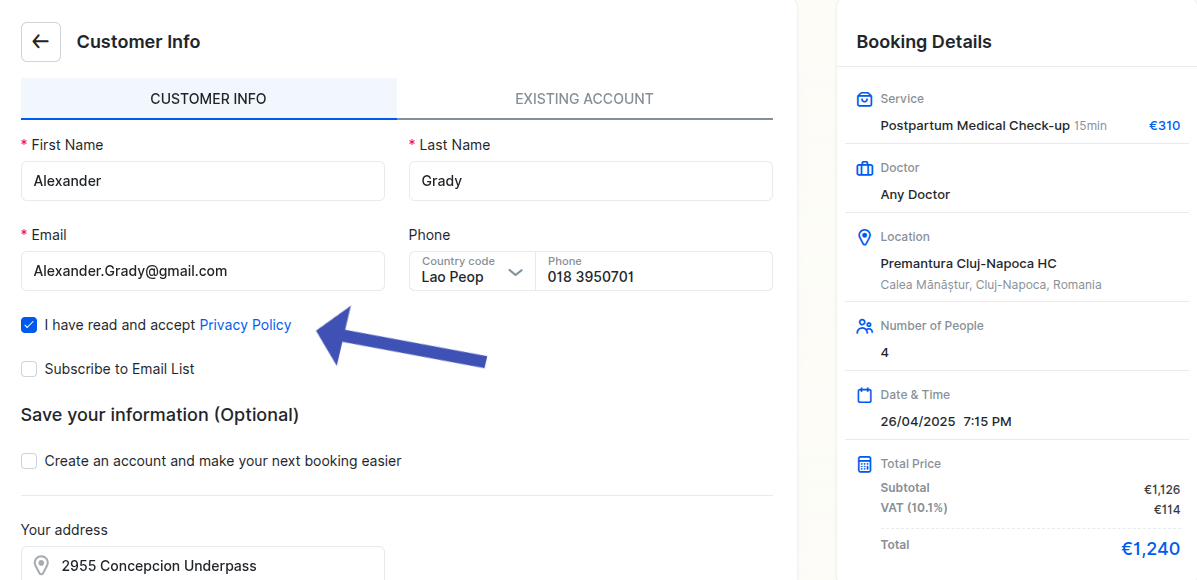
Once added, the social media links and custom links & policies will appear in the footer of your booking website:

The last, unnamed, Company Info section serves as a notice and automatically retrieves information about your company (business name, address, website, and phone number) from Settings -> Company Settings. You can use the hyperlink in this section to quickly access the Company Settings and adjust these details if necessary.

Services Page Settings
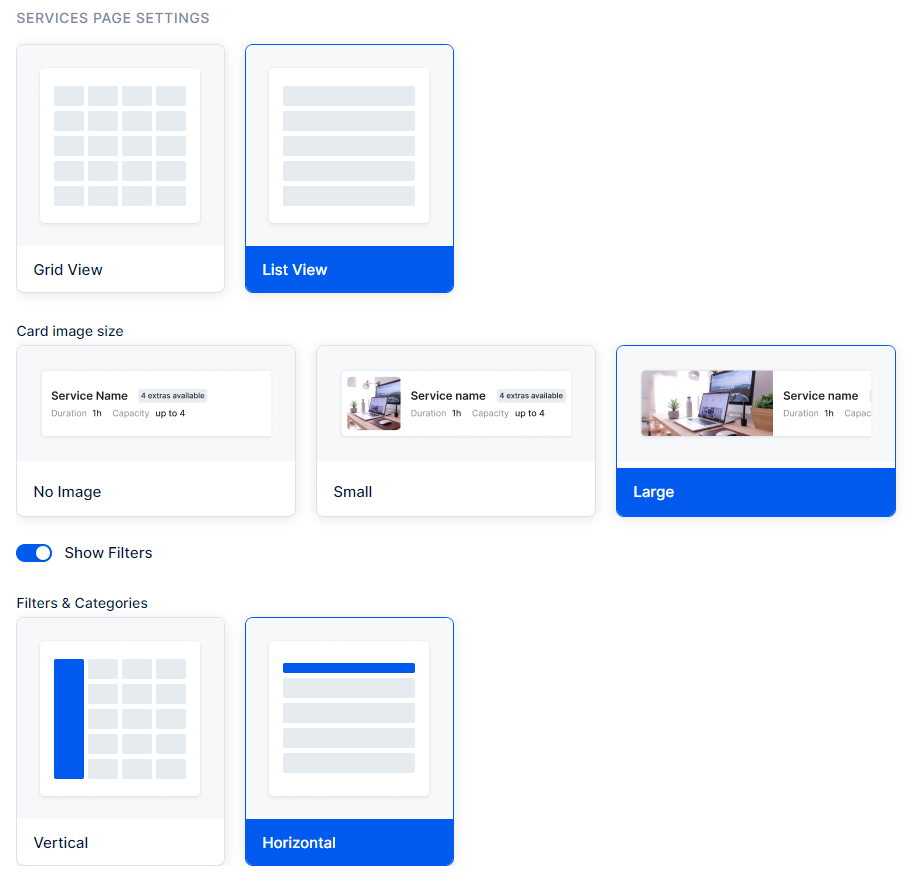
In the "Services Page Settings", you can specify the presentation of your services on the Services page of the booking website. This includes the desired view of the services section, configuring the service image size, deciding whether filters will appear on the booking website, and determining their orientation, whether horizontal or vertical.
Employees Page Settings
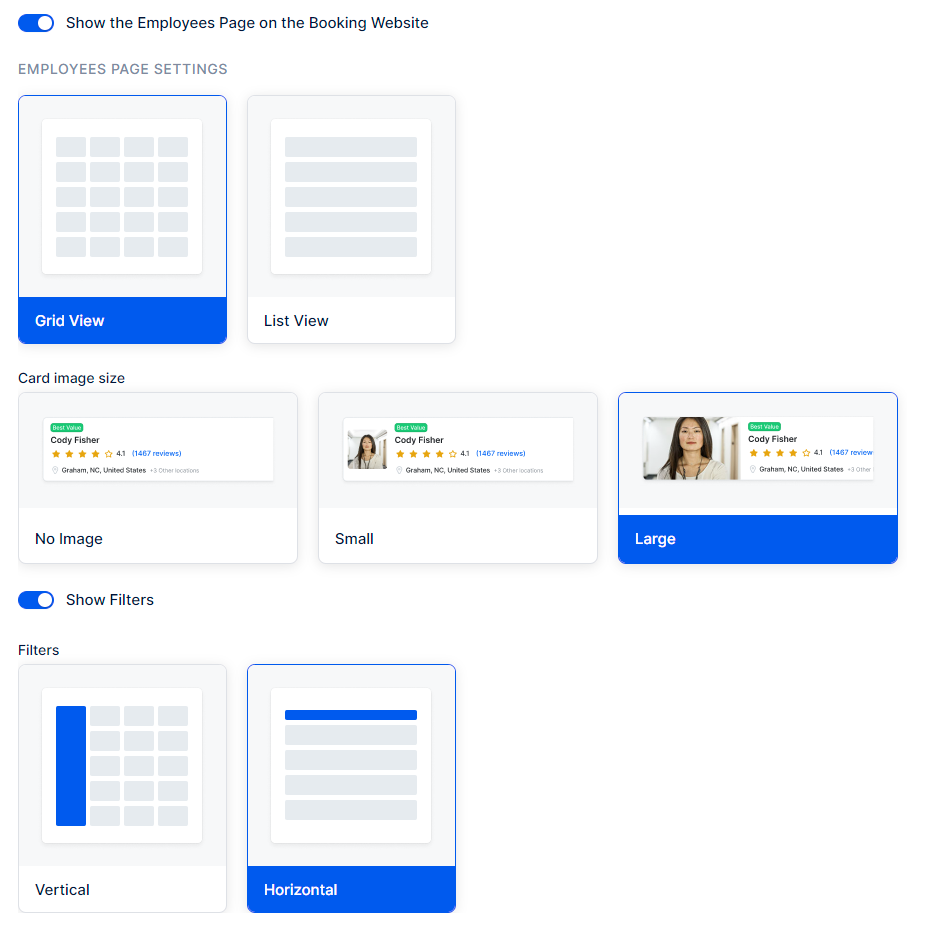
The "Employees Page Settings" allow you to customize how your employees are showcased on your booking website. At the top of this page, you can choose to enable or disable the Employees Page. You can also decide how the employees will be displayed—either in a grid view or a list view.
You can configure the employee cards to show no image, a small image, or a large image. Additionally, you have the option to hide the filters or display them. If displayed, the filters can be shown vertically in a column next to the employees, or horizontally in a row above the employees.
The employee cards will also show the overall star rating and reviews for each employee, provided you have enabled the Ratings & Reviews feature.
Booking Form Steps
Customize Thank You Page
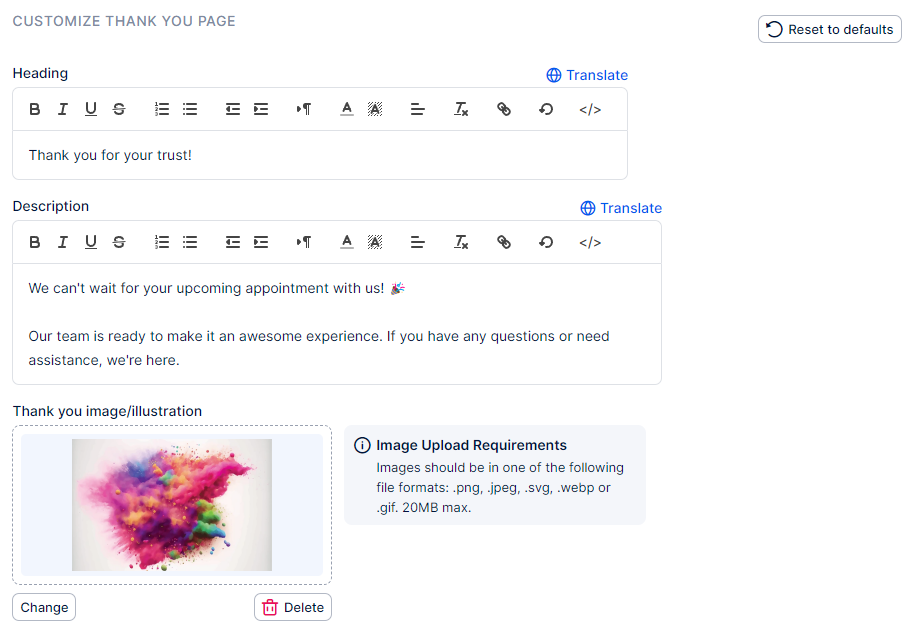
In the "Customize Thank You Page" section, you have the option to customize the content that appears after your customer successfully completes their booking. You can set a different image, heading, and description, replacing the default "Thank you!" text, "Your appointment is scheduled. We appreciate your trust and look forward to seeing you." text, and default icon, respectively.
As indicated in the screenshot below, if you include multiple languages in the Language section, you will also be able to translate these sections into other languages.
The "Reset to defaults", located in the top right corner, allows you to reset all the "Thank you" content to Trafft's default values.
Have more questions
If you face an issue, and cannot find an answer in the documentation, feel free to submit a support ticket!
Contact us