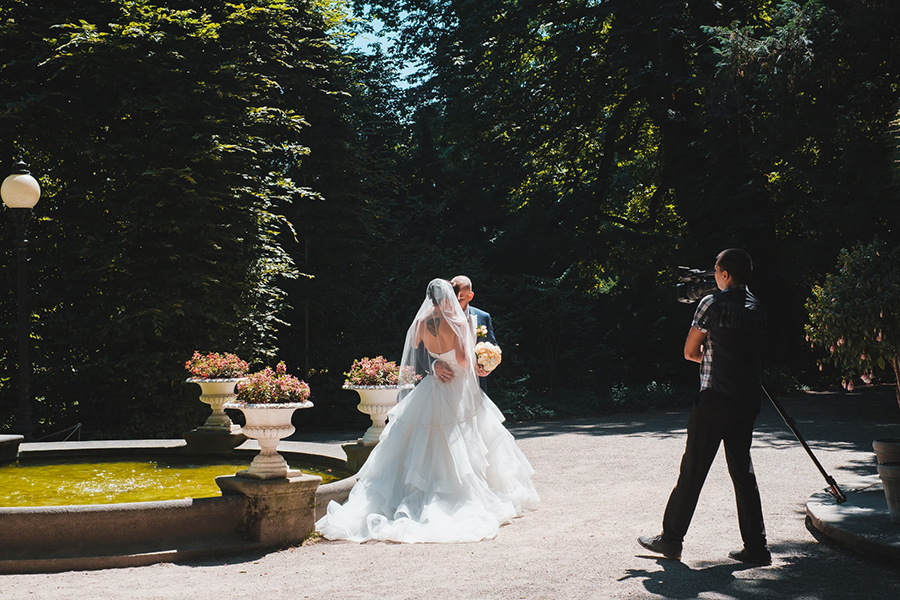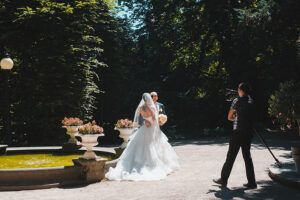
Images and multimedia are essential for websites and social media platforms. However, everyone still wants printed photographs.
People can then use them as banners, signage, or posters. So, knowing how to print photography to make it look great is crucial.
Seeing the image in print is more satisfying than looking at the virtual image. An image with clear details, when hung on the wall, is very eye-catching.
This is especially true for businesses such as advertising companies.
Yet, there are times when the quality of a printed image isn’t as good as a digital image. So it’s important to know how to print photography the right way.
The good news is that there are ways to make it happen. It is possible to make printed images that are as good as those on social media and other platforms.
How to Print Photography: Tips and Tricks
Adjust The Monitor Setting

There are two things to consider before editing the images.
First, the screen’s real color. Second, ensure that the printer settings reproduce the colors on the screen.
Before starting, ensure that the monitor isn’t on the bright settings. Otherwise, it will affect the adjustments made when editing.
On-screen, the image might look bright and just right. But when printed, it could be darker than the color shown on the monitor.
The ultimate solution for this is to set the monitor’s brightness level to normal.
Sometimes judging the right level can be tricky. An easy way to do this is to go to the settings page and adjust the brightness to the default level.
It is also best to calibrate the monitor and balance the color. This is possible by using a spectrometer and calibration software.
Even without printing an image, doing this step is a must.
It will also improve the quality of the images on the screen. Otherwise, the images will look different on various screens or gadgets.
The truth is, fixing the color is trickier than tweaking the brightness settings.
Most of the monitor’s settings are in the default setting. However, over time, there could be some instances where colors change.
Don’t only rely on what the eye can see. Adjusting the colors and brightness solely on this basis is not always accurate.
Instead, users should rely on data. A useful tool in this regard is the histogram section on Photoshop or Lightroom.
This shows users if the images are in the right color or brightness. It also helps to identify if an image is underexposed or overexposed.
Users can adjust the image as necessary, without clipping the highlights or shadows.
Soft Proofing Before Printing
This process helps to show how the image will look when printed. This method of how to print photography allows one to visualize the real outcome.
The best way to do this is through Photoshop, Adobe Lightroom, or other photography-related software.
Soft Proofing uses a profile matched with the specific printer and paper used. It thus shows users the available colors for printing.
One can check if the patch of yellow will be as vivid as expected. It may be that toning it down produces a better reproduction of the image.
Soft Proofing allows users to pick from various color spaces and printers. They can also make their own presets.
However, they must ensure that they select the right printer and color space. This makes it easier to adjust the saturation, color balance, and sharpness of the print.
Keep making adjustments until the image closely matches the original image.
Another advantage of Soft Proofing is that it is easy for users to analyze paper types. As a result, they can choose the right one for a particular series or photos.
Take note that a printed image’s colors are also dependent on the paper and the printer.
In the past, photographers used Hard Proofing to tweak the lighting or color of an image. This is still possible today, but Soft Proofing is easier and saves time.
Picking The Correct Print Size

High-quality prints for posters and wall arts require a high-quality image resolution. If not, the difference in picture quality will be visible to the eye.
The right print size and picture resolution should always be together.
Adjusting the photo’s size in the print section will not do anything to improve its quality. The best thing to do is to ensure that the image file has enough pixels.
By doing so, the printed-out materials will remain sharp and clear at any print size.
Here are some of the important details to know about an image’s pixels. Printed images use the reference DPI or “Dots-per-Inch.”
This stands for the number of dots per printed inch. These images come from square-shaped dots.
This is what most know as the image’s pixel.
When the image has more dots, it means that it has higher pixels. On the other hand, lower resolution images have limited details.
Don’t get confused between PPI and DPI.
PPI stands for pixels-per-inch, and it refers to digital media. DPI refers to print.
The standard DPI is 72 for monitors. But it should be at least 300 DPI for excellent print quality.
It is easy to identify if the image has a low DPI.
The low-resolution image may look fine on a computer. On zooming in, though, there is a lack of detail and it becomes pixelated.
Therefore, 200 dots per inch is usually the accepted quality.
Always Check The Paper Profile
Don’t forget to check that the profile and the type of paper match. Most well-known printers, such as Canon and Epson, have ‘canned’ profiles to match each paper.
Ensure that the setting is on the matte paper profile if the material used for printing is matte paper. Or select the luster profile for the luster paper.
As simple as that.
The paper profile for a printer is like the monitor’s profile for the GPU. It signals to the printer how the type of paper will react to a certain ink.
Thus the printer knows how to set down the ink on the paper, avoiding a negative reaction.
Using the proper profile is crucial since the paper types differ from one another. Differences range from the actual color gamut to the surface’s quality.
Photographers may use A3+ or A2 paper for larger prints. In this instance, they may use brands such as Ilford, Canson, and Hahnemuehle.
These paper suppliers provide specific paper profiles and make them possible for downloading. In the editing software, check the Colour Management dialog box to see the profile.
Using the right profile for the printer and paper might not produce prints that look 100% like the images on the monitor. But it definitely reduces the number of variables.
Make a test print, and if it is too dark then the problem lies with the brightness setting. Don’t worry, as this is easy to fix.
The Right File Type To Use For Printing
All users likely know about the JPEG and RAW file. These formats determine the way a camera gets information during photo-taking.
The following will show the pros and cons of both types of files. Choosing which one of these file formats to use depends on what the user needs.
When shooting in RAW, remember to stick with an uncompressed image format throughout the editing pipeline. For instance, use TIFF or PSD.
The JPEG format is fine with images used on social media or other internet pages. However, Richmond advises that JPEG is not the best for printing.
The portable files are usually JPEG and PNG. Yet, they do not have enough detail or the depth of information that most photographers, designers, and editors use for working.
Exporting JPEG files results in less depth in colors and design.
A challenge arises if a photographer cannot shoot RAW. Or they have set their camera to JPEG without realizing it until the shoot.
Well, the only solution for that is to ensure that the quality will not degrade further. Use Lightroom or other similar applications to edit images in JPEG format.
This will prevent any further destruction of the details while editing.
It’s essential to choose TIFF or PSD if exporting images to Photoshop. Another way is to open the original JPEG in that application.
This will not upgrade the image to its highest quality. But all the details remain, avoiding disruption to the original quality.
It will also avoid having to recompress an already compressed file.
Use Color Management

Color Management is an important skill. It is one that photographers, designers, and editors need to learn.
It is the process used for putting the digital file into the medium of print. The purpose of color management is to get the printed result the same as, or as close to, the calibrated monitor.
RGB, or Red-Green-Blue, is the universal color space used in computers and handheld devices. When added together, they produce white.
The required color space for print is Adobe RGB. However, using the same color space when exporting files will make them look dull.
Sadly, the standard RGB doesn’t look as good in print as it did on the screen. To make images look right, users need to convert them first to Adobe RGB.
If the monitor allows Adobe RGB, then start to use it. Why?
The extra hues of green, indigo, and blue are possible with Adobe RGB. Editors usually only see these by using laser printers.
On the other hand, sRGB cannot do the same thing.
To learn more about printing and colors, you can check the product print colors explained guide.
Choose Suitable Photo Paper
Picking the right paper is a crucial step in learning how to print photography. It has a huge effect on the final printed result.
It’s not like choosing inkjet printers that can produce stunning photos regardless.
As all editors know, plain paper absorbs the ink. This can destroy fine details and reduce the overall sharpness of the print.
Plain paper is okay for text and drafts of digital images. But for the best results, always use the photo paper recommended by the manufacturer.
Of course, remember that paper comes in various formats. The most common paper types are glossy and semi-glossy or matte paper.
The glossy paper has a shiny surface that generates glare in direct sunlight. One of the cons here is that it smudges easily.
For printed material that is less reflective and less smudgy, go for matte paper. It doesn’t have the same fine detail and is not as sharp as the glossy paper.
But the dappled finish of the matte paper makes it more unique.
Take note that using regular copy paper can cause wrinkles or smudges on inkjet prints. A solution is to use heavier paper such as white matte 65 lb card stock.
This will result in a better quality print than using copy or printer paper. Use this tip if aiming for a colorful image or using an inkjet printer.
Printer Maintenance
Always Check the Printer Settings
Make sure to always check the ink type and paper type in the print settings dialog. This will prevent unnecessary damage to the printed images.
See if the setting matches the paper and ink specs that are available on their box packaging.
Yes, it’s okay to configure the printer for premium paper and quality ink. However, the setting should make it clear to the printer that the image to print is a high-quality photo, and not a draft or simple output.
Use The Manufacturer’s Ink - ALWAYS

Printers often have specific fluid or ink that is best for them.
Most tools like printers aren’t stand-alone gadgets. Manufacturers are always pairing them to a particular ink product.
The same goes with the oil in a car engine.
Using remanufactured or refilled ink cartridges can result in low-quality prints. Especially so when printing photos.
Using third-party ink cartridges will likely provide inconsistent print results.
Have Realistic Expectations
It is impossible for an image to appear the same on-screen and in print.
The images on screens have a lot of things happening and factors that affect the results. When it comes to the technology used by screens and prints, the dynamic range of each is different.
Moreover, prints reflect light while screens emit light. The printed materials also have a limited range of brightness compared to screens.
Portable devices, TV sets, computers, and gadgets have 10x the dynamic range of photo paper. Paper’s contrast ratio is approximately 100:1, while a screen’s is between 1000:1 and 3000:1.
But the interesting thing is that human eyes change everything. The eye encompasses a dynamic contrast ratio of about 1,000,000:1.
However, it can take up to 30 minutes for it to adjust to the current brightness levels. Also, a chemical reaction occurs in the retina as it collects the available light.
The goal is to emulate the dynamic range seen on screen in the smaller range of a print.
Of course, this is almost impossible. But one can achieve something very similar.
Choose The Best Environment For Editing and Reviewing Photos

This might sound ridiculous. But the elements in an environment can affect how the pictures on a screen are seen.
If there’s too much sunlight, one has to figure out whether the picture is too dark or is it only because of reflection. It might also change the colors.
A perfect viewing station with properly tuned lighting can be costly. But it doesn’t have to be a professional studio.
It is possible to edit and review photos in places with neutral lighting.
If there is some doubt about the lighting or reflection on the screen, check under daylight from a window. Natural light is better and it can produce a wide range of colors.
If it’s not possible to buy better lighting equipment, a dedicated color viewing lamp will do.
The main goal is to create an ideal environment for editing photos. Avoid too much distraction and factors that may change the screen’s lighting.
Ending thoughts on how to print photography
To conclude this guide on how to print photography, here are some advantages of printing your own photos:
- It is easier to tweak and adjust an image before printing in order to achieve the desired result. Outsourcing this job might lead to dissatisfaction.
- Photographers can learn much through the editing process. By looking at the photos and settings they can see how to solve some issues or correct particular flaws, which are unnoticeable on screens.
- Doing the editing yourself will bring great satisfaction.
Seeing the printed images can boost the confidence of photographers. It is also very rewarding for them.
Yes, it takes time to get the hang of these instructions. But eventually, these steps will become second nature for photographers and editors.
Get more bookings with the right tool for the job
Staying organized has never been easier.
You can now manage your business and grow your brand with a single, powerful software that keeps all of your appointments in line, your clients organized and your business booming.
Trafft is perfect for business owners who need to streamline their booking experience both for their staff and their clients.

Trafft handles everything for you, even sending automated email or SMS reminders to your clients. No-shows? Not anymore!
The Trafft booking software adapts to different industries for a blissful online booking experience and employee management.
Want to know more? Check out Trafft's awesome features to see what you are missing.
If you enjoyed reading this article on how to print photography, you should also read this one on how to prepare for a photoshoot.
We also wrote articles about similar subjects like how to get more photography clients, becoming an event photographer, how to become a licensed photographer, social media marketing for photographers, real estate photography contract, appointment scheduling for real estate agents, how to get your photography noticed, real estate photography marketing and photography mood board.