How to Make a Booking Page? Step-By-Step Guide
So you’re considering making a booking page, but not sure where to start? Creating an online booking page is the right choice if you run an appointment-based business. But it’s hardly enough to just create one and call it a day. Many competitors probably already turned to online booking, the question is, how do you plan to stand out?
We’ve prepared a detailed step-by-step guide to teach you how to make a booking page for your business that stands out from competitors, enhances customer experience, and converts passive scrollers into loyal customers. From must-have sections to UX principles, we’ve covered every important aspect of creating your own online booking page. Ready to get your calendar fully booked? Read on!
What Is a Booking Page?
A booking page is a dedicated section of your website that allows visitors to schedule appointments. It’s a perfect solution to connect customers with your business and enable them to view available time slots, select desired services, and confirm bookings. A well-designed booking page not only simplifies the booking process but also enhances customer experience and increases conversion rates as shown by industry benchmarks on conversion rates by industry.
What Should the Booking Page Include?
Service information
Use descriptive names for the services your customers can book. Each name should clearly explain what the service is all about. Add service descriptions for each, but make sure customers see the description only when they click to read more. By doing this, your booking page will provide all relevant information, but still be organized and clean.
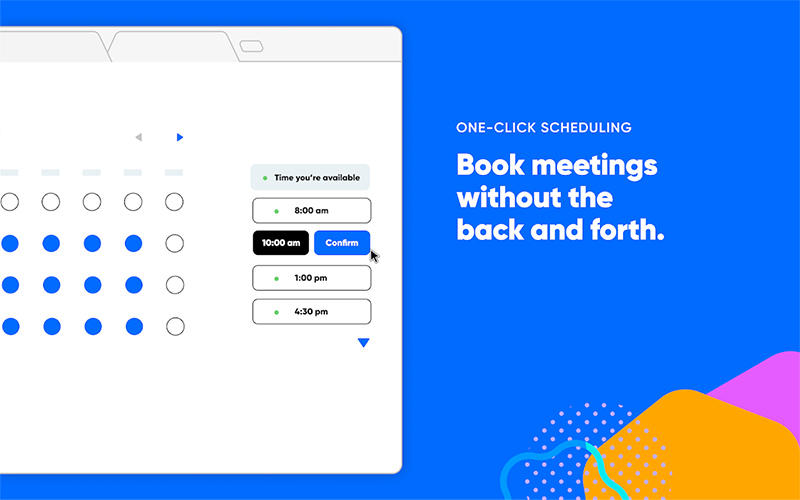
Availability calendar
Clearly highlight which dates and times are available by integrating the availability calendar into your booking page. The goal is that customers can easily spot available slots and claim them.
Booking form
A booking form serves a great purpose when it comes to creating a seamless scheduling experience for both you and your customers. Make sure it’s user-friendly and that it collects necessary information, such as contact details, name, and specific requirements.
Booking confirmation
Your job is not done once customers have booked an appointment. You still have to set up automation to let them know the next steps and send the confirmation immediately. You could do it via email, SMS, WhatsApp, or any other communication channel they prefer.
Just make sure to include appointment details (time, place, services, employee, etc.) and let them know how they can reschedule an appointment, whether you have an appointment cancellation policy, and how they can reach out if they have any questions.
Automatic reminders
Automatic reminders are a great way to make sure your customers actually show up for their appointments. They hold both your employees and customers accountable, and drastically reduce no-shows. The best time to send reminders is approximately 24 hours before. You can send appointment reminders via SMS or email and use pre-made templates or create your own.
Payment integration
It is quite important to have multiple payment options integrated into your booking page if you want to ask for upfront payments. When it comes to payment integration, besides offering multiple options, it’s also important to use providers that have strong security measures in place. Integrating payment getaways is an effective way to make sure you always get paid for your work.
Support for multiple locations
If you run a business that spans multiple locations, offering your customers to choose a location that suits them most will enhance their satisfaction. Your booking page should include every location where you operate, and this should be the first section to appear.
Group bookings
Accepting group bookings? Then you should allow customers to book group appointments directly on your booking page. Just make sure to include important information, such as minimum and maximum capacity.
Recurring appointments
If one appointment is not enough for your customers, allow them to book recurring appointments and integrate that option into your booking page. Don’t forget to add details for recurring bookings, such as how often they happen and the date and time for future appointments.
Benefits of Having an Online Booking Page
24/7 availability
Forget about traditional working hours! With an online booking page, customers can book appointments 24/7, and fill your calendar while you maintain a healthy work-life balance. By offering customers to book appointments online, you’ll offer them a convenient way to schedule appointments, improve customer satisfaction, and attract a wider audience. It’s a perfect way to book appointments for anyone, without a need for lengthy phone calls, and any room for errors and misunderstandings. Your introverted customers will thank you for it!
Reduced manual labor
You don’t have to hire a receptionist whose only job is to answer phone calls and schedule appointments. You don’t even have to answer back-and-forth DMs on Instagram from people who want to schedule appointments. All you have to do is share your booking page in a few clicks and automate the rest.
Better efficiency
You’ll book more customers, but you’ll also serve more customers. The booking page frees up your time and lets you focus on providing high-quality services to customers who schedule an appointment. It’s not just about attracting new customers but maximizing your revenue potential and that’s what online booking is all about!
Fantastic customer experience
Build trust and loyalty among customers by offering them a perfect, personalized, and efficient booking experience. A fantastic booking page not only converts more visitors into customers but also leads to repeat business and positive reviews.
How Does an Online Booking Page Work?
What’s it going to look like when you create an online booking page?
Once you’ve set everything up, promote your booking page on social media and other marketing channels where you communicate with your audience. Customers who want to book an appointment will click on the booking link, see the services, choose what they want when they want to book, and provide contact information.
Additionally, they can pay for services in advance, choose a location, and favorite employee, and even could enter discount coupons if they have one. Once they’ve submitted the booking form, they’ll receive confirmation and you’ll both get appointment details.
Noticed how you’ve only had to share a link without having to do anything else? That’s what we’ve been talking about this whole time!
How to Create an Online Booking Page Step-By-Step
Want to create an effective booking page? Follow this 13-step-by-step guide and you’ll get there:
1. Figure out your requirements
Think about what you want from your booking page. What are your expectations? What are must-have vs. nice-to-have features? Where are you in your business, and where do you want to be in the future? Once you’ve got this figured out, it’s time to:
2. Choose a platform
Choose a booking platform that supports both your current and FUTURE requirements. It’s important for your booking page to be able to grow alongside your business. Maybe you don’t want to run email marketing campaigns right now, but that’s one of your marketing goals in the future. If that’s the case, choose a booking platform that has integrations with email marketing software.
3. Get familiar with it
When it comes to booking platforms, simplicity is the key. But not only for customers; for you as well. You don’t want to spend hours in the backend to make it all work. That pretty much ruins the point of the booking page. Make sure that the booking platform is easy to use and navigate before you commit to it.
4. Configure general settings
It’s time to cover the basics and configure time zones, working hours, booking intervals, buffer time between appointments, and other general settings. Make sure that the booking page settings reflect your business’s availability and processes.
5. Create service categories
Once you’ve configured general settings, it’s time to add service categories you want to show up on your booking page. E.g. if you run a salon, divide services into beauty treatments, hair treatments, coloring, etc.
6. Create services and put them into suitable categories
Now is the perfect time to get into details. Add each service your business provides, add images, write descriptions, and of course prices. Don’t forget to put each service into a category that suits it most.
7. Add extras
Earn extra revenue by utilizing upsells. Adding extras for other services is a great way to make the most out of each appointment. For example, if you have a hair salon, offering haircuts as an extra service alongside hair coloring is a great way to make extra revenue.
8. Add employees
Each employee is an integral part of your business and customers certainly have their favorites. It’s definitely awesome to allow customers to choose employees on the booking page. But it’s also vital to assign services to each employee because they probably don’t provide the same services. Maybe one employee is more expensive than the other, and your booking page should clearly communicate that.
9. Configure special days/holidays:
You treat employees with an extra day off for their birthday? No problemo! Just make sure to set up special days and holidays to reflect your availability on the booking page.
10. Customize the booking page with your branding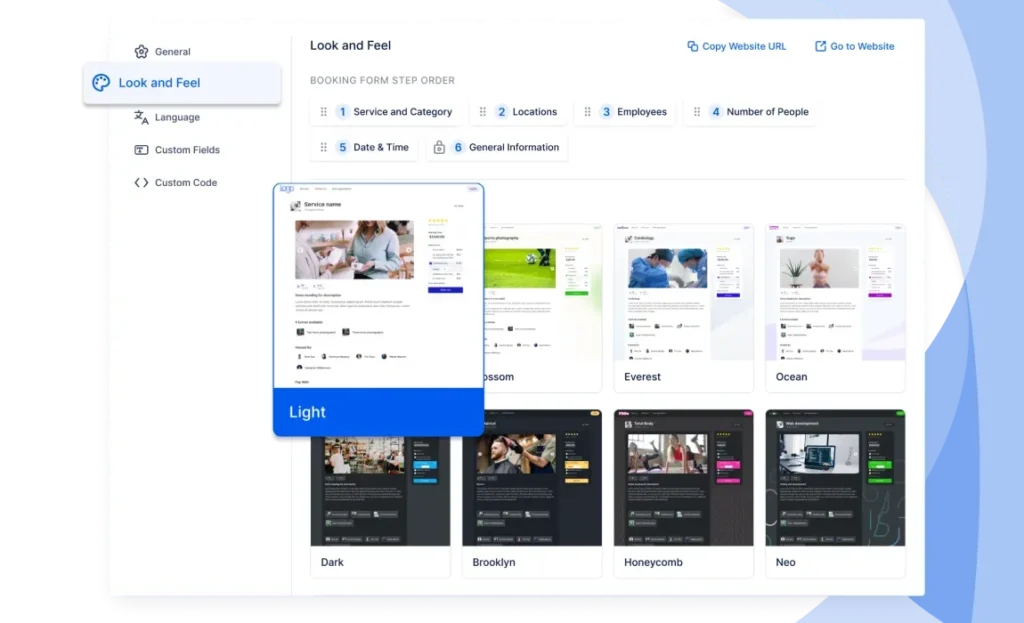
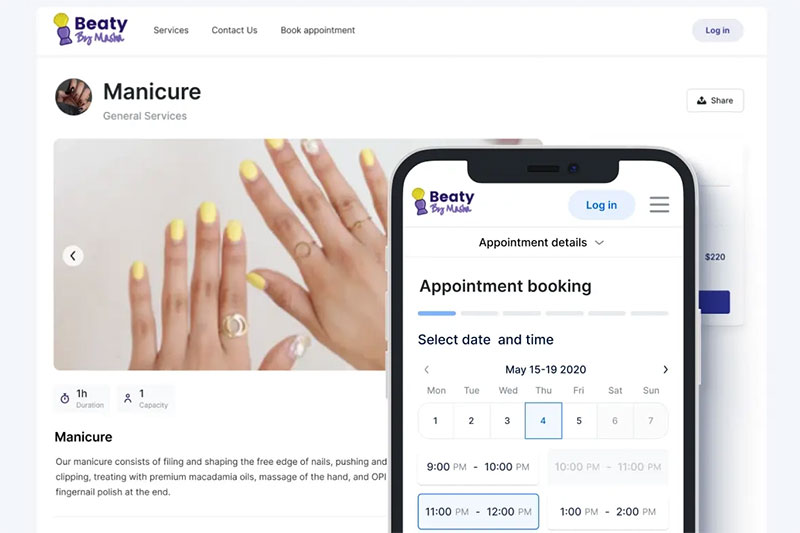
Booking page design is vital if you want it to be a high-converting one. Make sure your booking page has your logo, reflects your brand’s visual identity, but also follows best practices when it comes to user experience. Design should be clean, responsive on all devices, and have a visual hierarchy and logical flow.
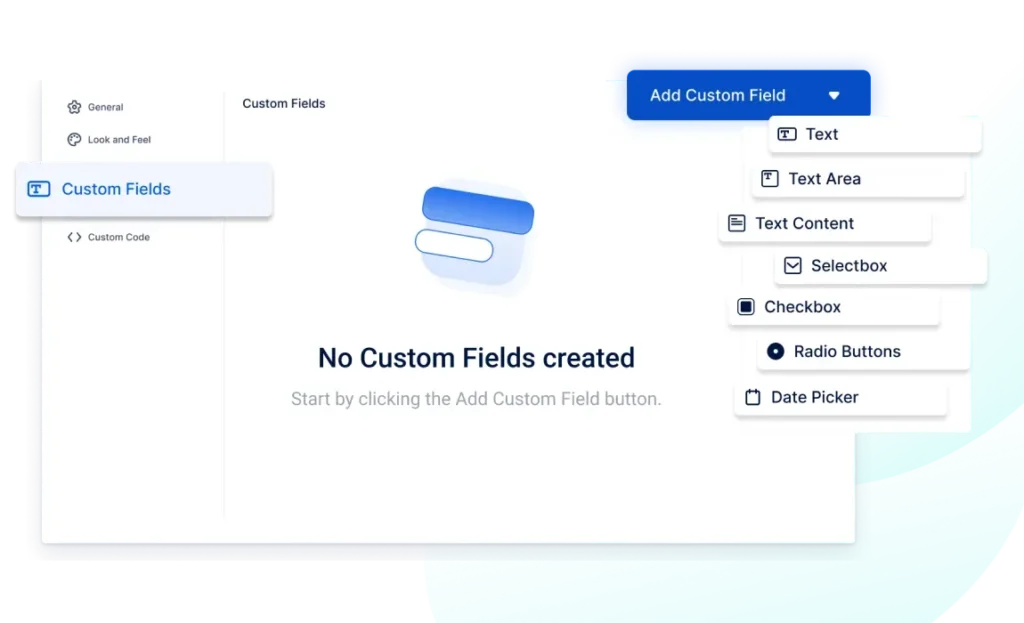
11. Add custom fields
Not every business is the same. Information that’s crucial for your business may be redundant for some. Make sure to add custom fields to collect the information regarding appointments that you need. It can be additional information about the nature of the appointment or something else that’s vital for your business and customers.
Also, you can use these custom fields to collect additional info about your customers (e.g. their age, gender, location) or find out how they've heard about your business in the first place. That's a perfect opportunity to get to know your customers better so you can tailor your services to fit their unique needs.
12. Enable payment integration
Integrating a secure payment system into a booking page right from the start is important if you want to offer customers a convenient way to pay for services, and make sure you get paid on time. Multiple payment options are always a great idea, and if you don’t require upfront payments, you can also ask customers to check the box if they want to pay when they finish with an appointment.
Booking platforms often offer you a solution to automatically create and send invoices and manage taxes, which can come in handy if you have a high volume of appointments!
13. Test & launch
We’re almost there! Before you get your booking page out in the world, test it yourself. See if every feature works the way it’s supposed to, check the confirmation and reminders, and get ready to promote your booking page. Once you’ve made sure everything works properly, all you have to do is share one simple link and watch your calendar get filled with appointments.
Booking Page Example
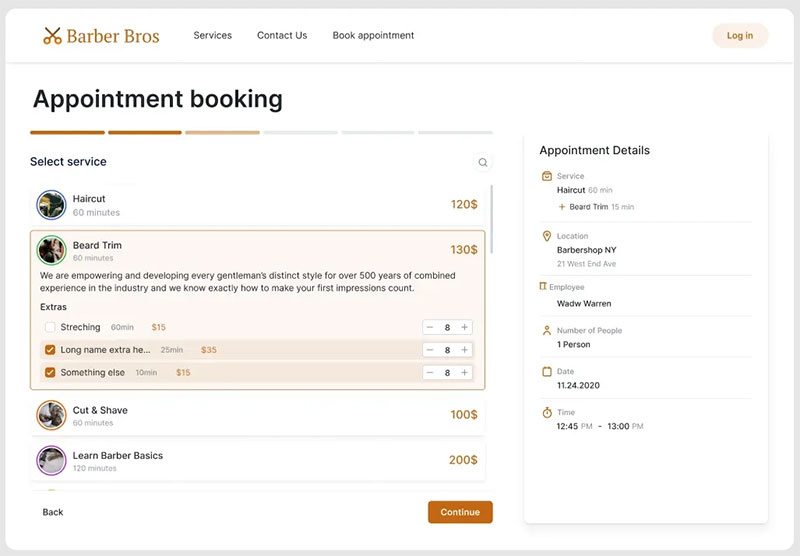
Looking for inspiration? Here’s an example of a well-designed booking page that perfectly fits customer preferences, offers a great user experience, and reflects the brand’s visual identity:
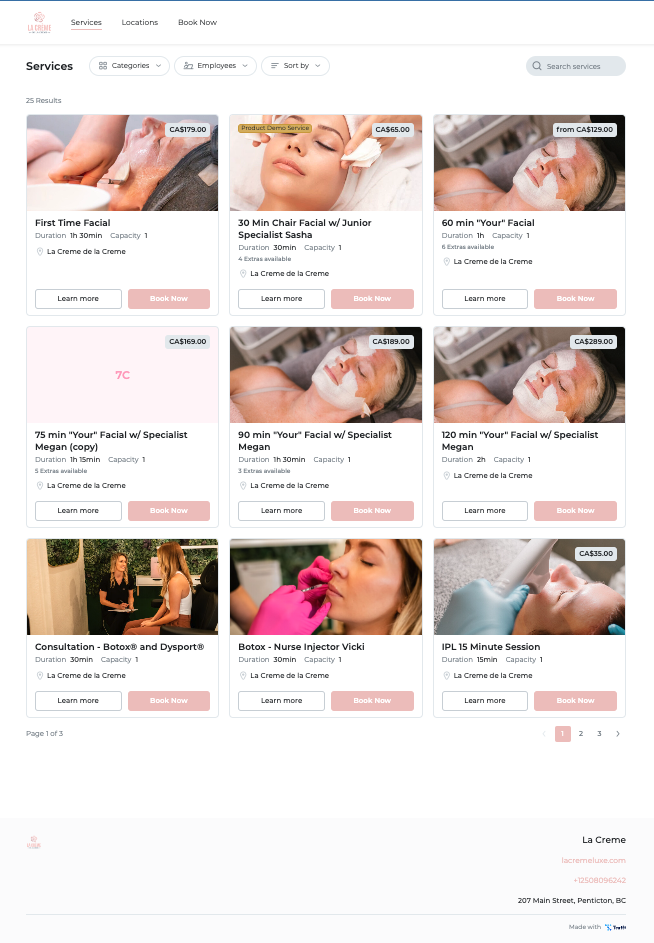
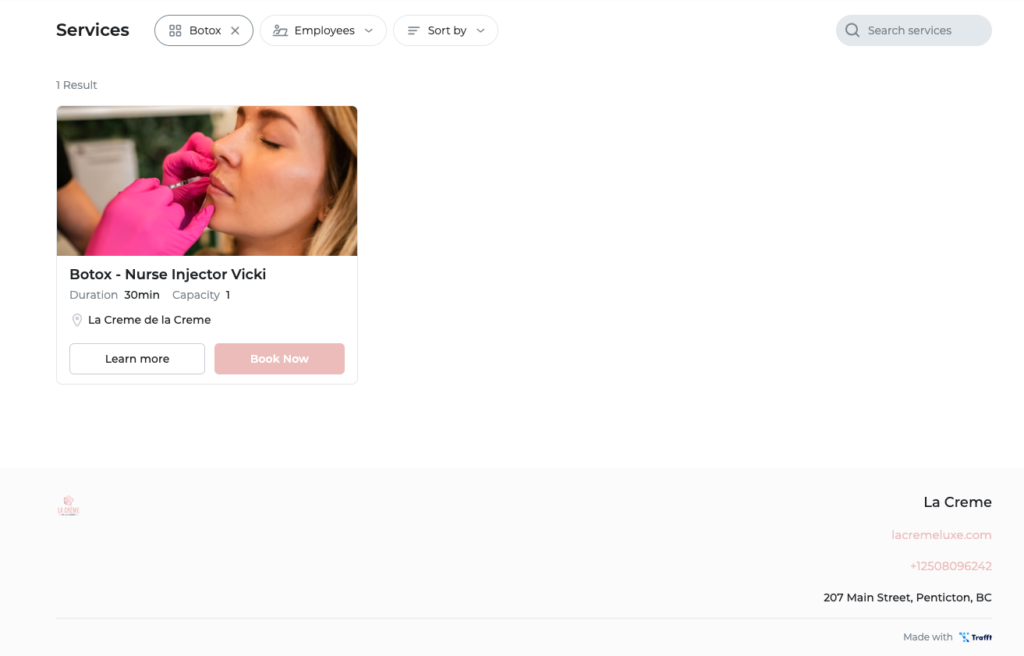
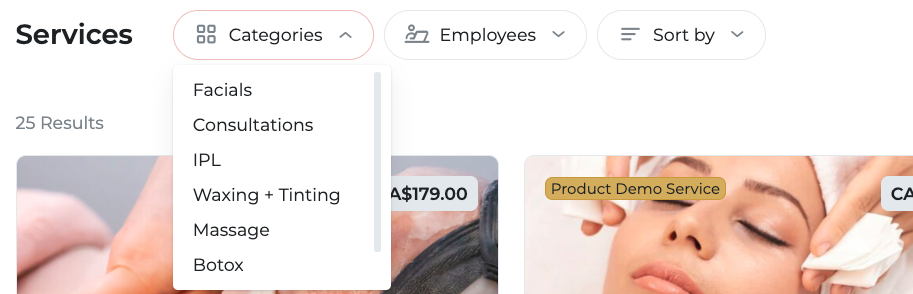
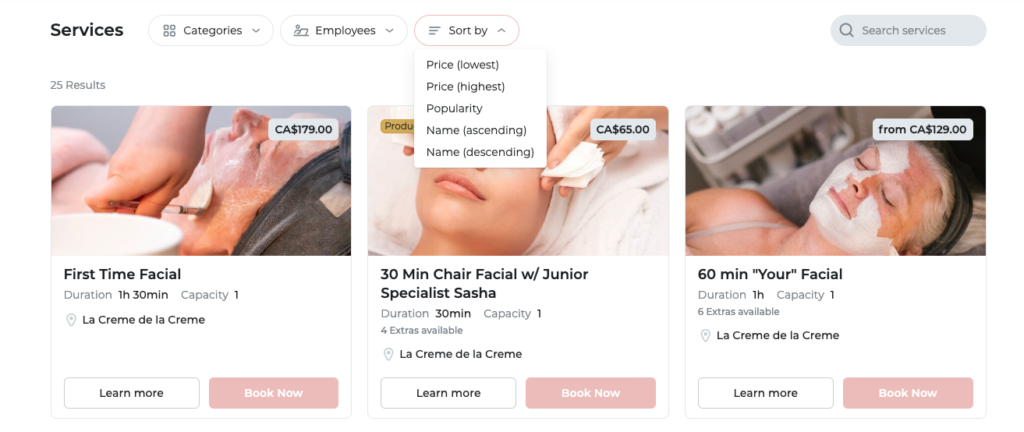
In this booking page example, customers can easily navigate it, and sort services based on their preferences, choose the desired category, and employee, and see detailed descriptions. It strikes a perfect balance between relevant information and user experience, which makes it a great example.
Booking Page Template
It’s definitely easier to have something to start from rather than starting from scratch. Because of that, Trafft offers you a wide range of booking page templates to choose from and customize to fit your brand. When you sign up for free, you’ll find various templates for different industries such as:
- Healthcare
- Salons
- Barbershops
- Coaching
- Consulting
- Education & Teaching
- Fitness & Sports
- Dental clinics
- Cleaning services
- Personal services
- Automotive services
- Home services
- Government & administrative services
Give it a try, create your own booking page from our proven templates, and do it all without any risk whatsoever.
How? Try Trafft for free and see for yourself.
Bonus: Our FREE plan stays free forever for all users with less than 5 members.