If you are a business owner handling multiple employees' schedules, you know how overwhelming it can be to keep everything organized. Whether you're coordinating appointments, managing shifts, or navigating time-off requests, the complexity of making a schedule that works can quickly become a major headache.
That's where Trafft comes in - a powerful scheduling tool designed to simplify these tasks and help you stay on top of your business. So, if you want to learn how to create and manage employees with Trafft and say goodbye to chaotic spreadsheets and missed appointments, keep on reading!
How Many Employees Can I Add?
Employees are the ones providing the service at your company, and with Trafft, you can add as many as you need. You can also set their unique schedules and track their performance for the next seven days.
On the other hand, if you are the only one providing services at your company, your admin details are used to create your first employee - you. Just make sure to connect that employee to at least one service
How to Create and Manage Employees: Step-by-Step Guide
If you want to add employees to your booking website, here are the steps to follow:
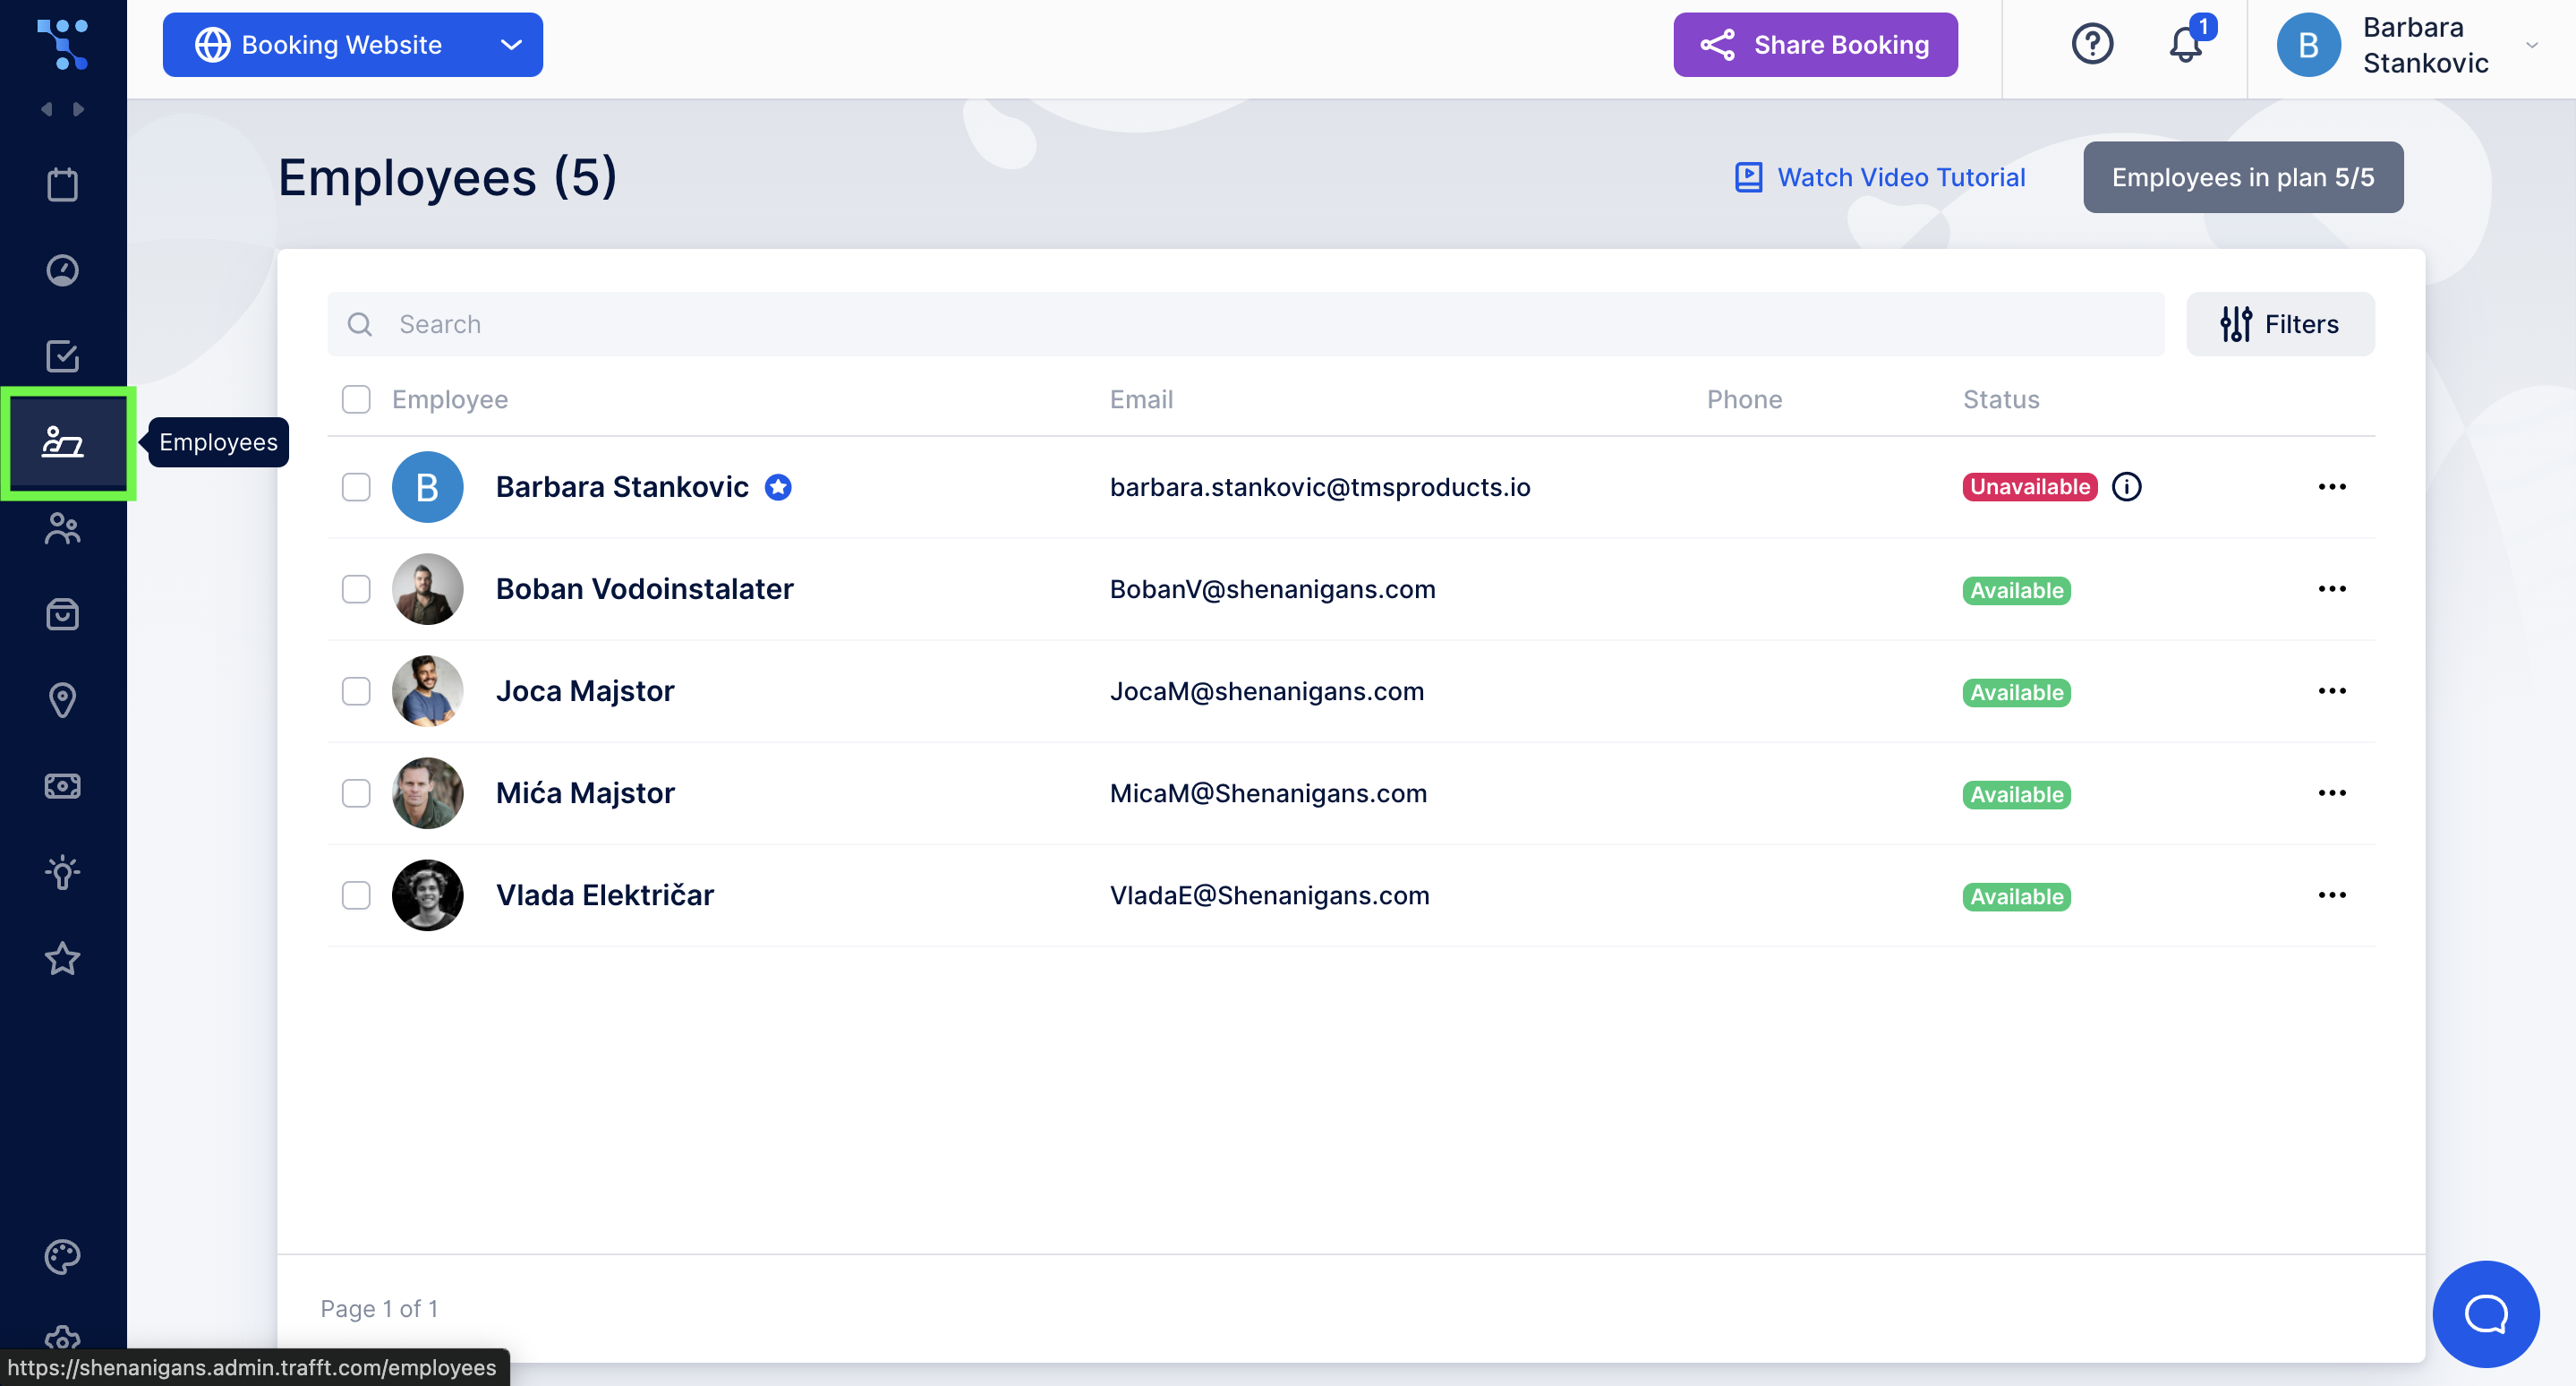
- Log in to your Trafft account and click the Employees tab. You’ll see here that the Trafft has already created an example employee suitable for the industry you selected when you signed up.
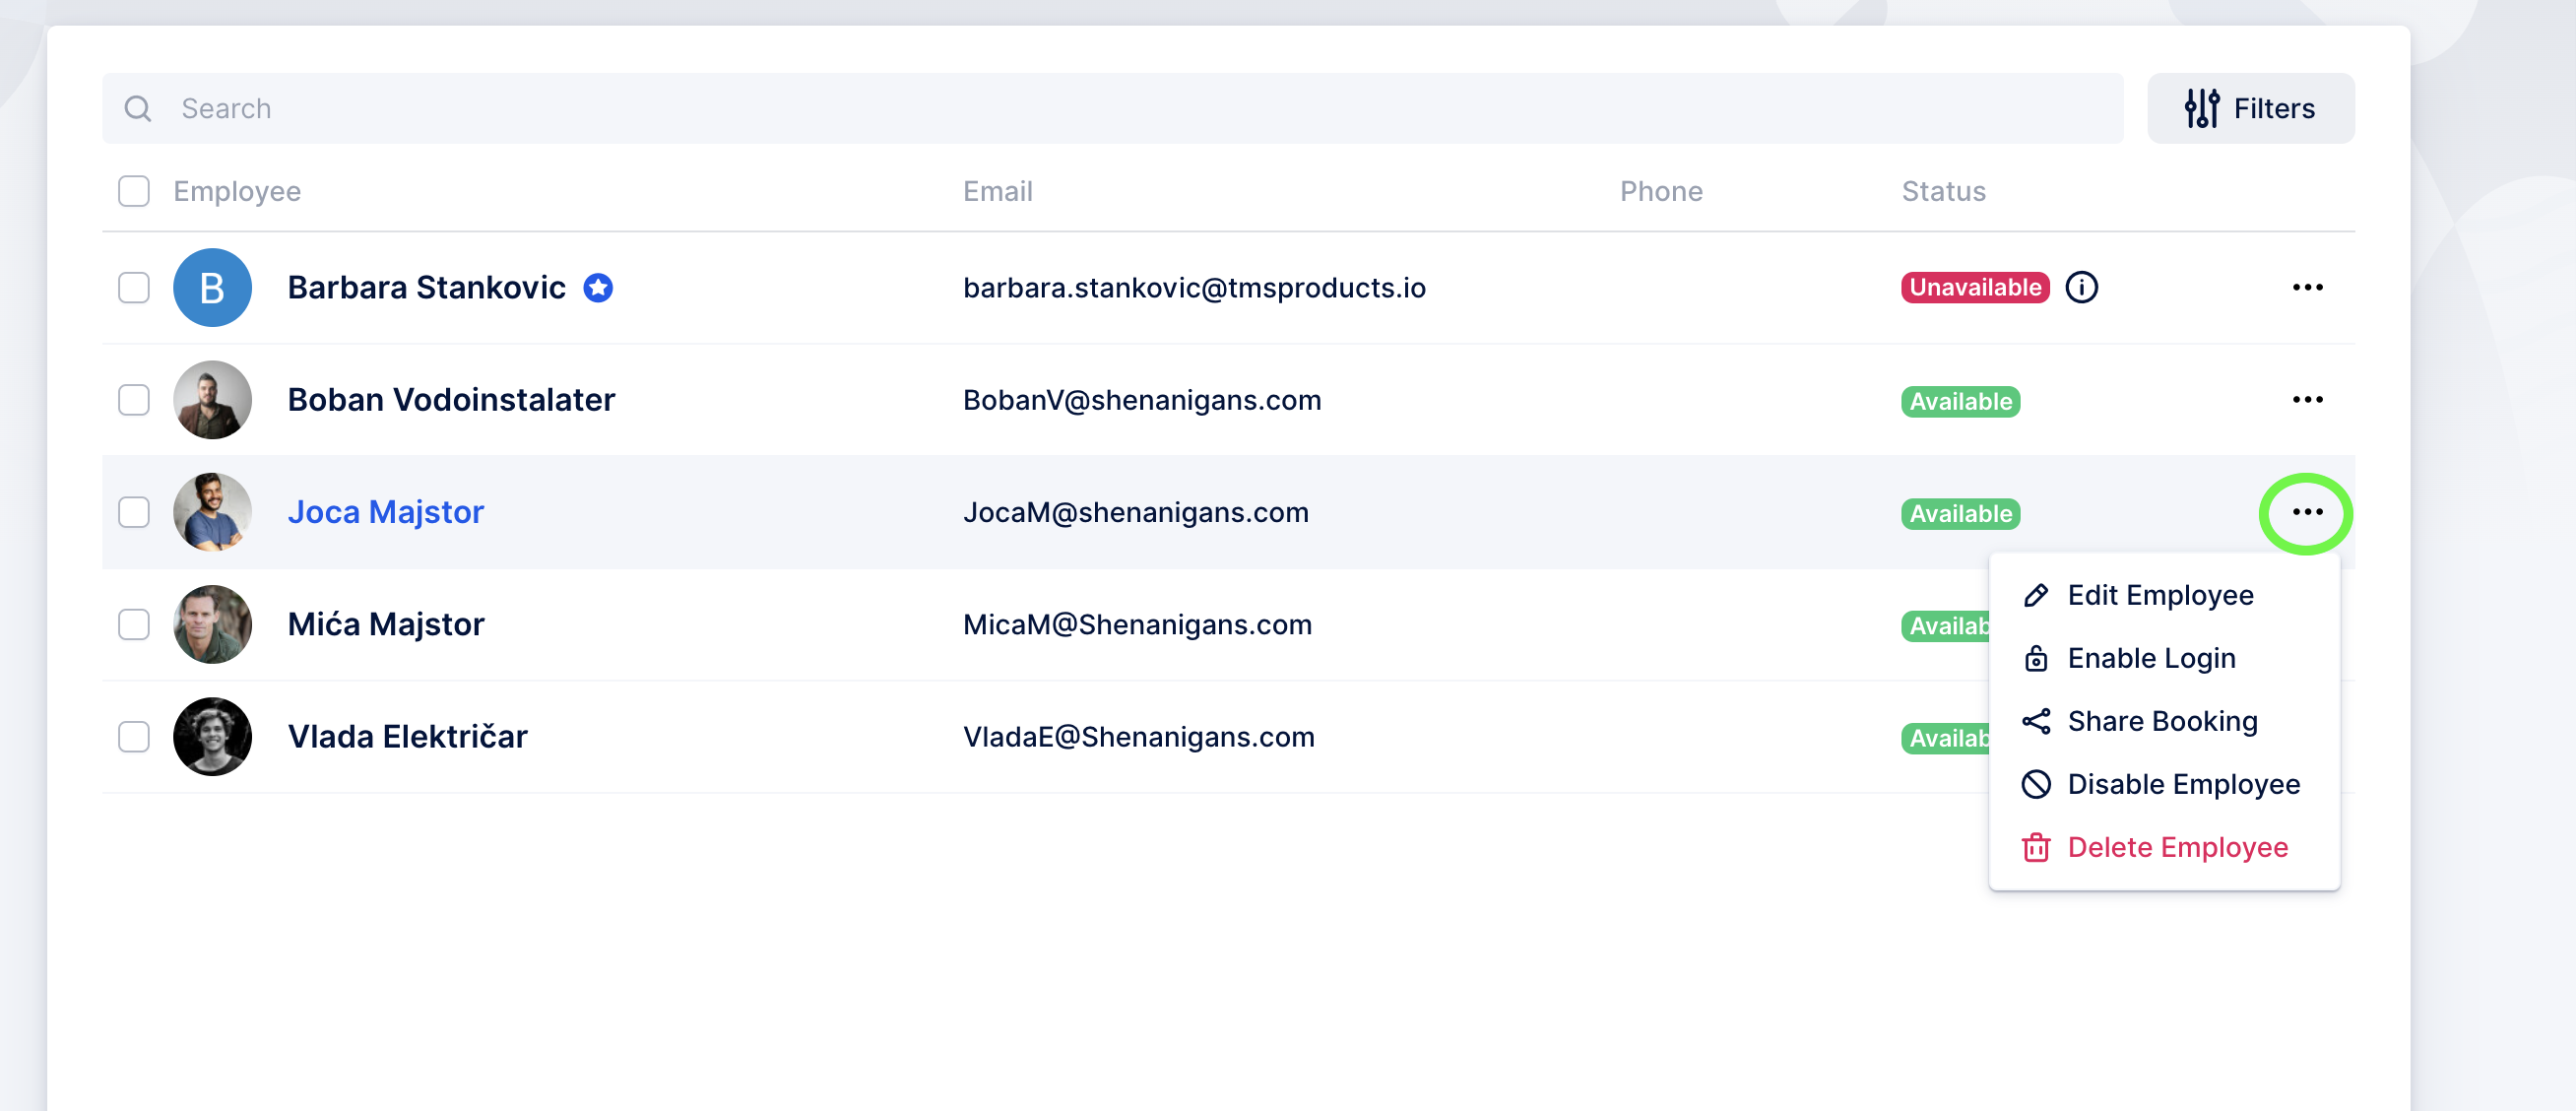
- Click on the three dots next to Status, and from the drop-down menu, click on Edit Employee, Disable it, or Delete Employee if you decide to add new ones.
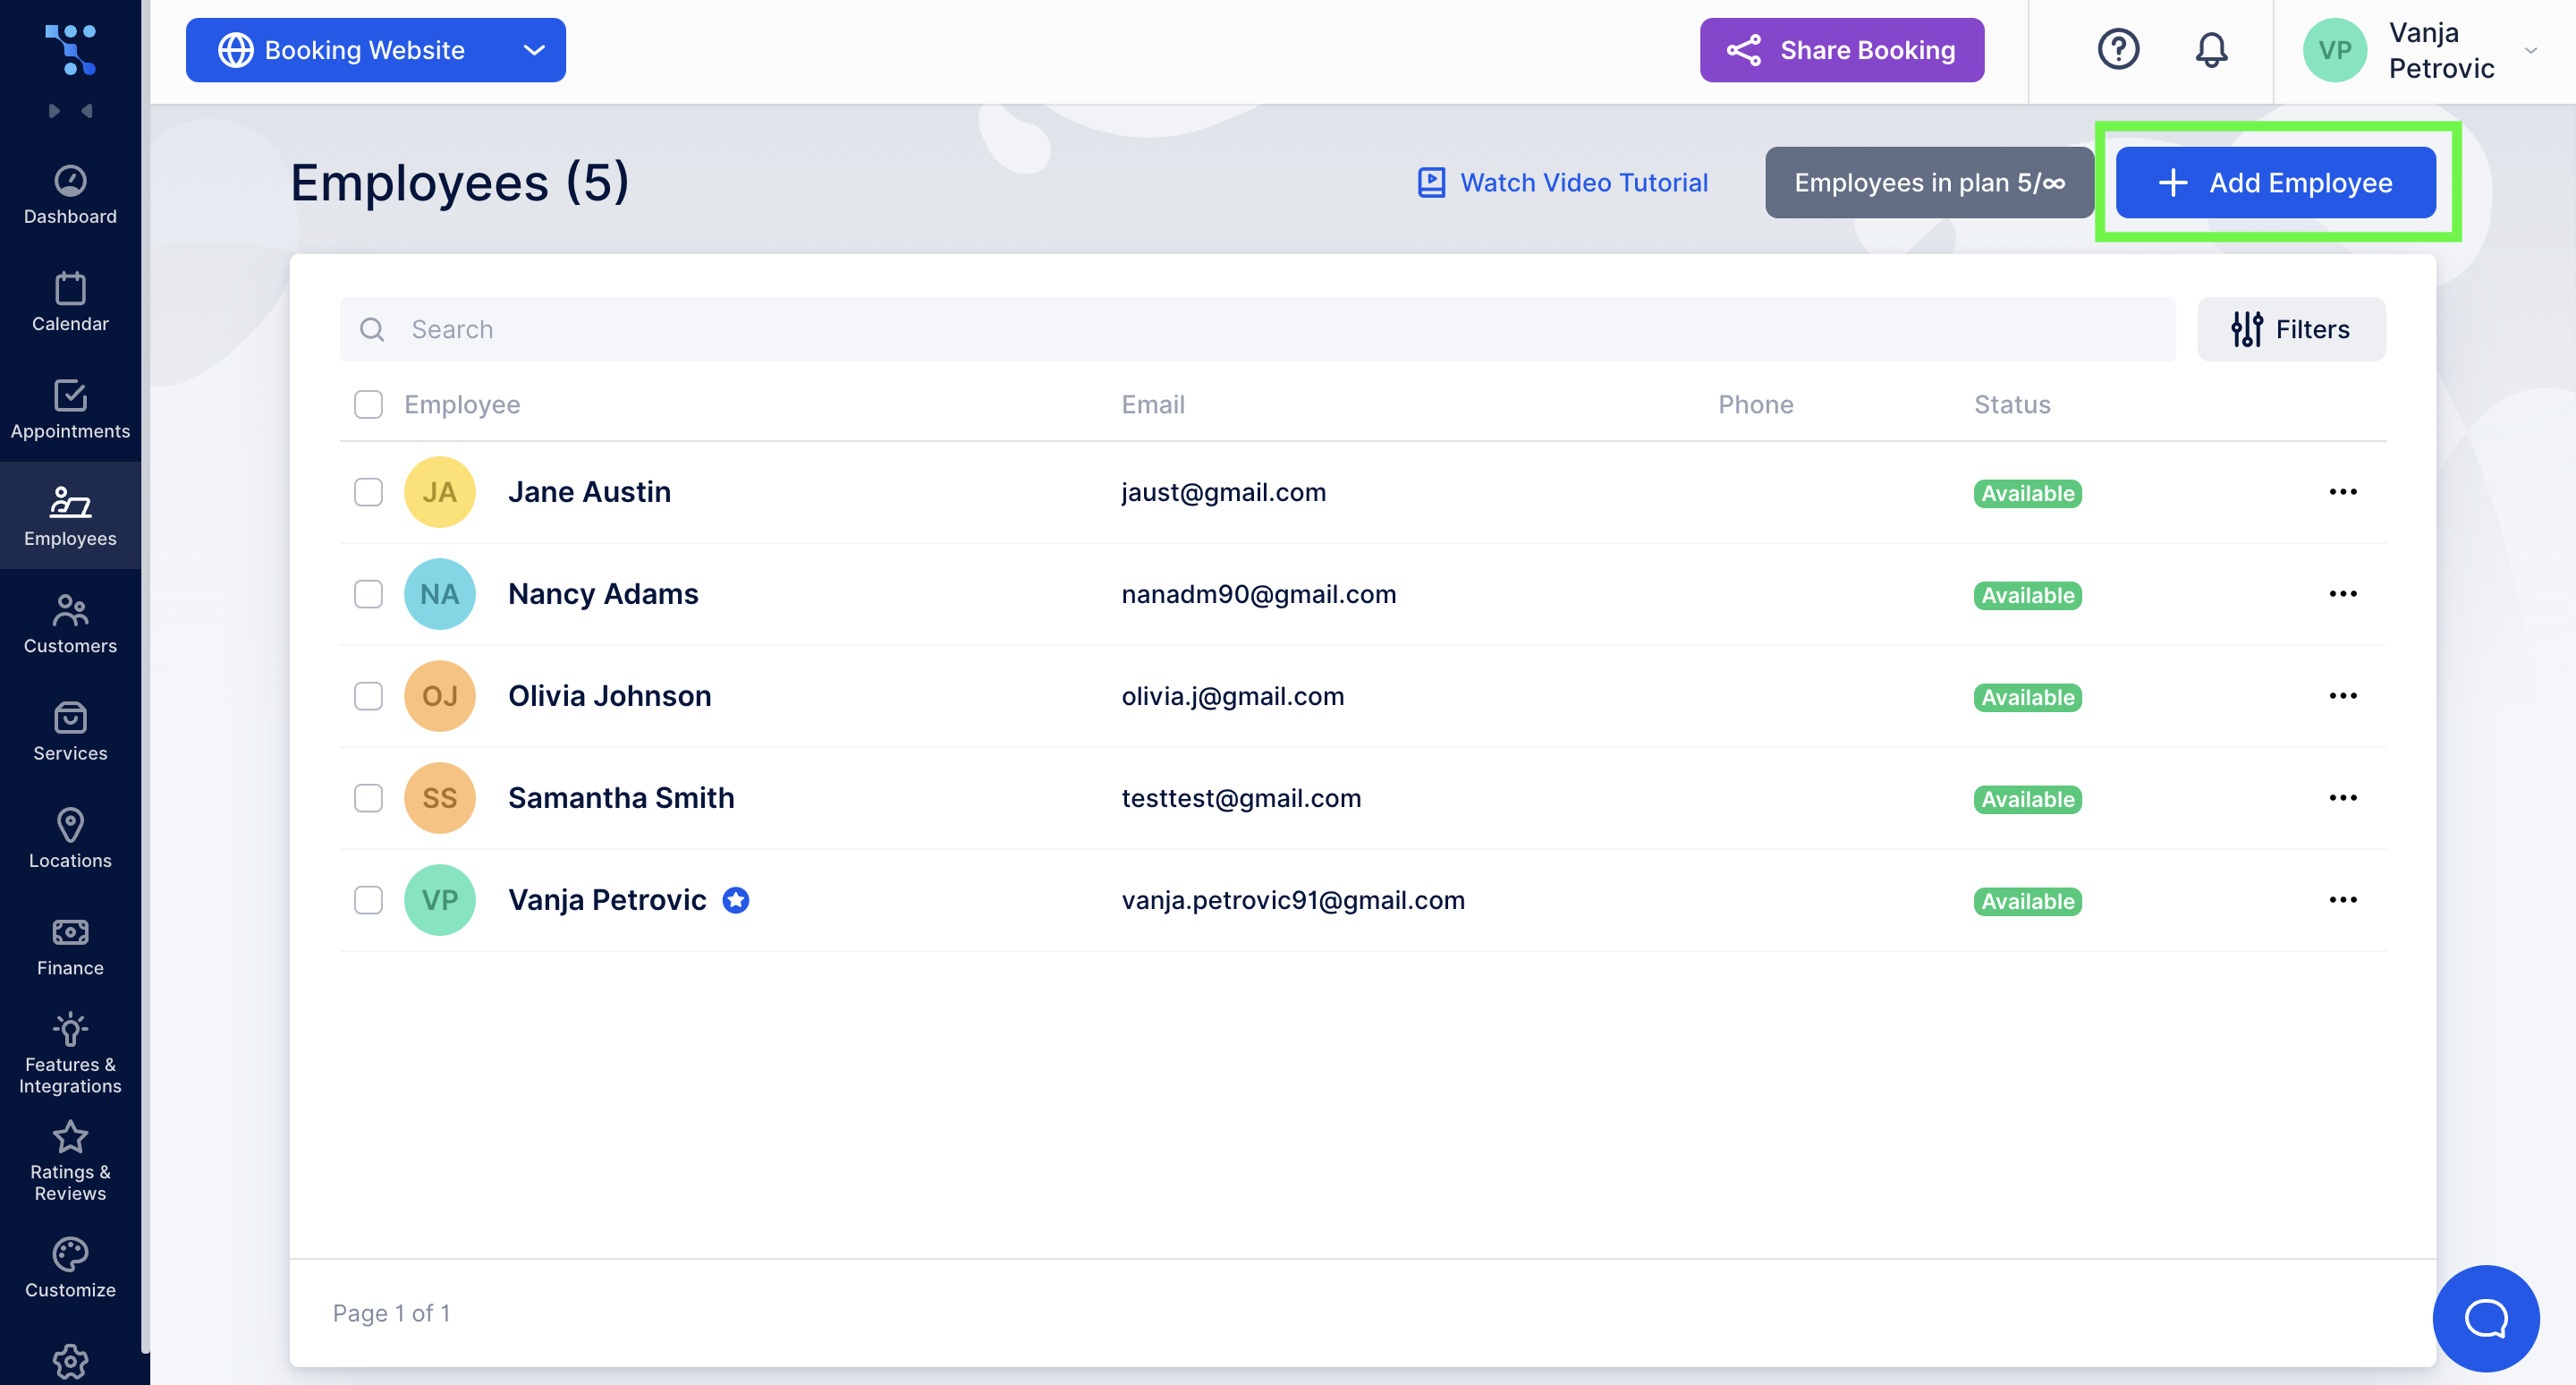
- To add a new employee, click on the Add Employee button in the upper right corner. You will see five tabs with options to set regarding the employee you are adding.
- Under the Employee info tab, set basic employee details such as name, email, phone number, etc. Fields that have a star beside them are mandatory. Additionally, please note that there cannot be two employees with the same email address.
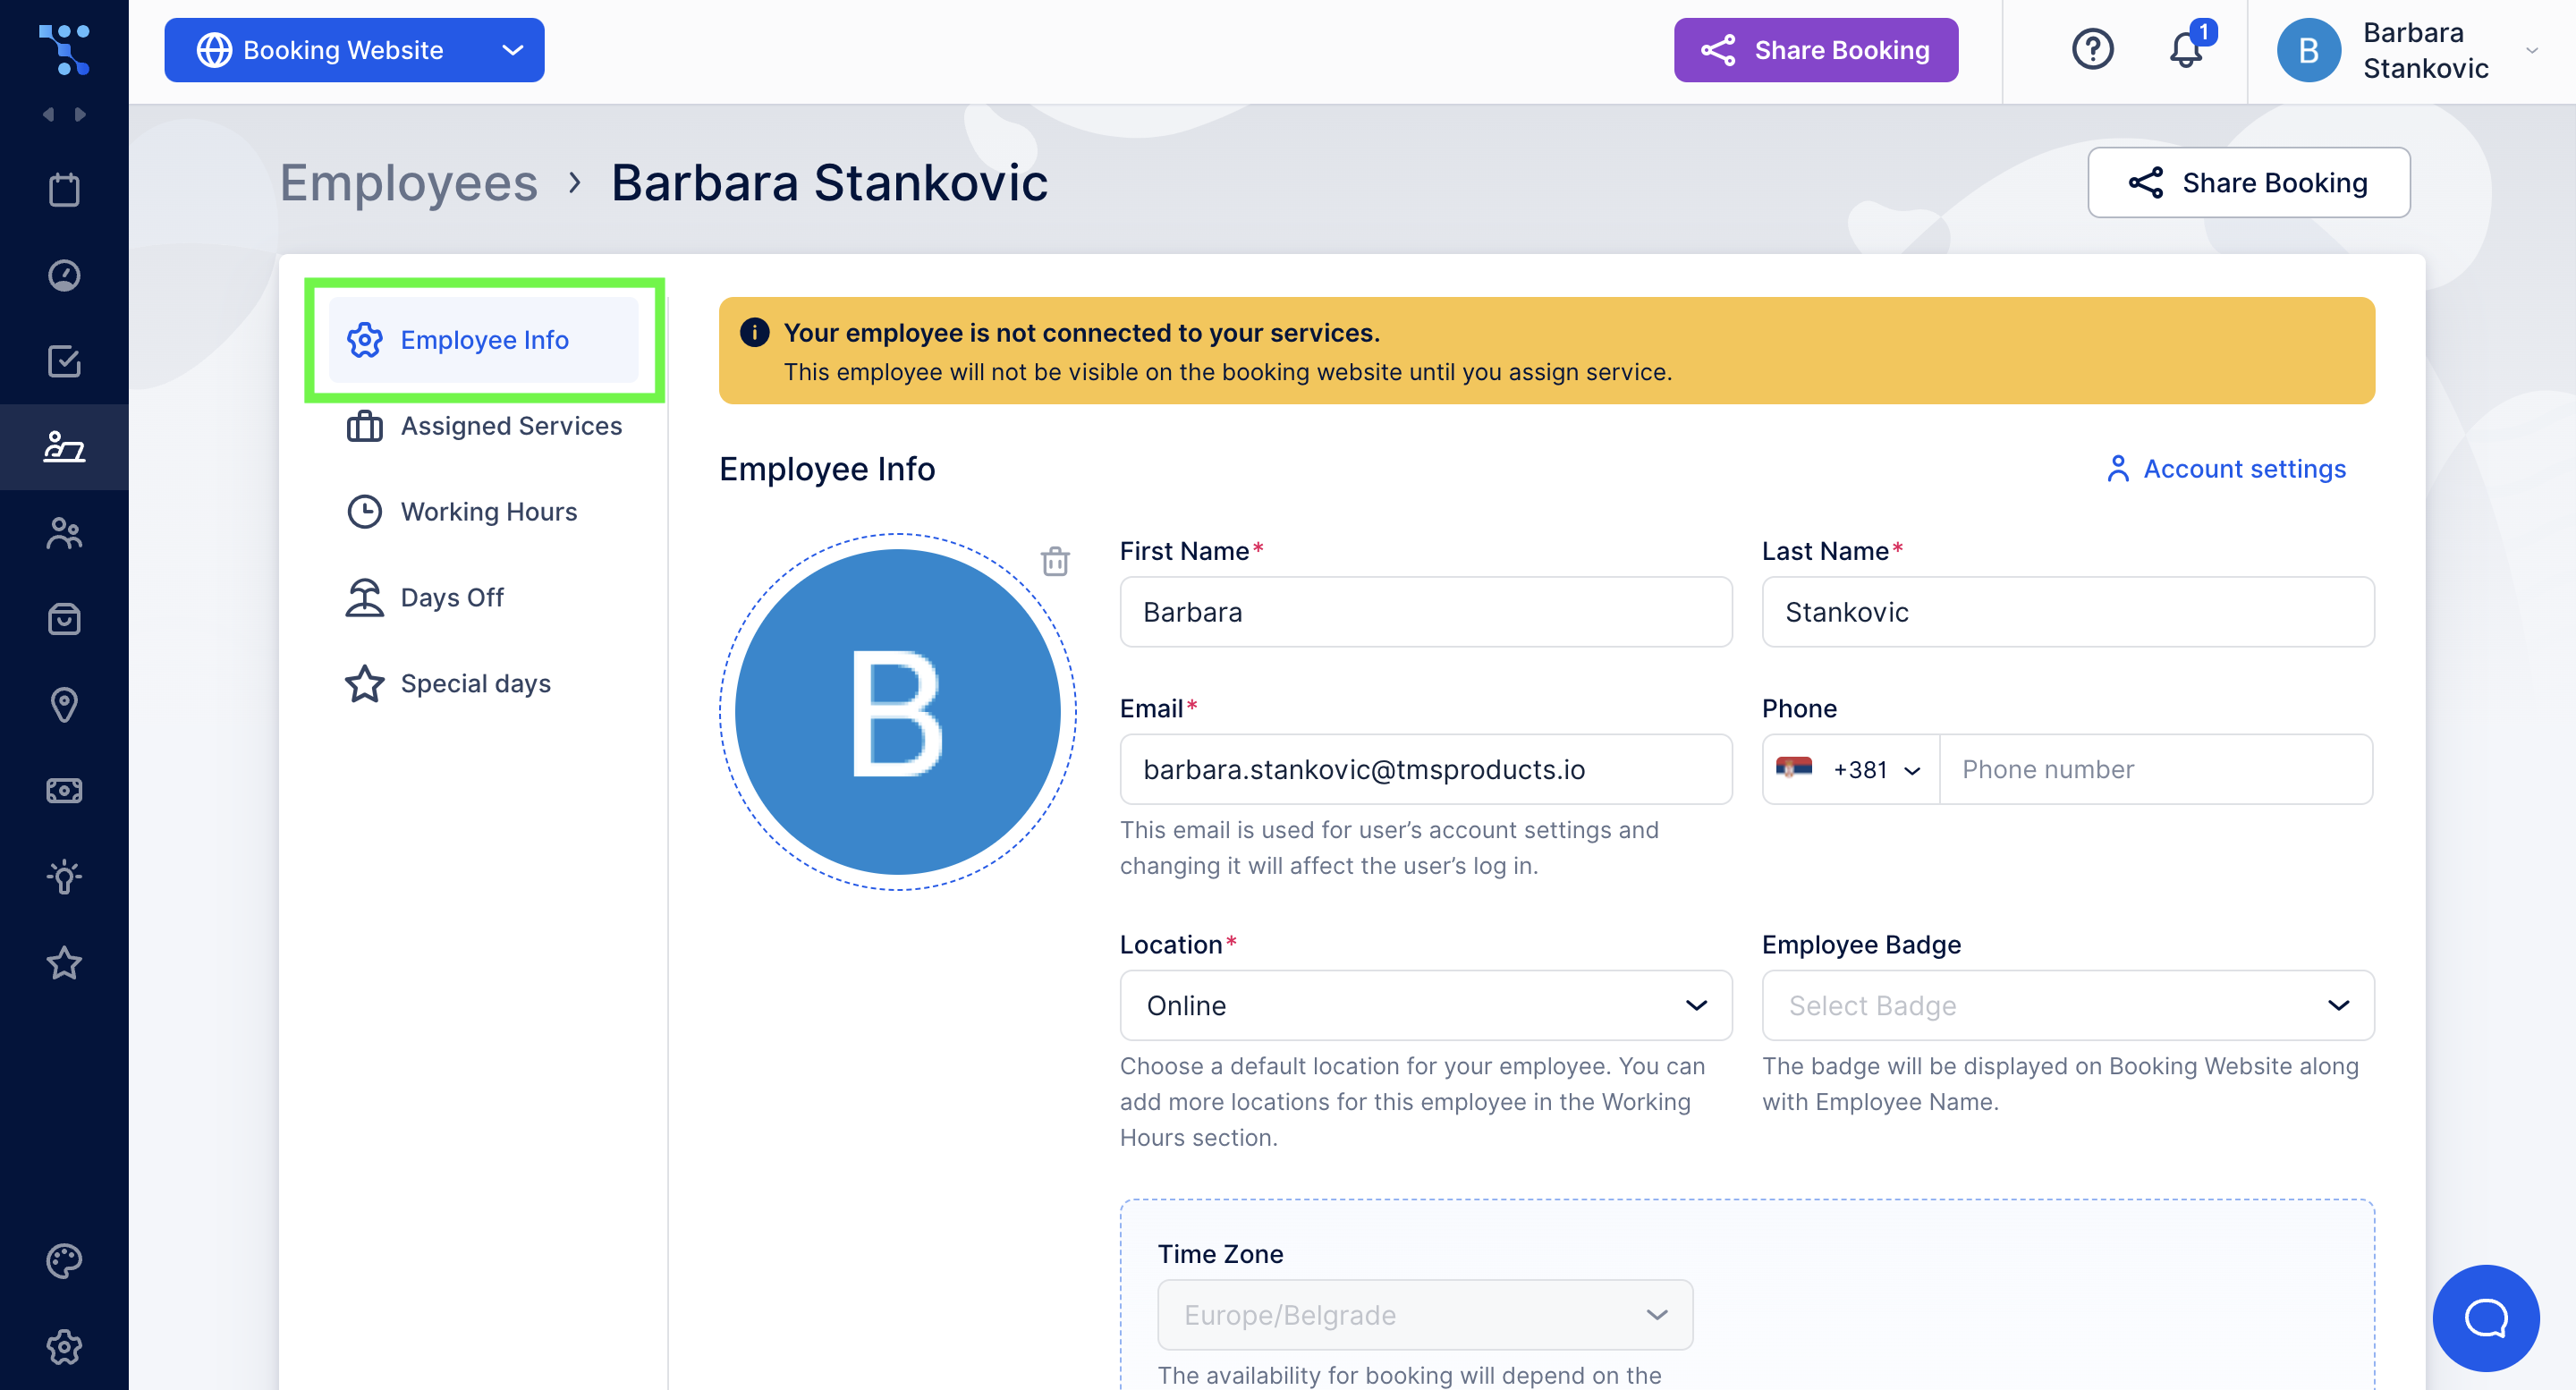
- In this section, you can also add an employee description or a biography that will be visible during the booking process. This can help your customers decide which employee to choose for the service.
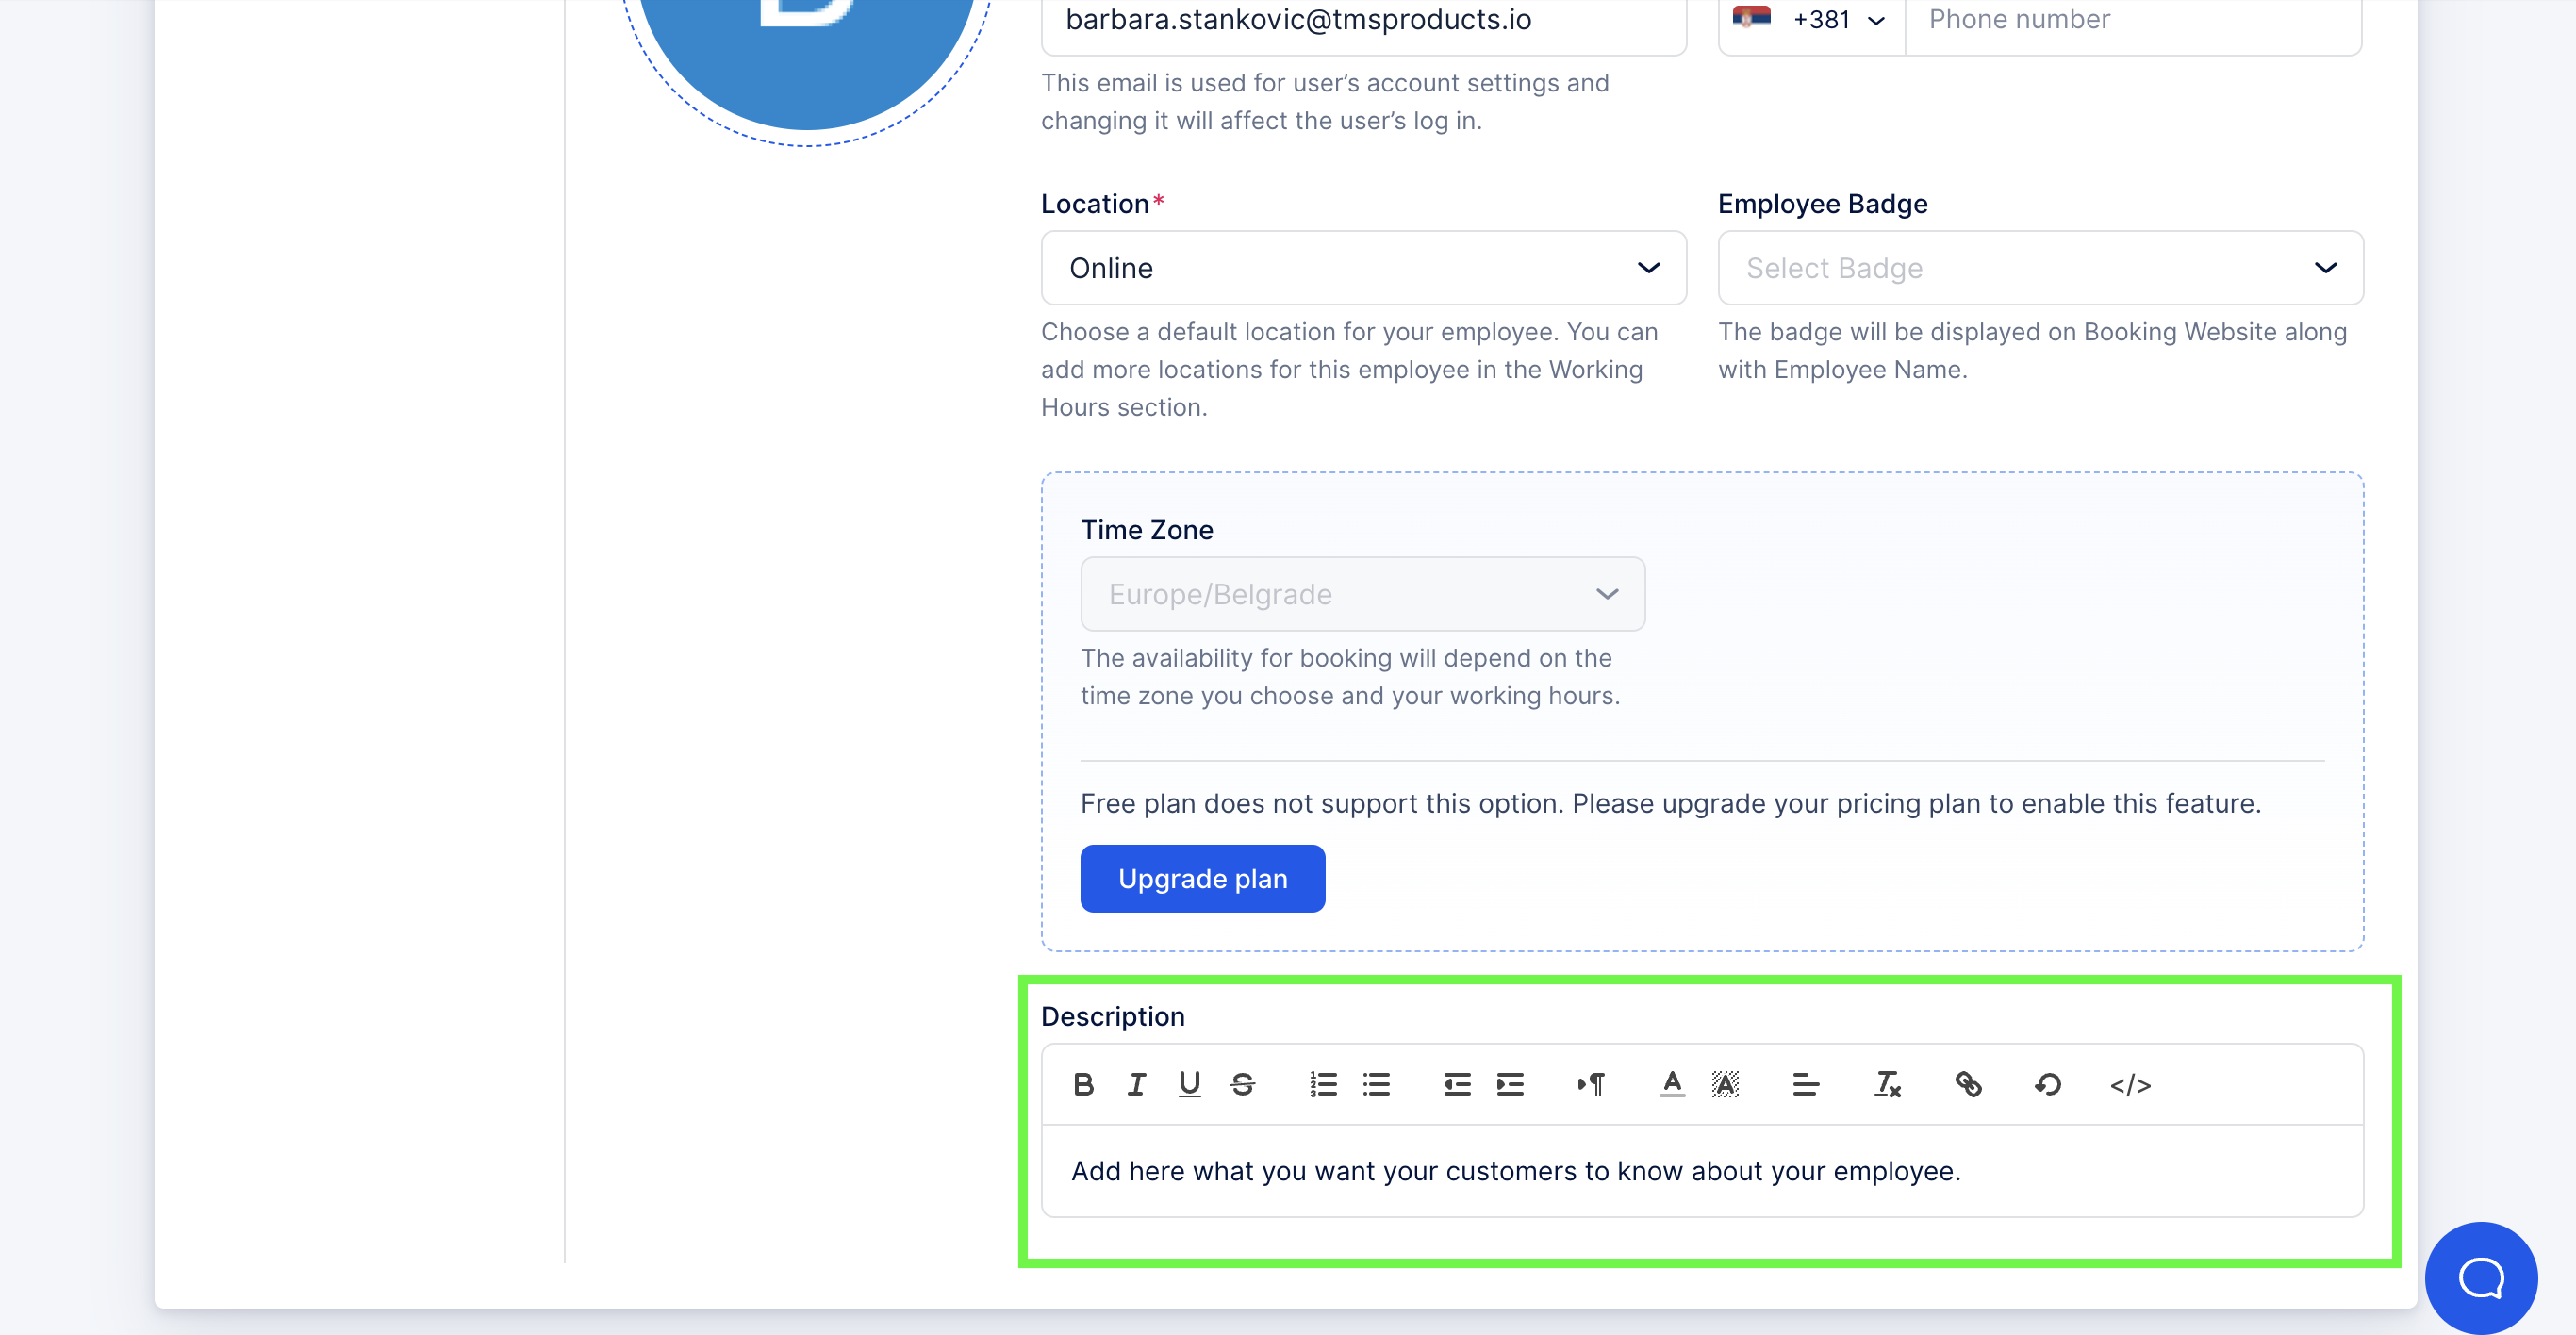
- You can also add a badge for your employee. Click on Manage Badges to define new ones or add existing ones.
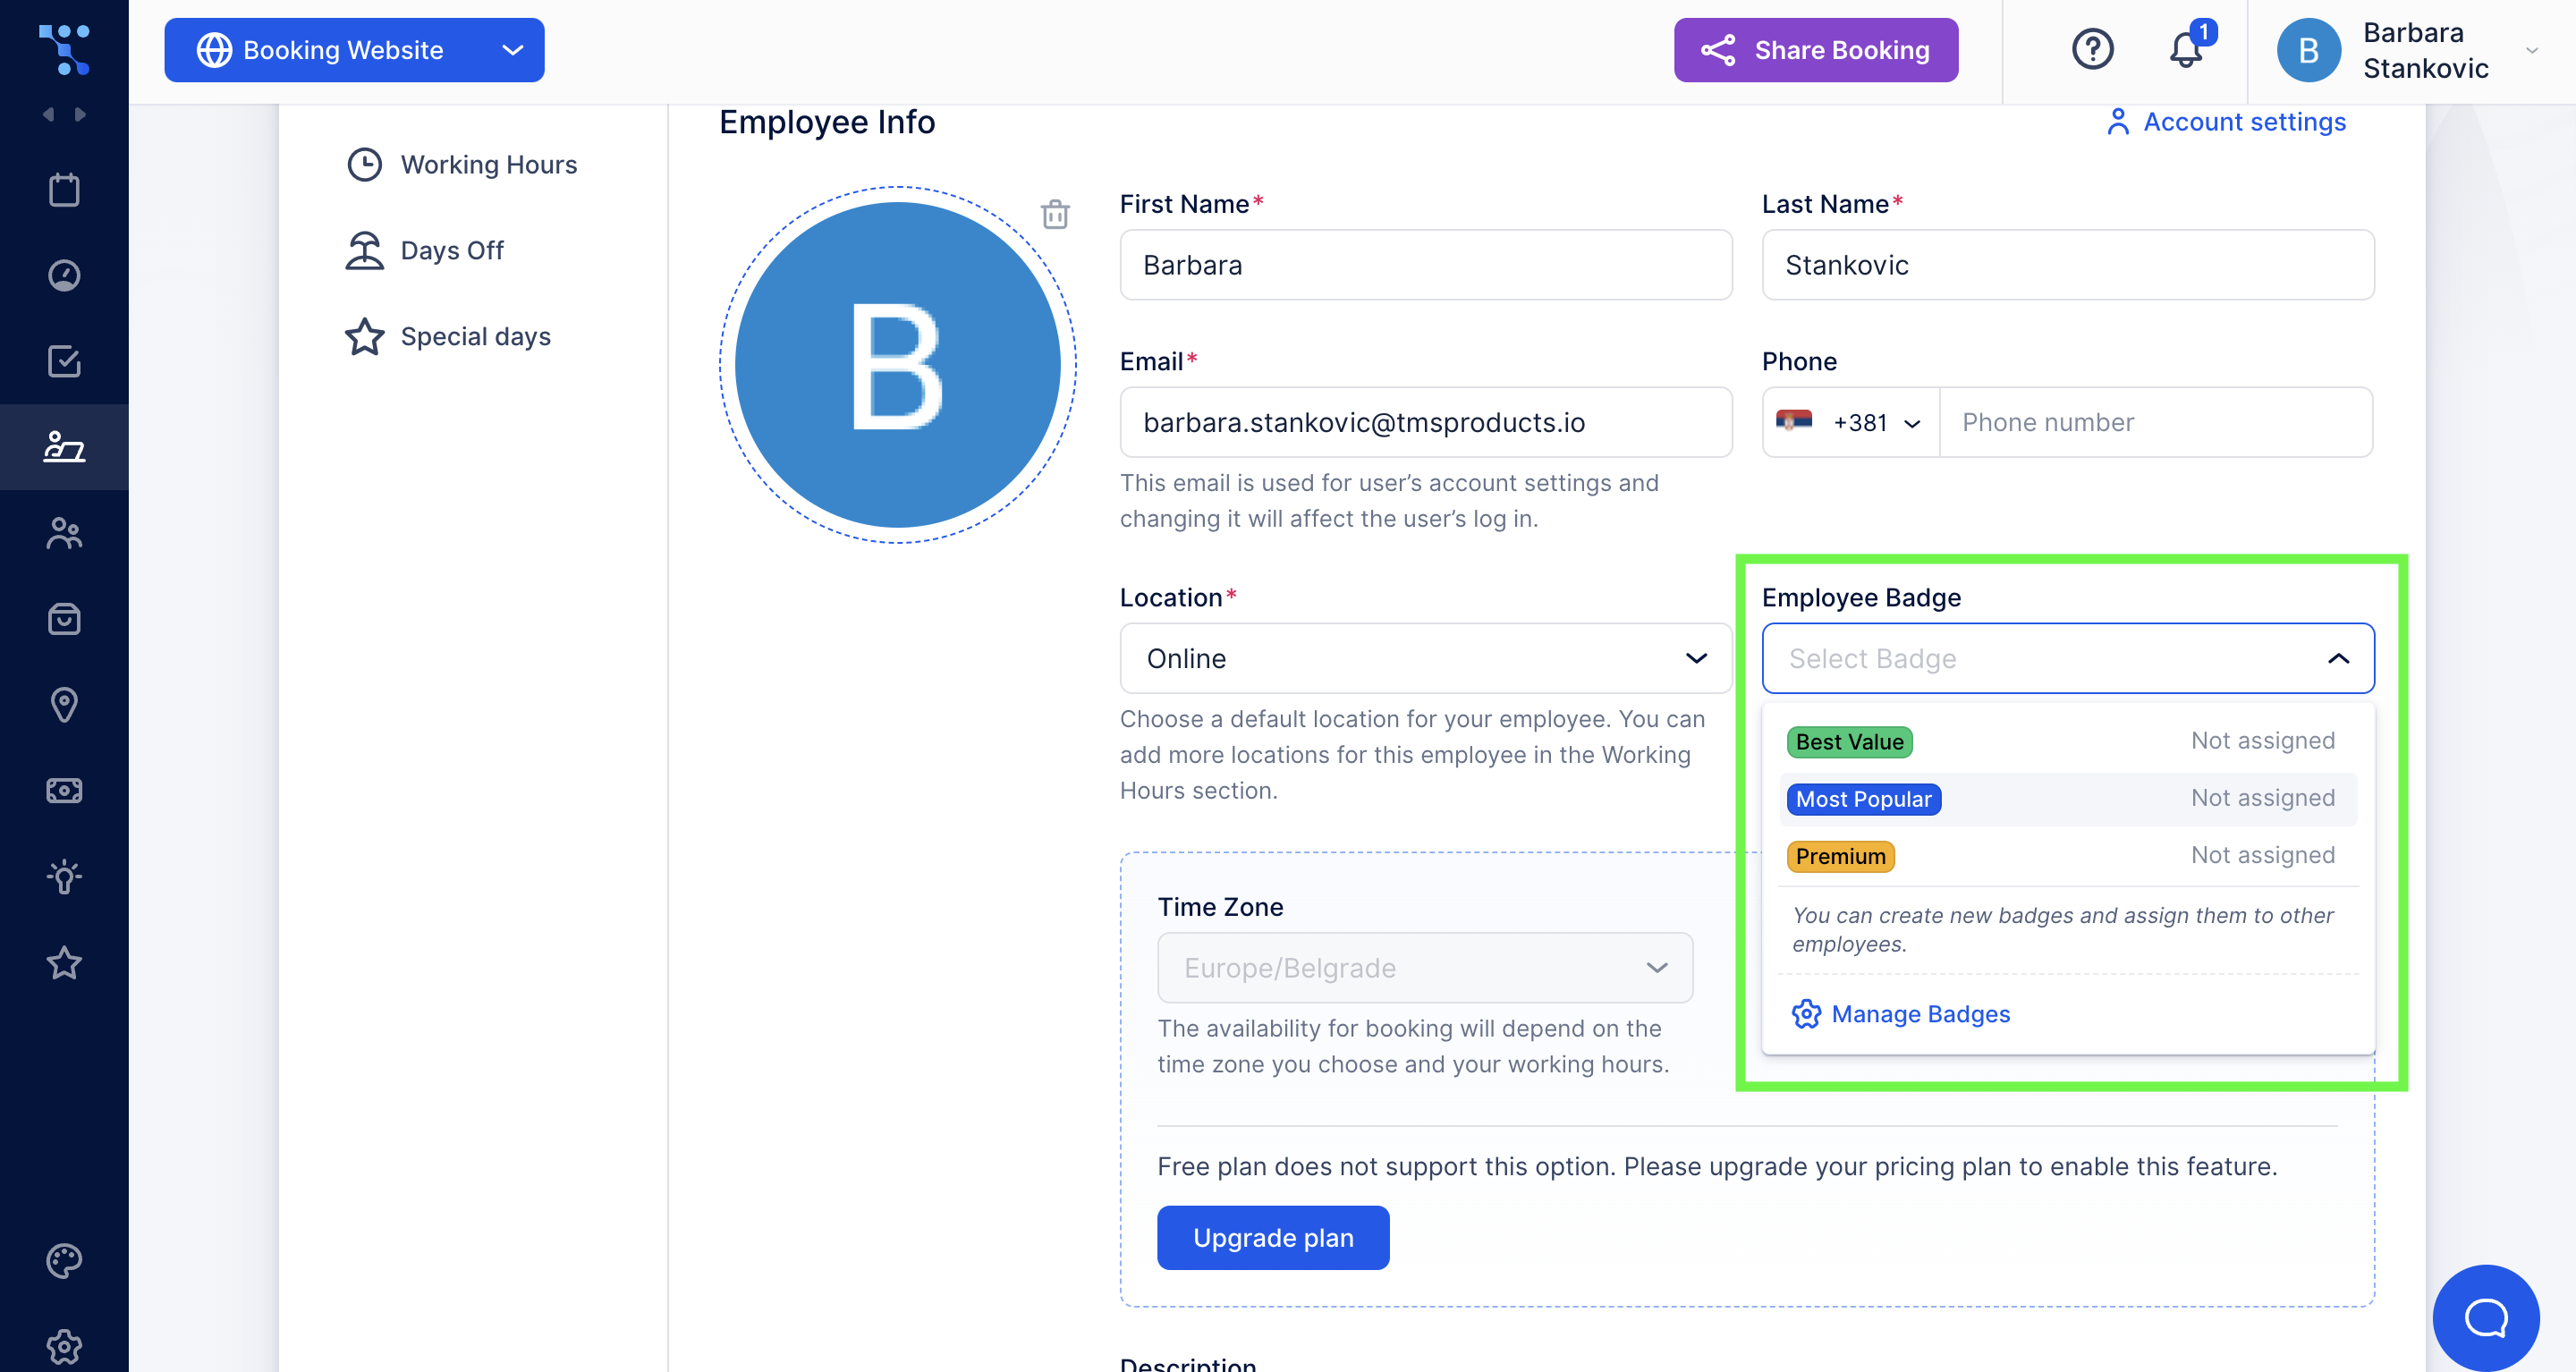
How to Set Different Locations for Your Employees
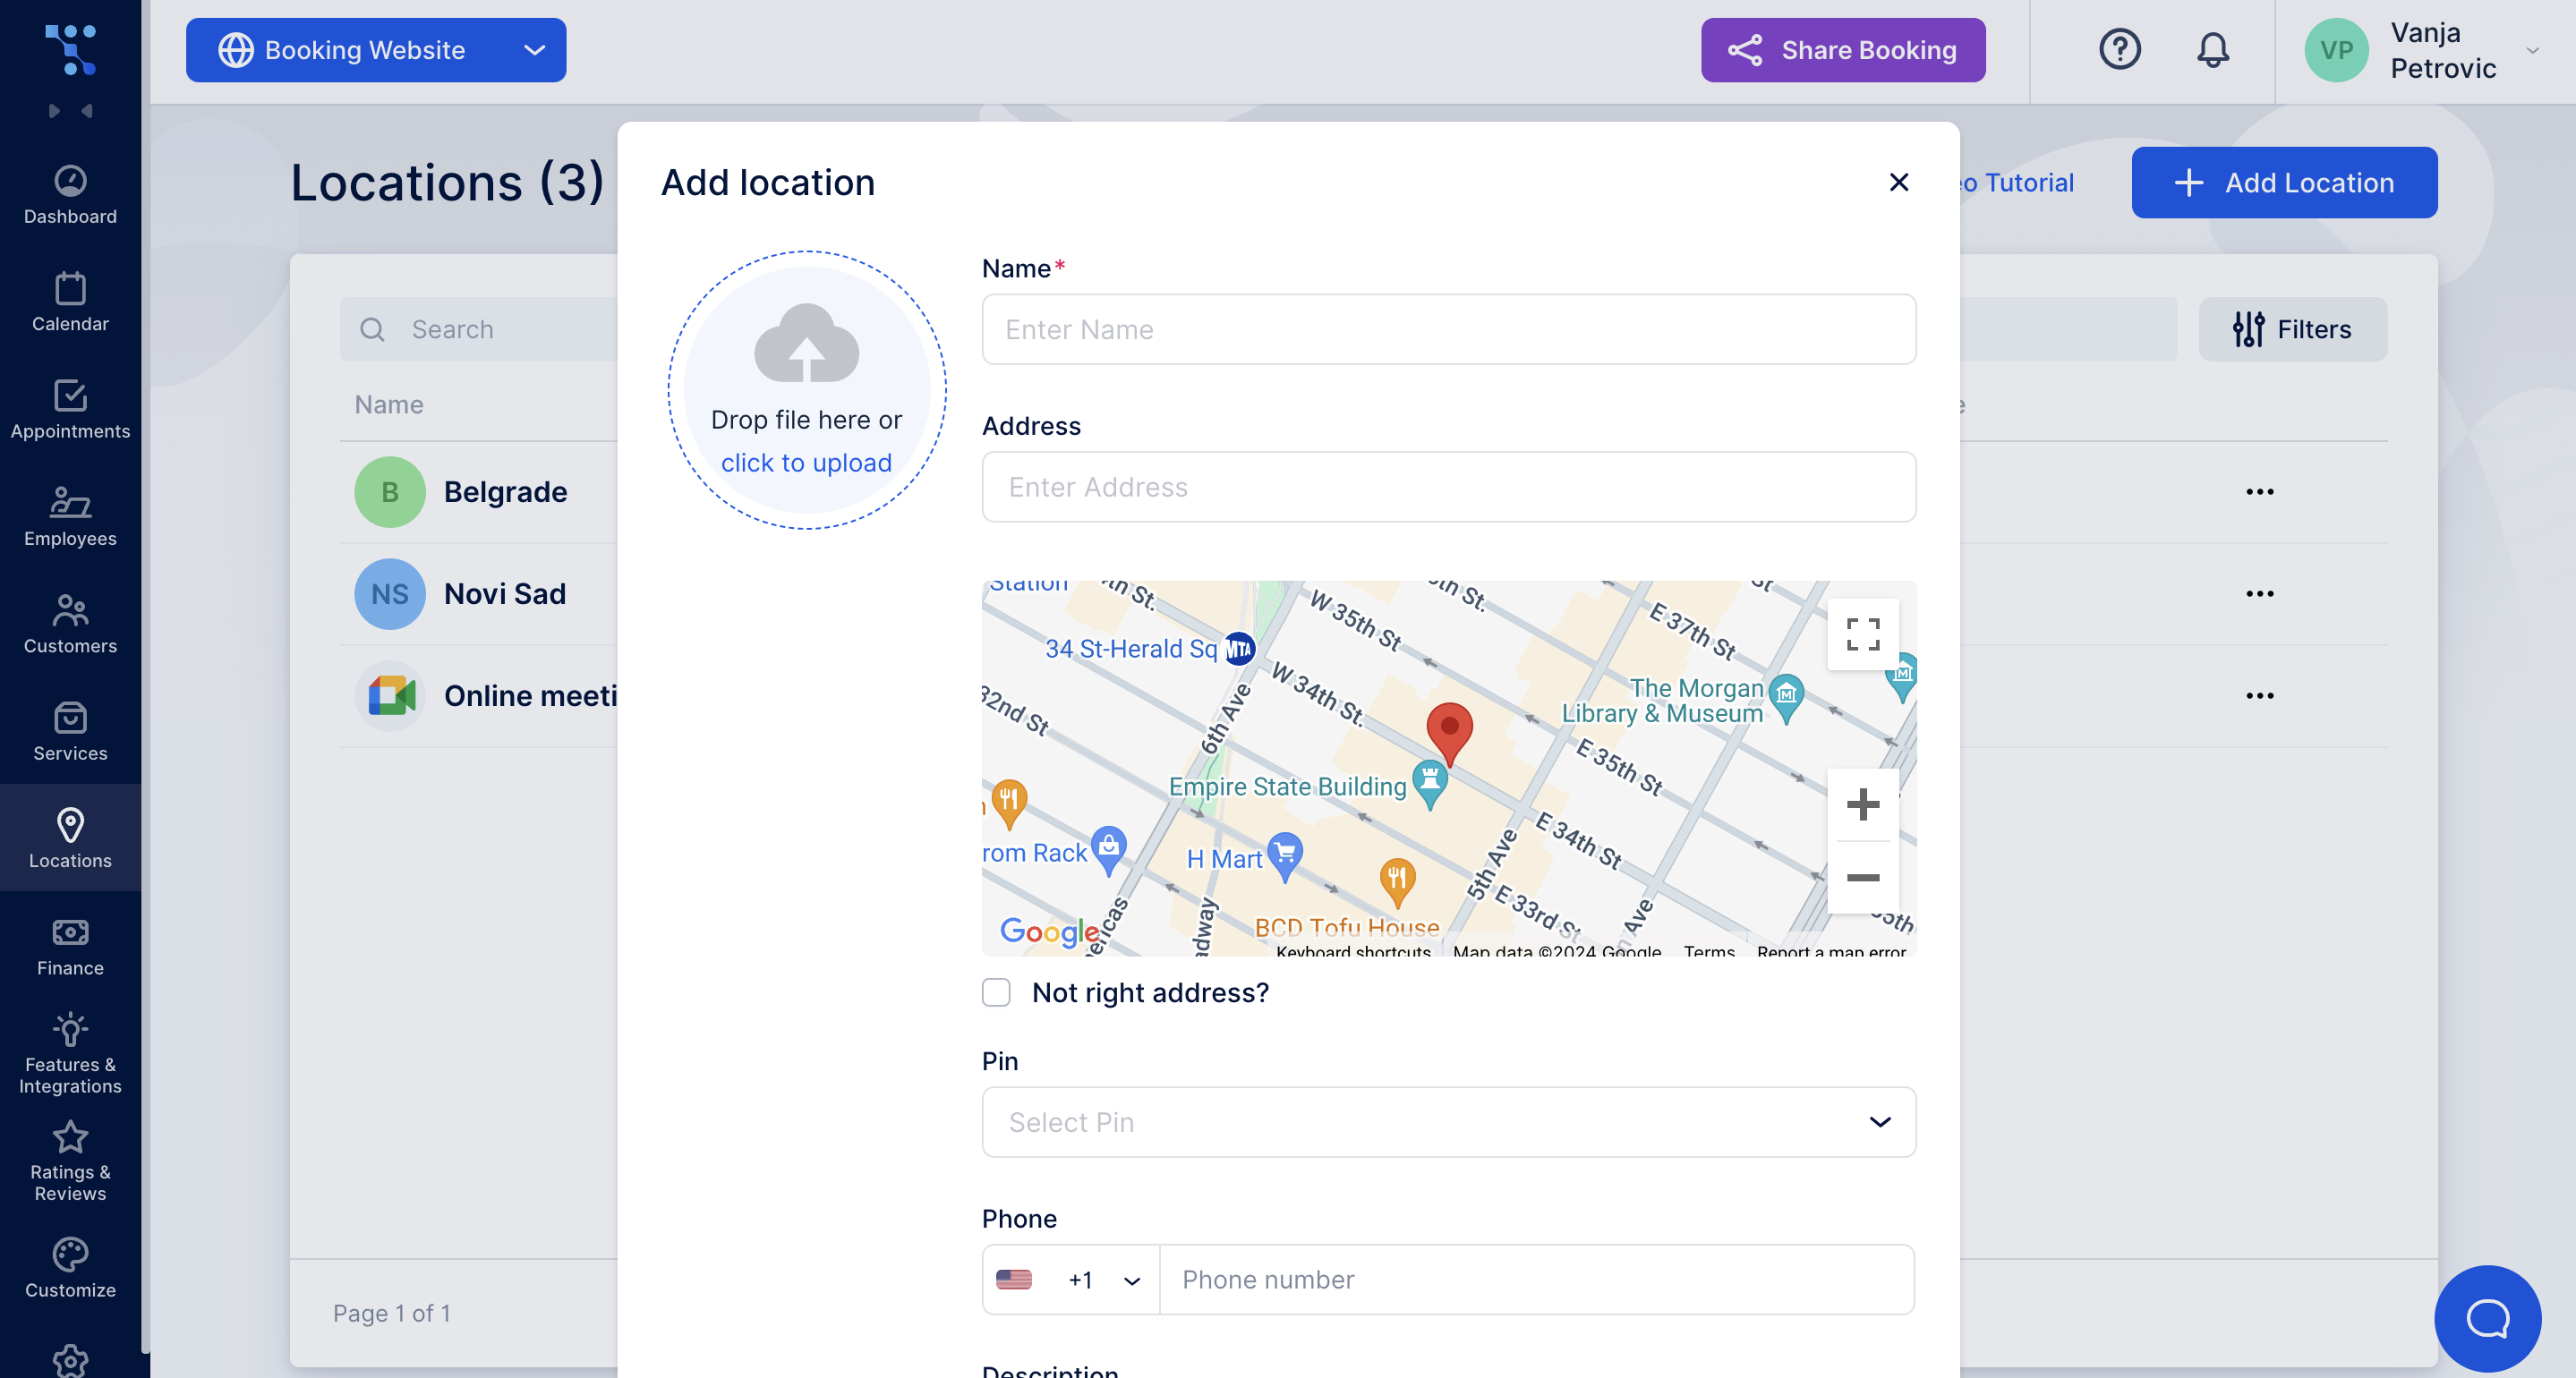
Before assigning different locations for your employees, you need to create at least one location on the Locations page.
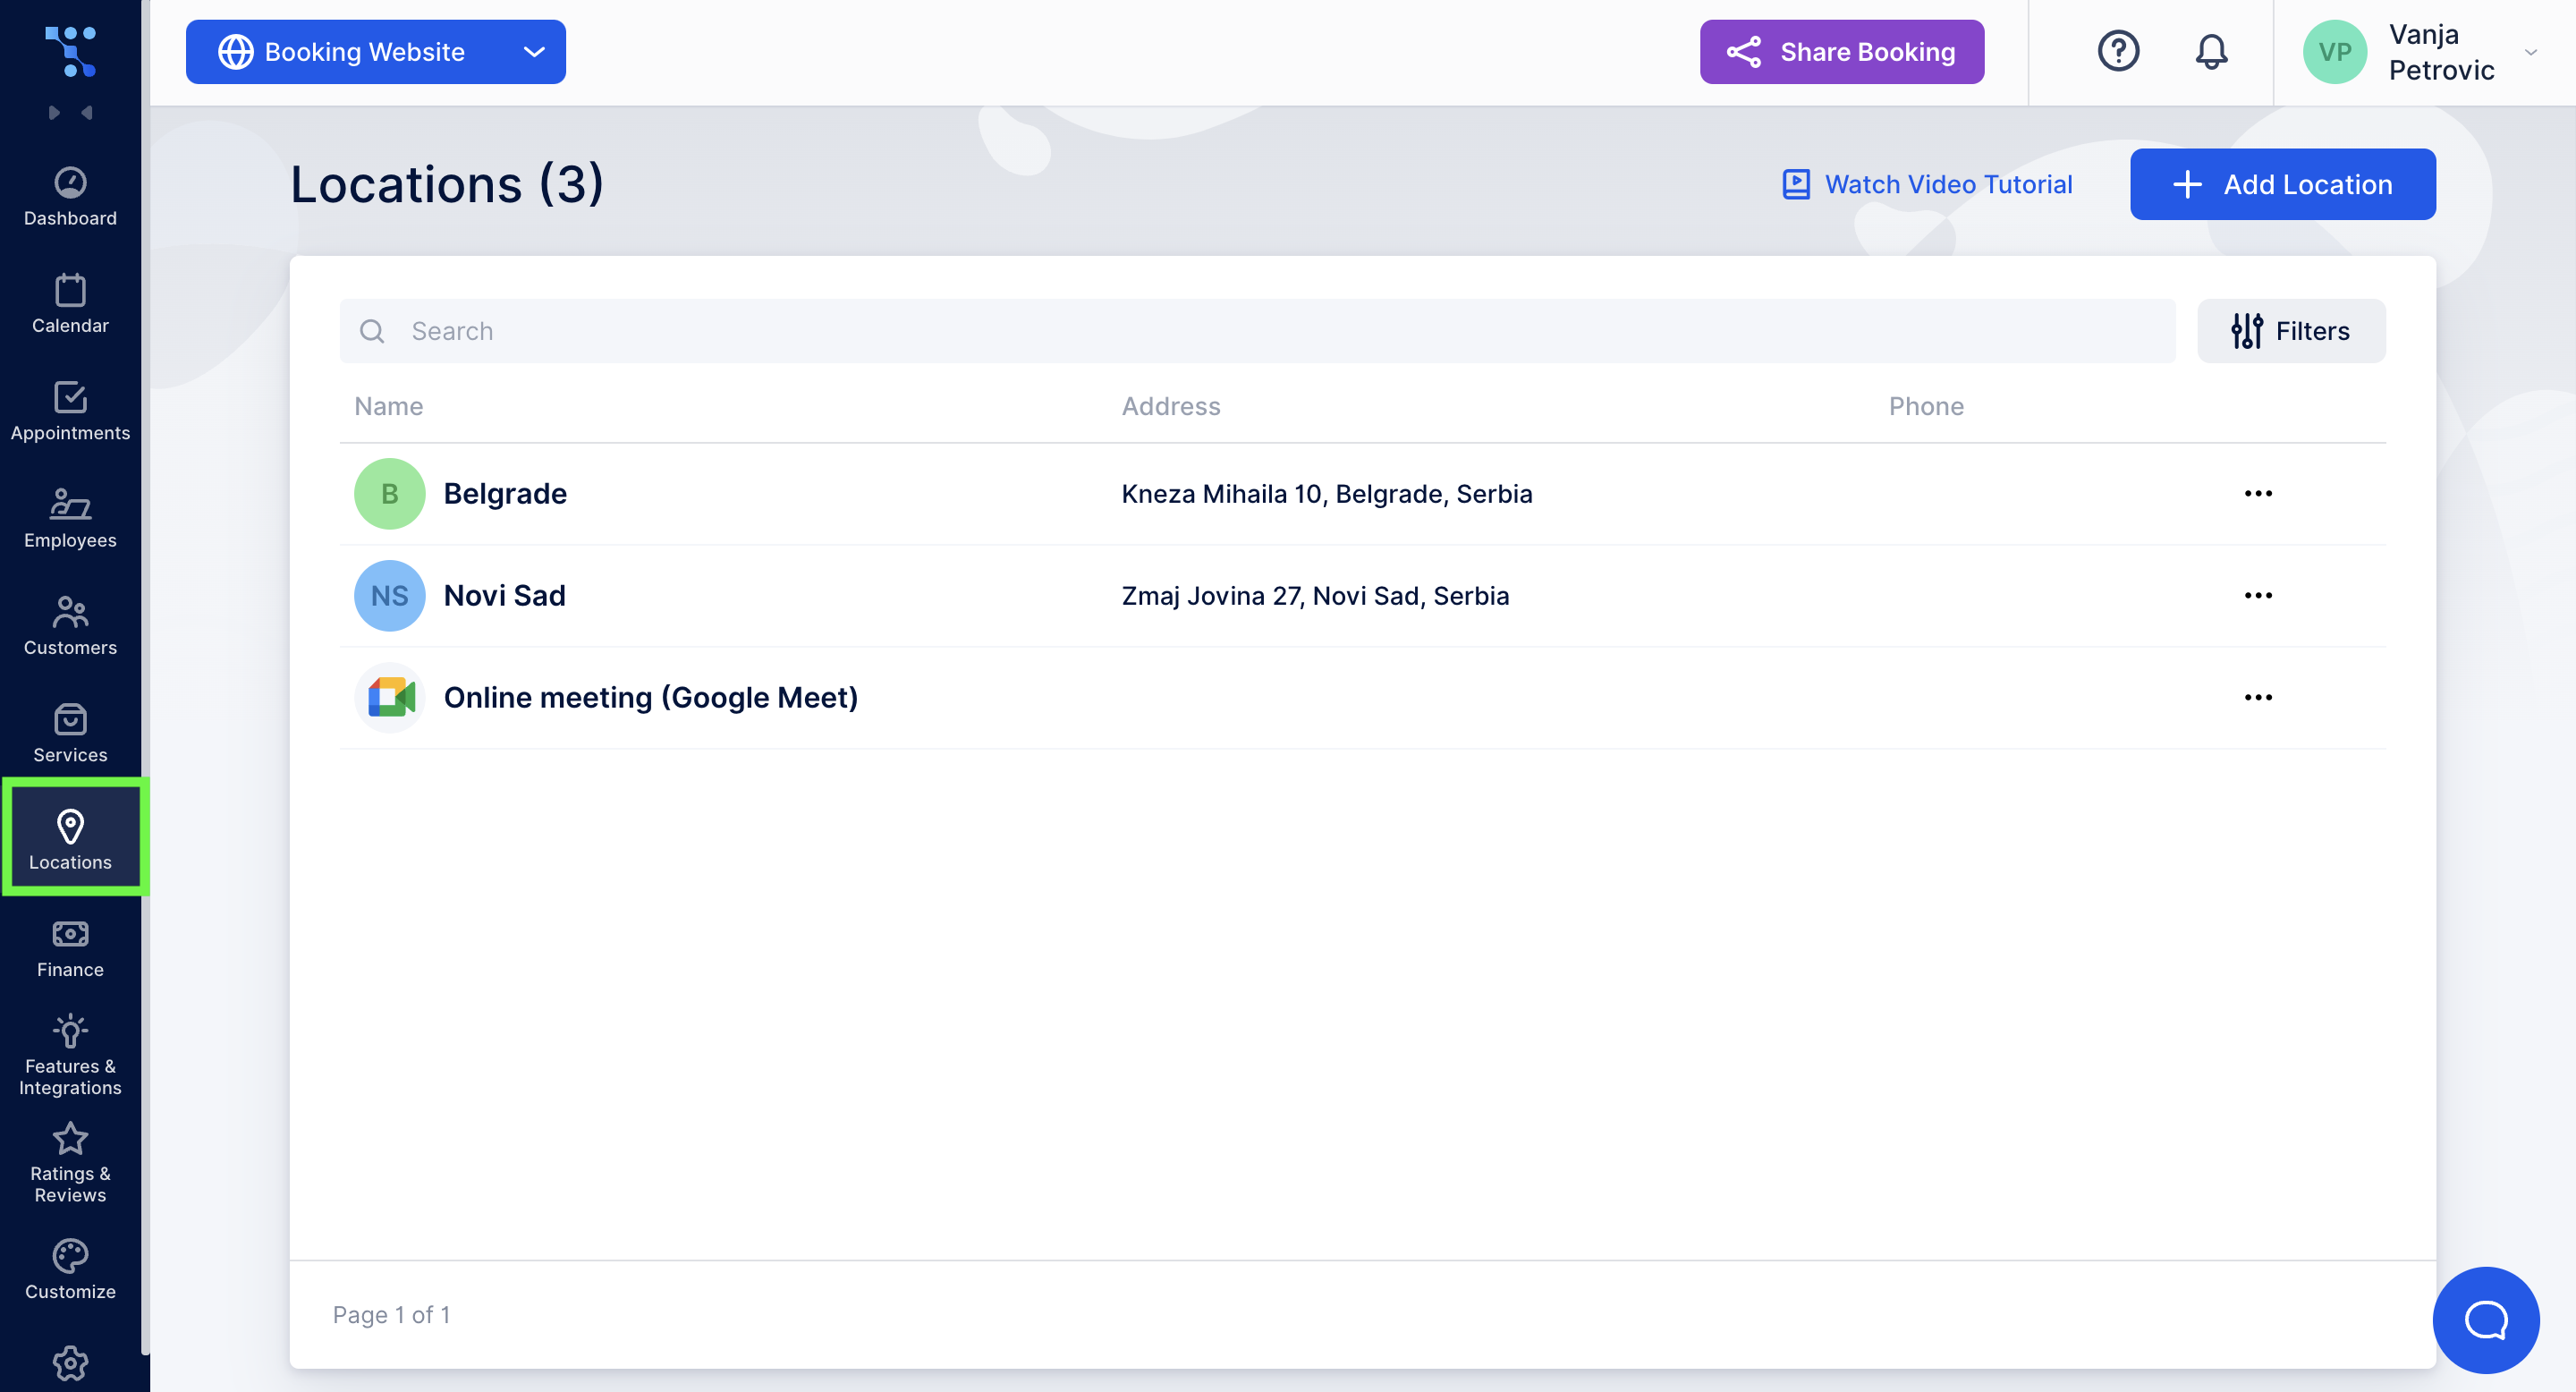
Click on Add Location and fill in the Name and the Address. Save the changes and go back to the employee info section.
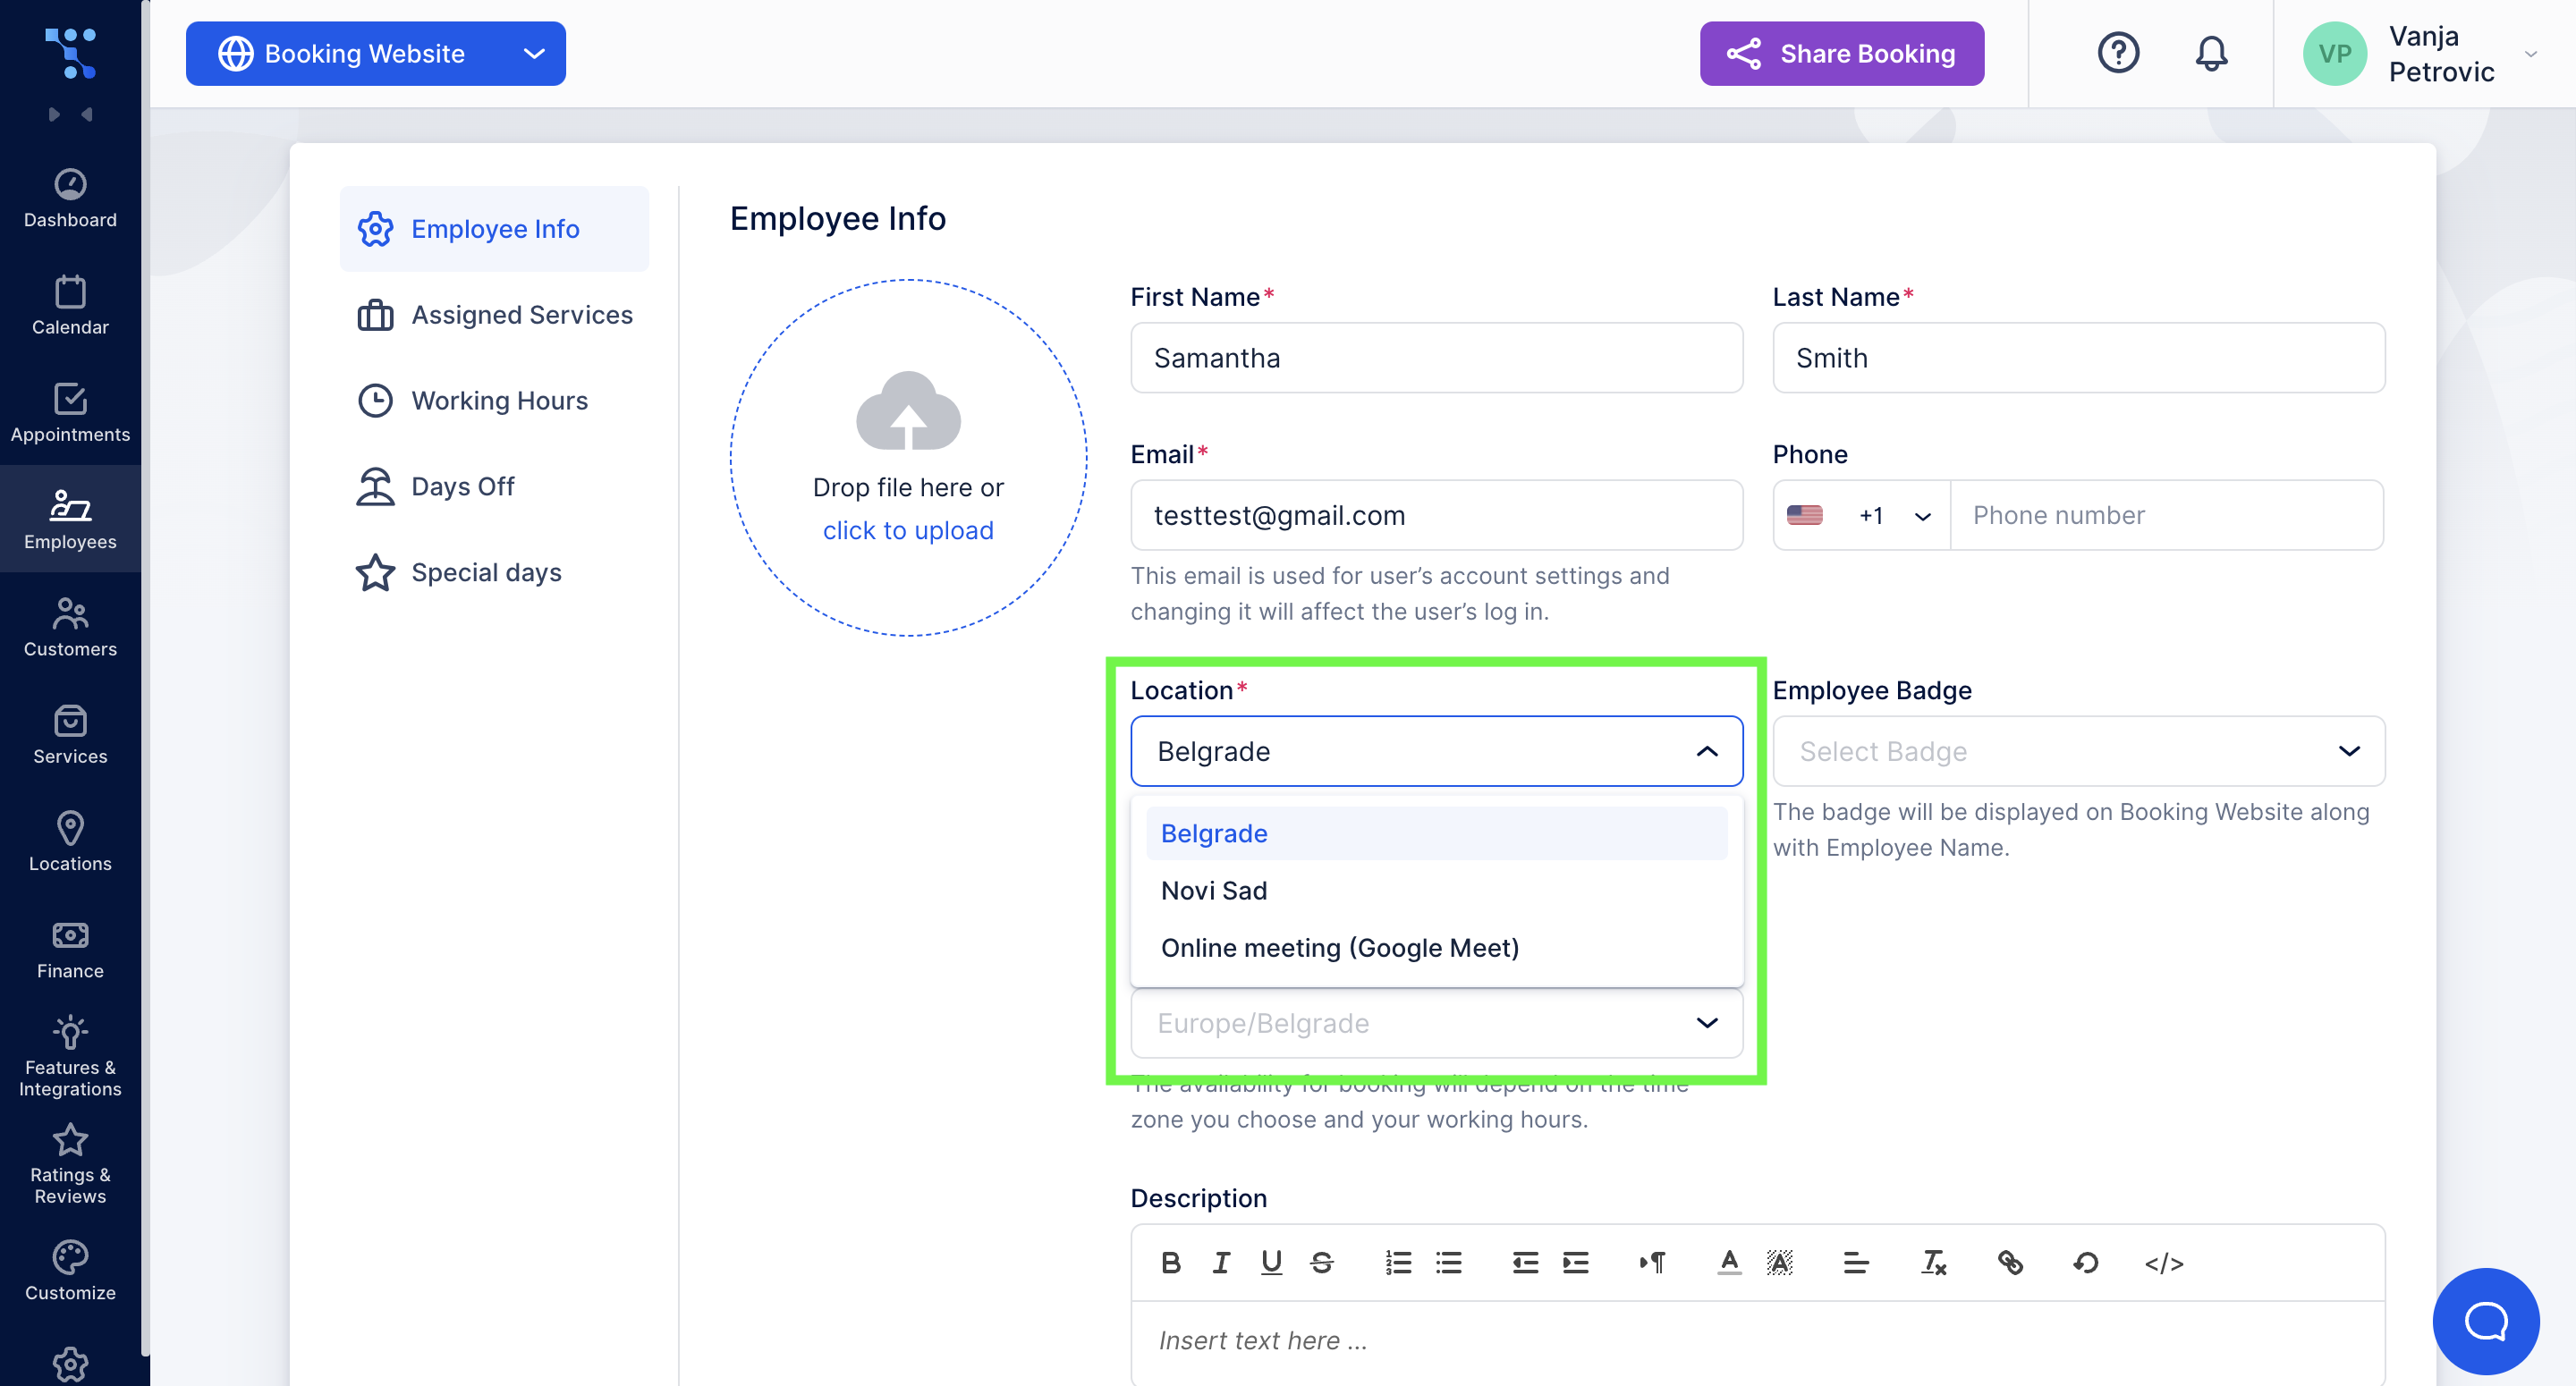
The Location field should now be present, and you can choose the one you want from the drop-down menu. It is necessary to select one default location just in case you don’t select any while adjusting the employees' work hours.
How to Assign Different Services to Your Employees
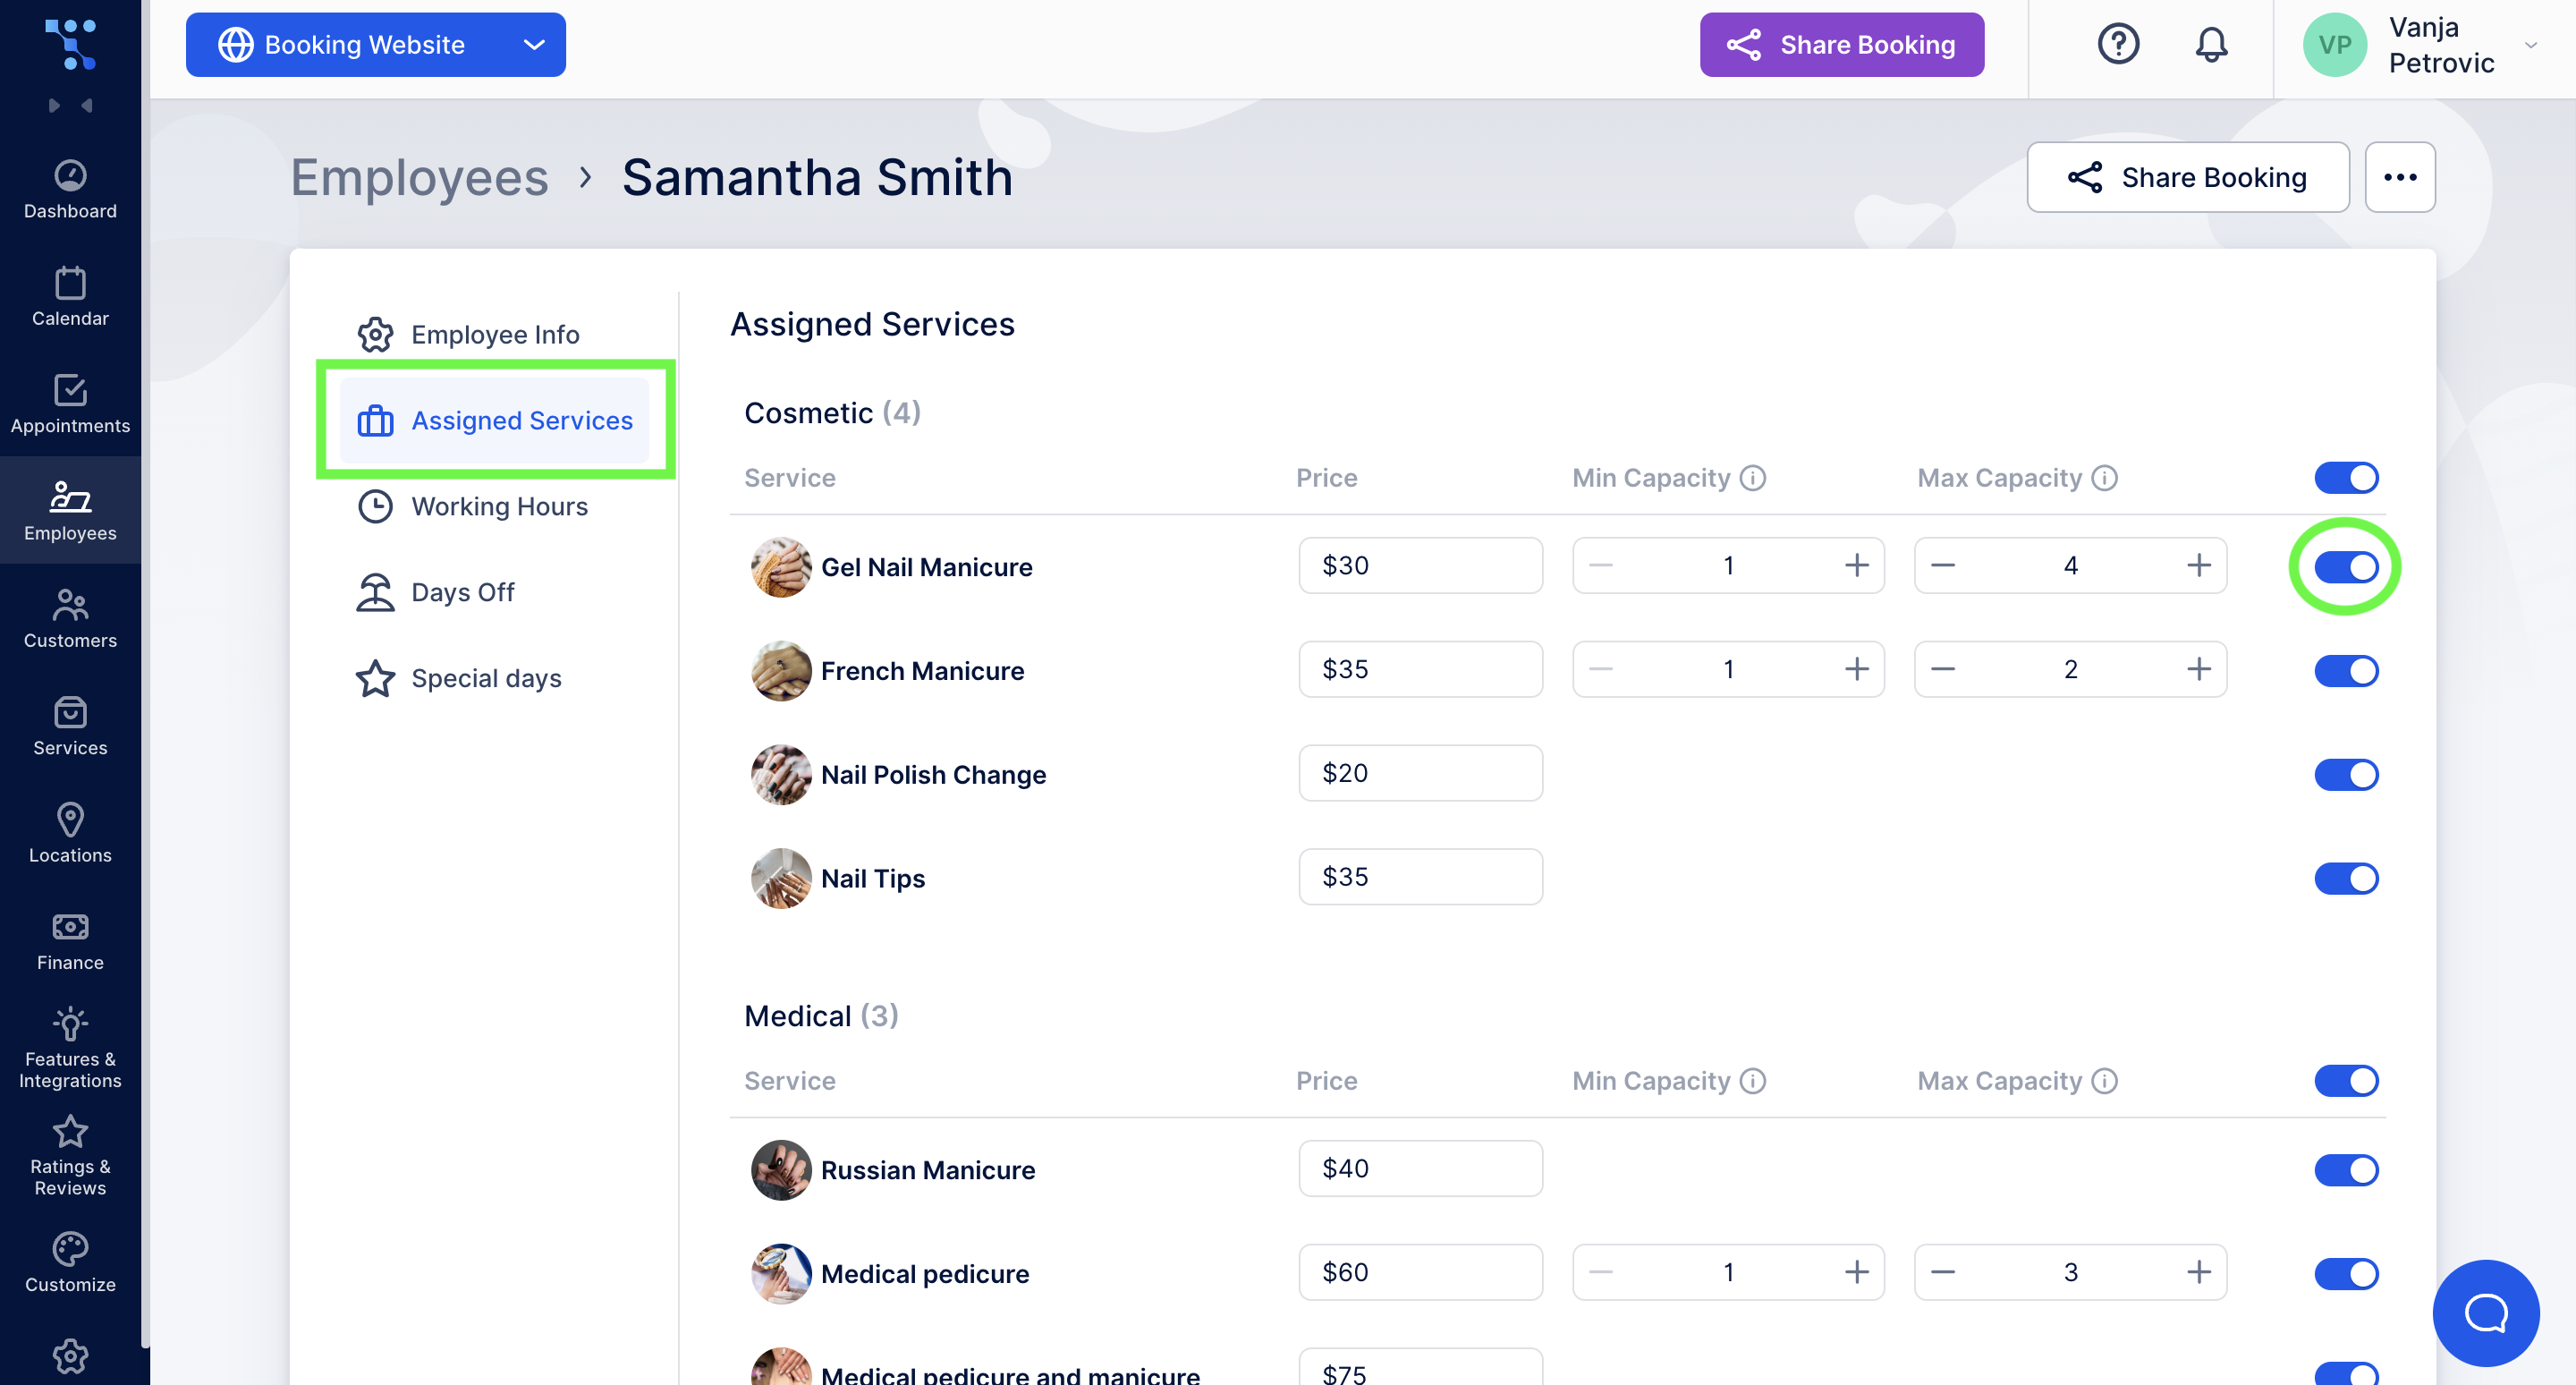
Navigate to the Assigned Services tab in your Employee Edit section. Here, you can see all the created services. Choose which services this employee will provide by enabling or disabling each of them. You can also set the price for each service while adjusting your service settings.
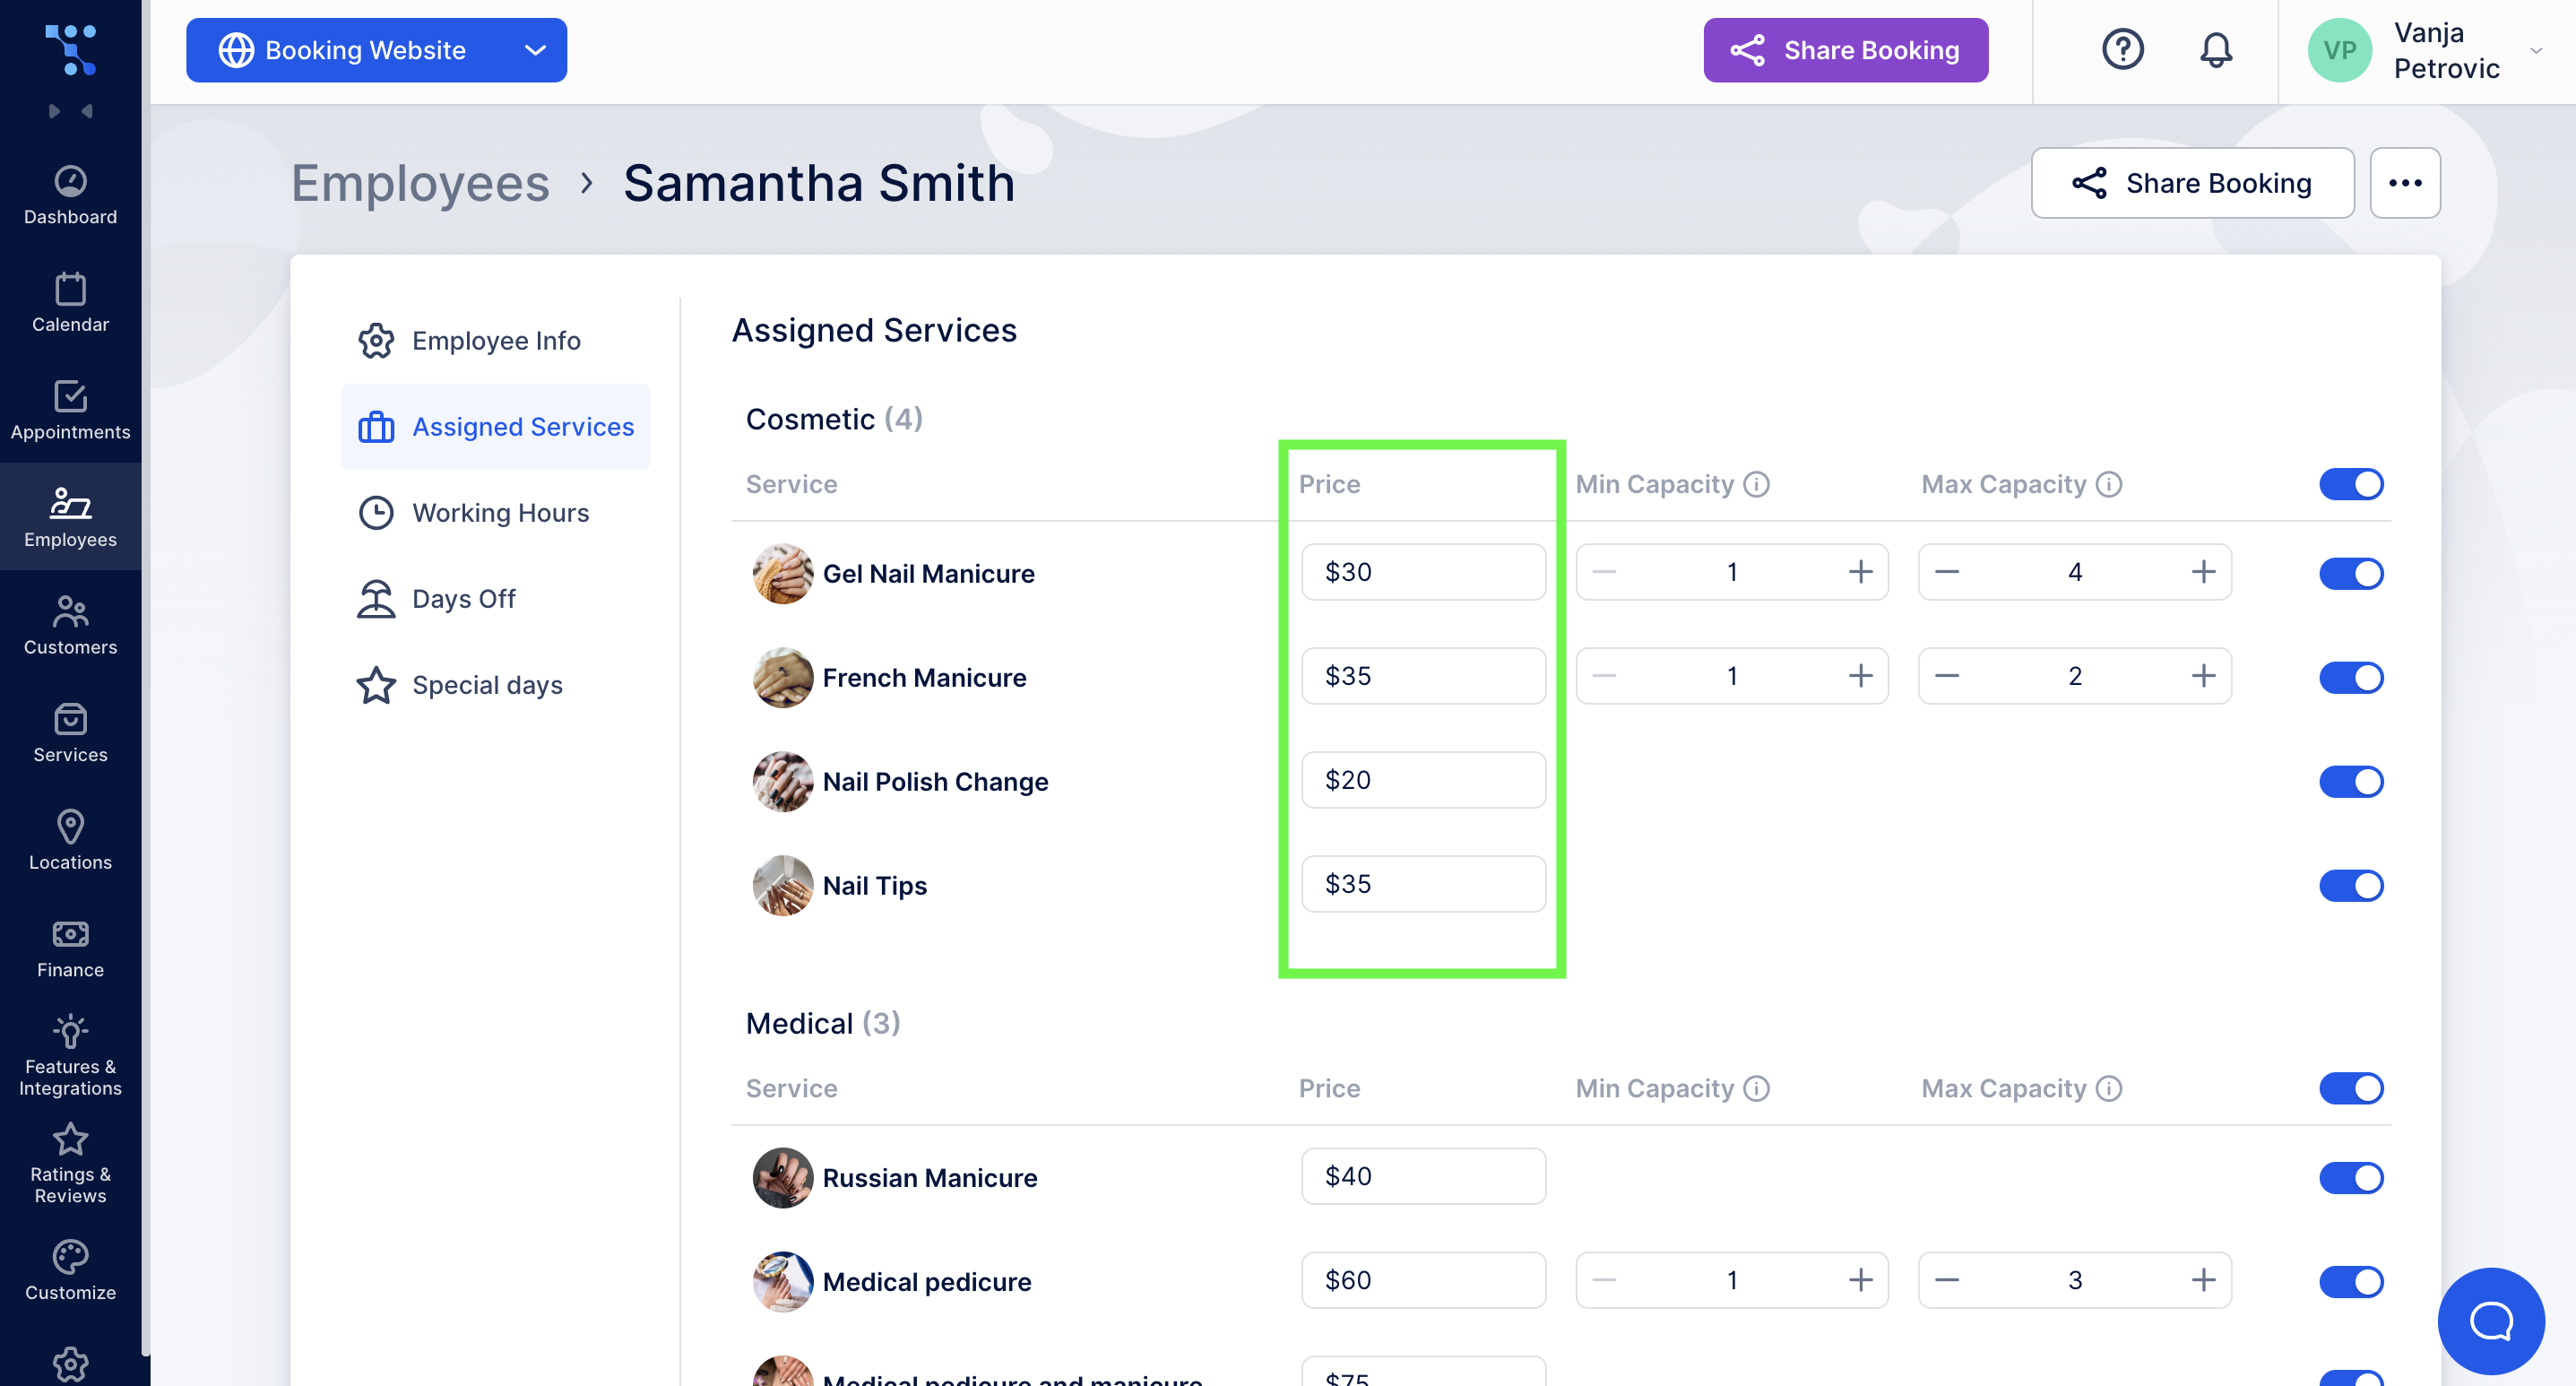
If you need your employees to have different prices for the same services, you can adjust that here. The prices you set in this section will apply to only this specific employee.
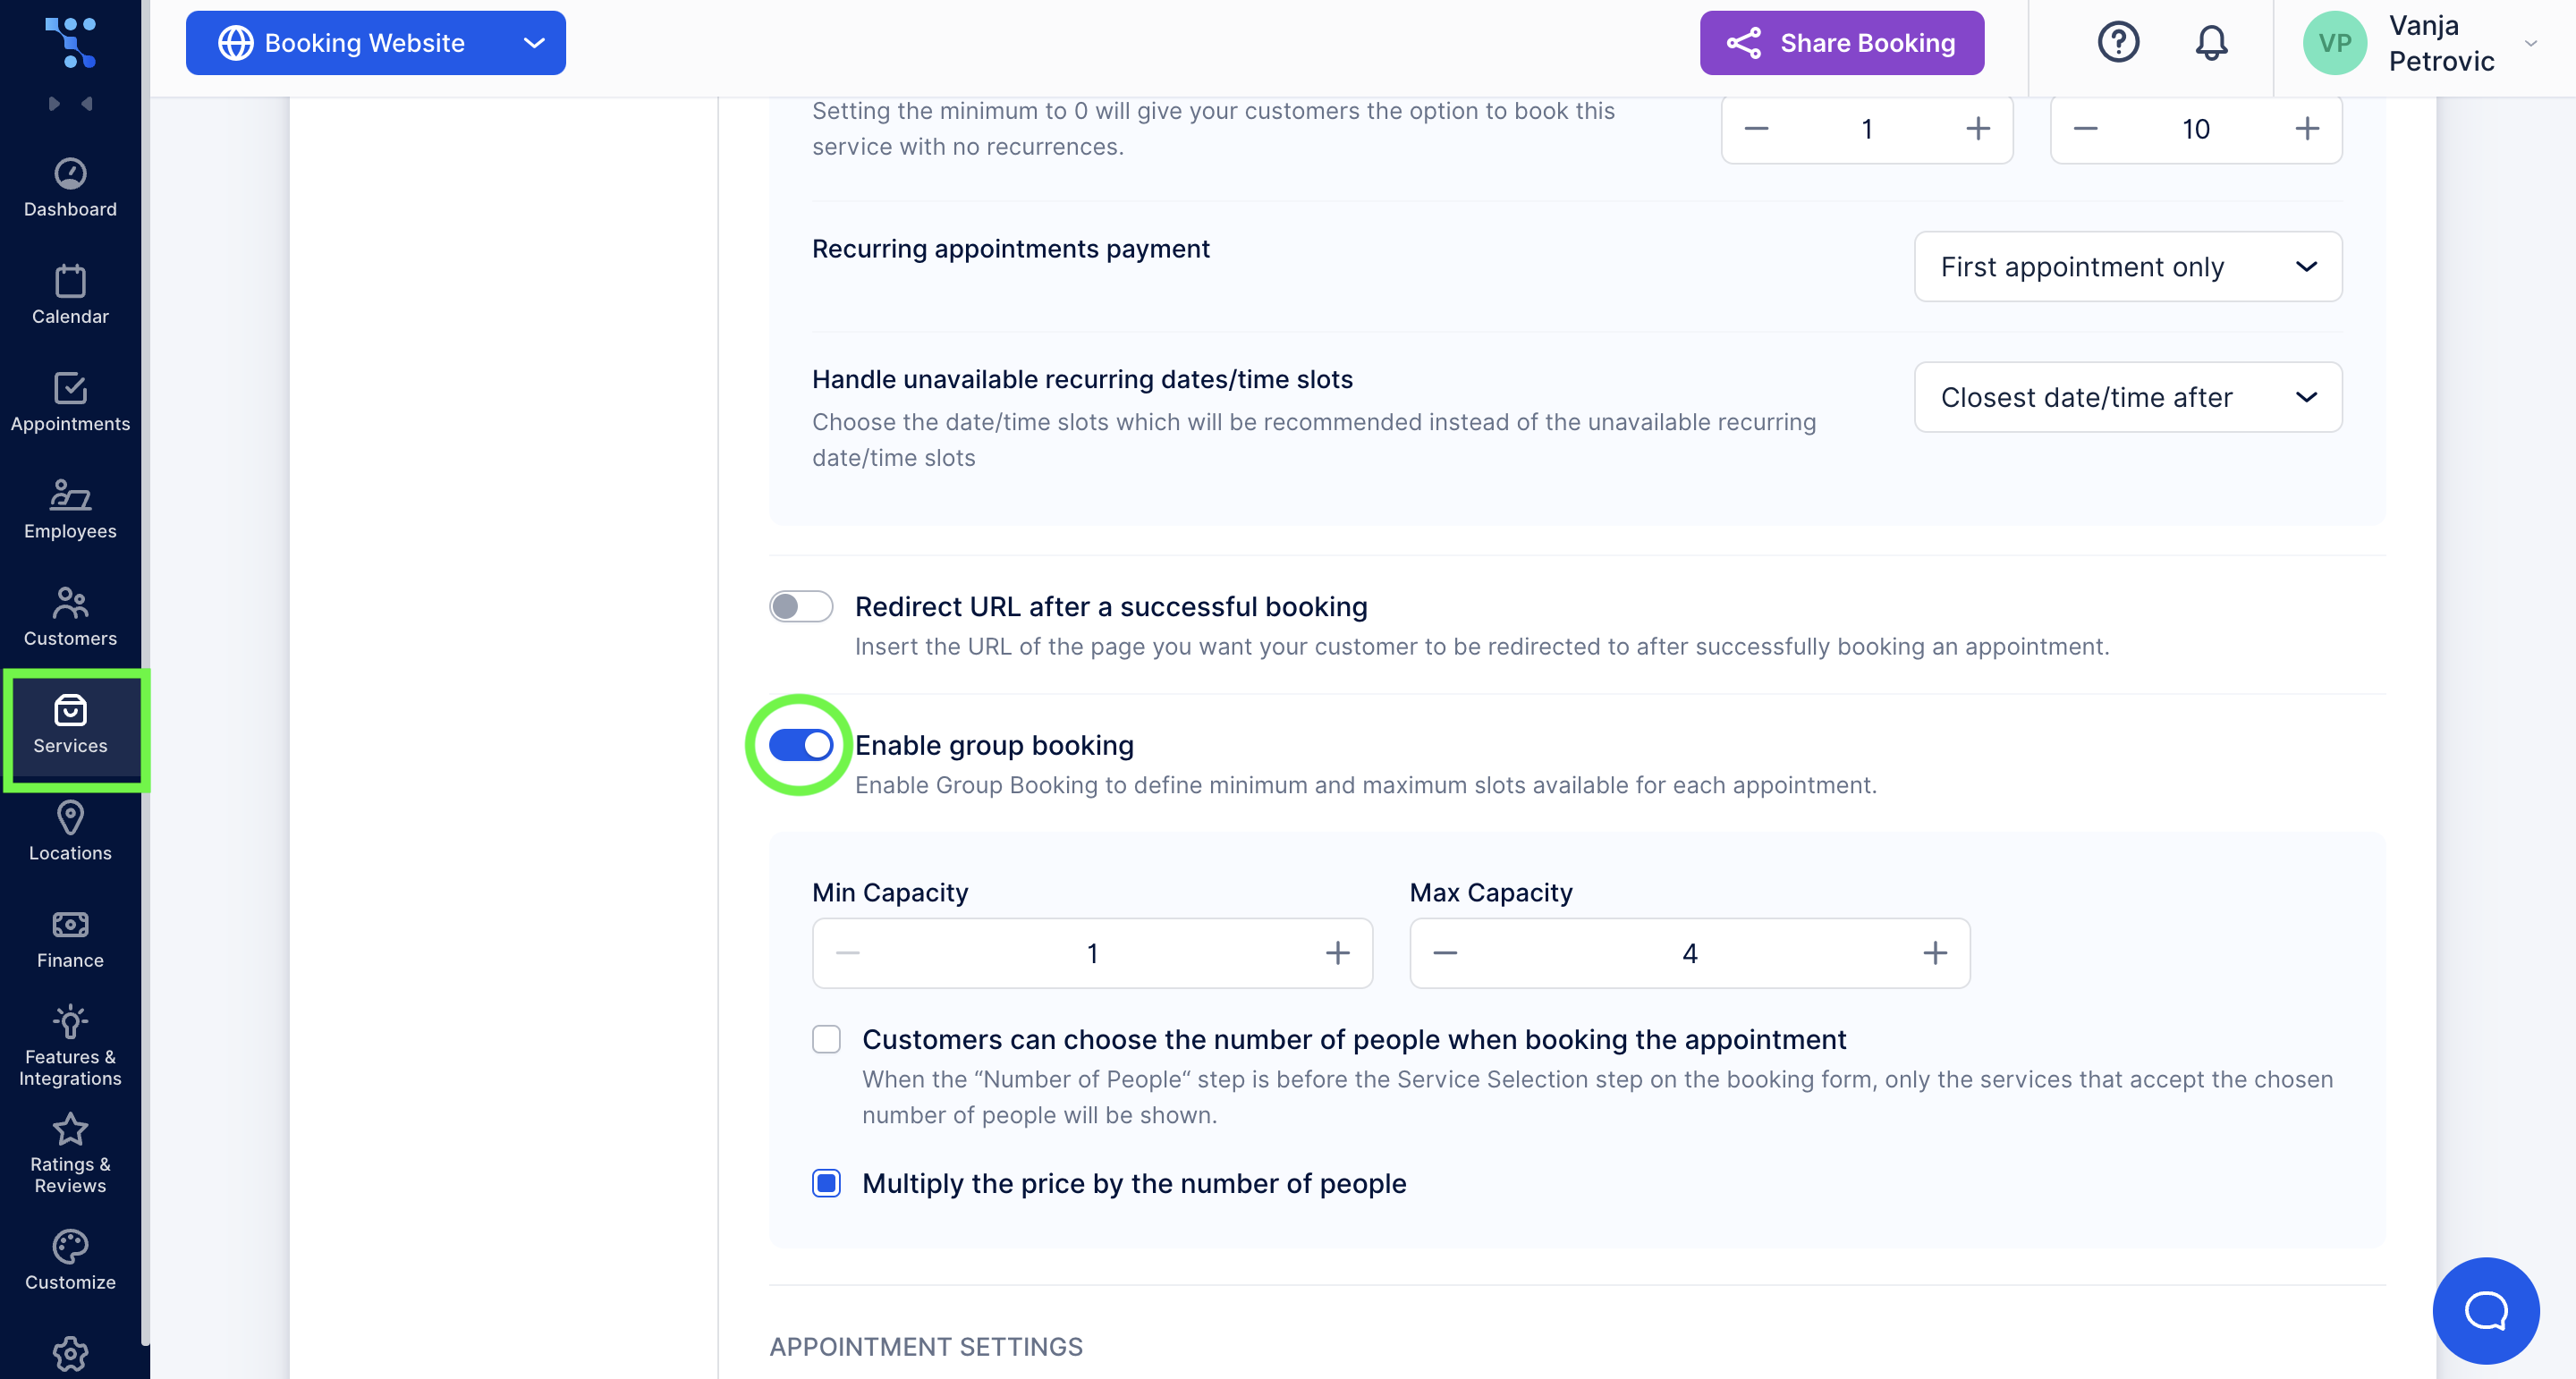
Your staff can also have different minimum and maximum capacities, but you first need to enable the group bookings for that specific service under service settings.
Employee Selection During Booking Process: Example
Here’s how the employee selection process looks for your customers. Once they choose a service, they will be met with a page where they can select the employee they want and available time slots for that service provider.
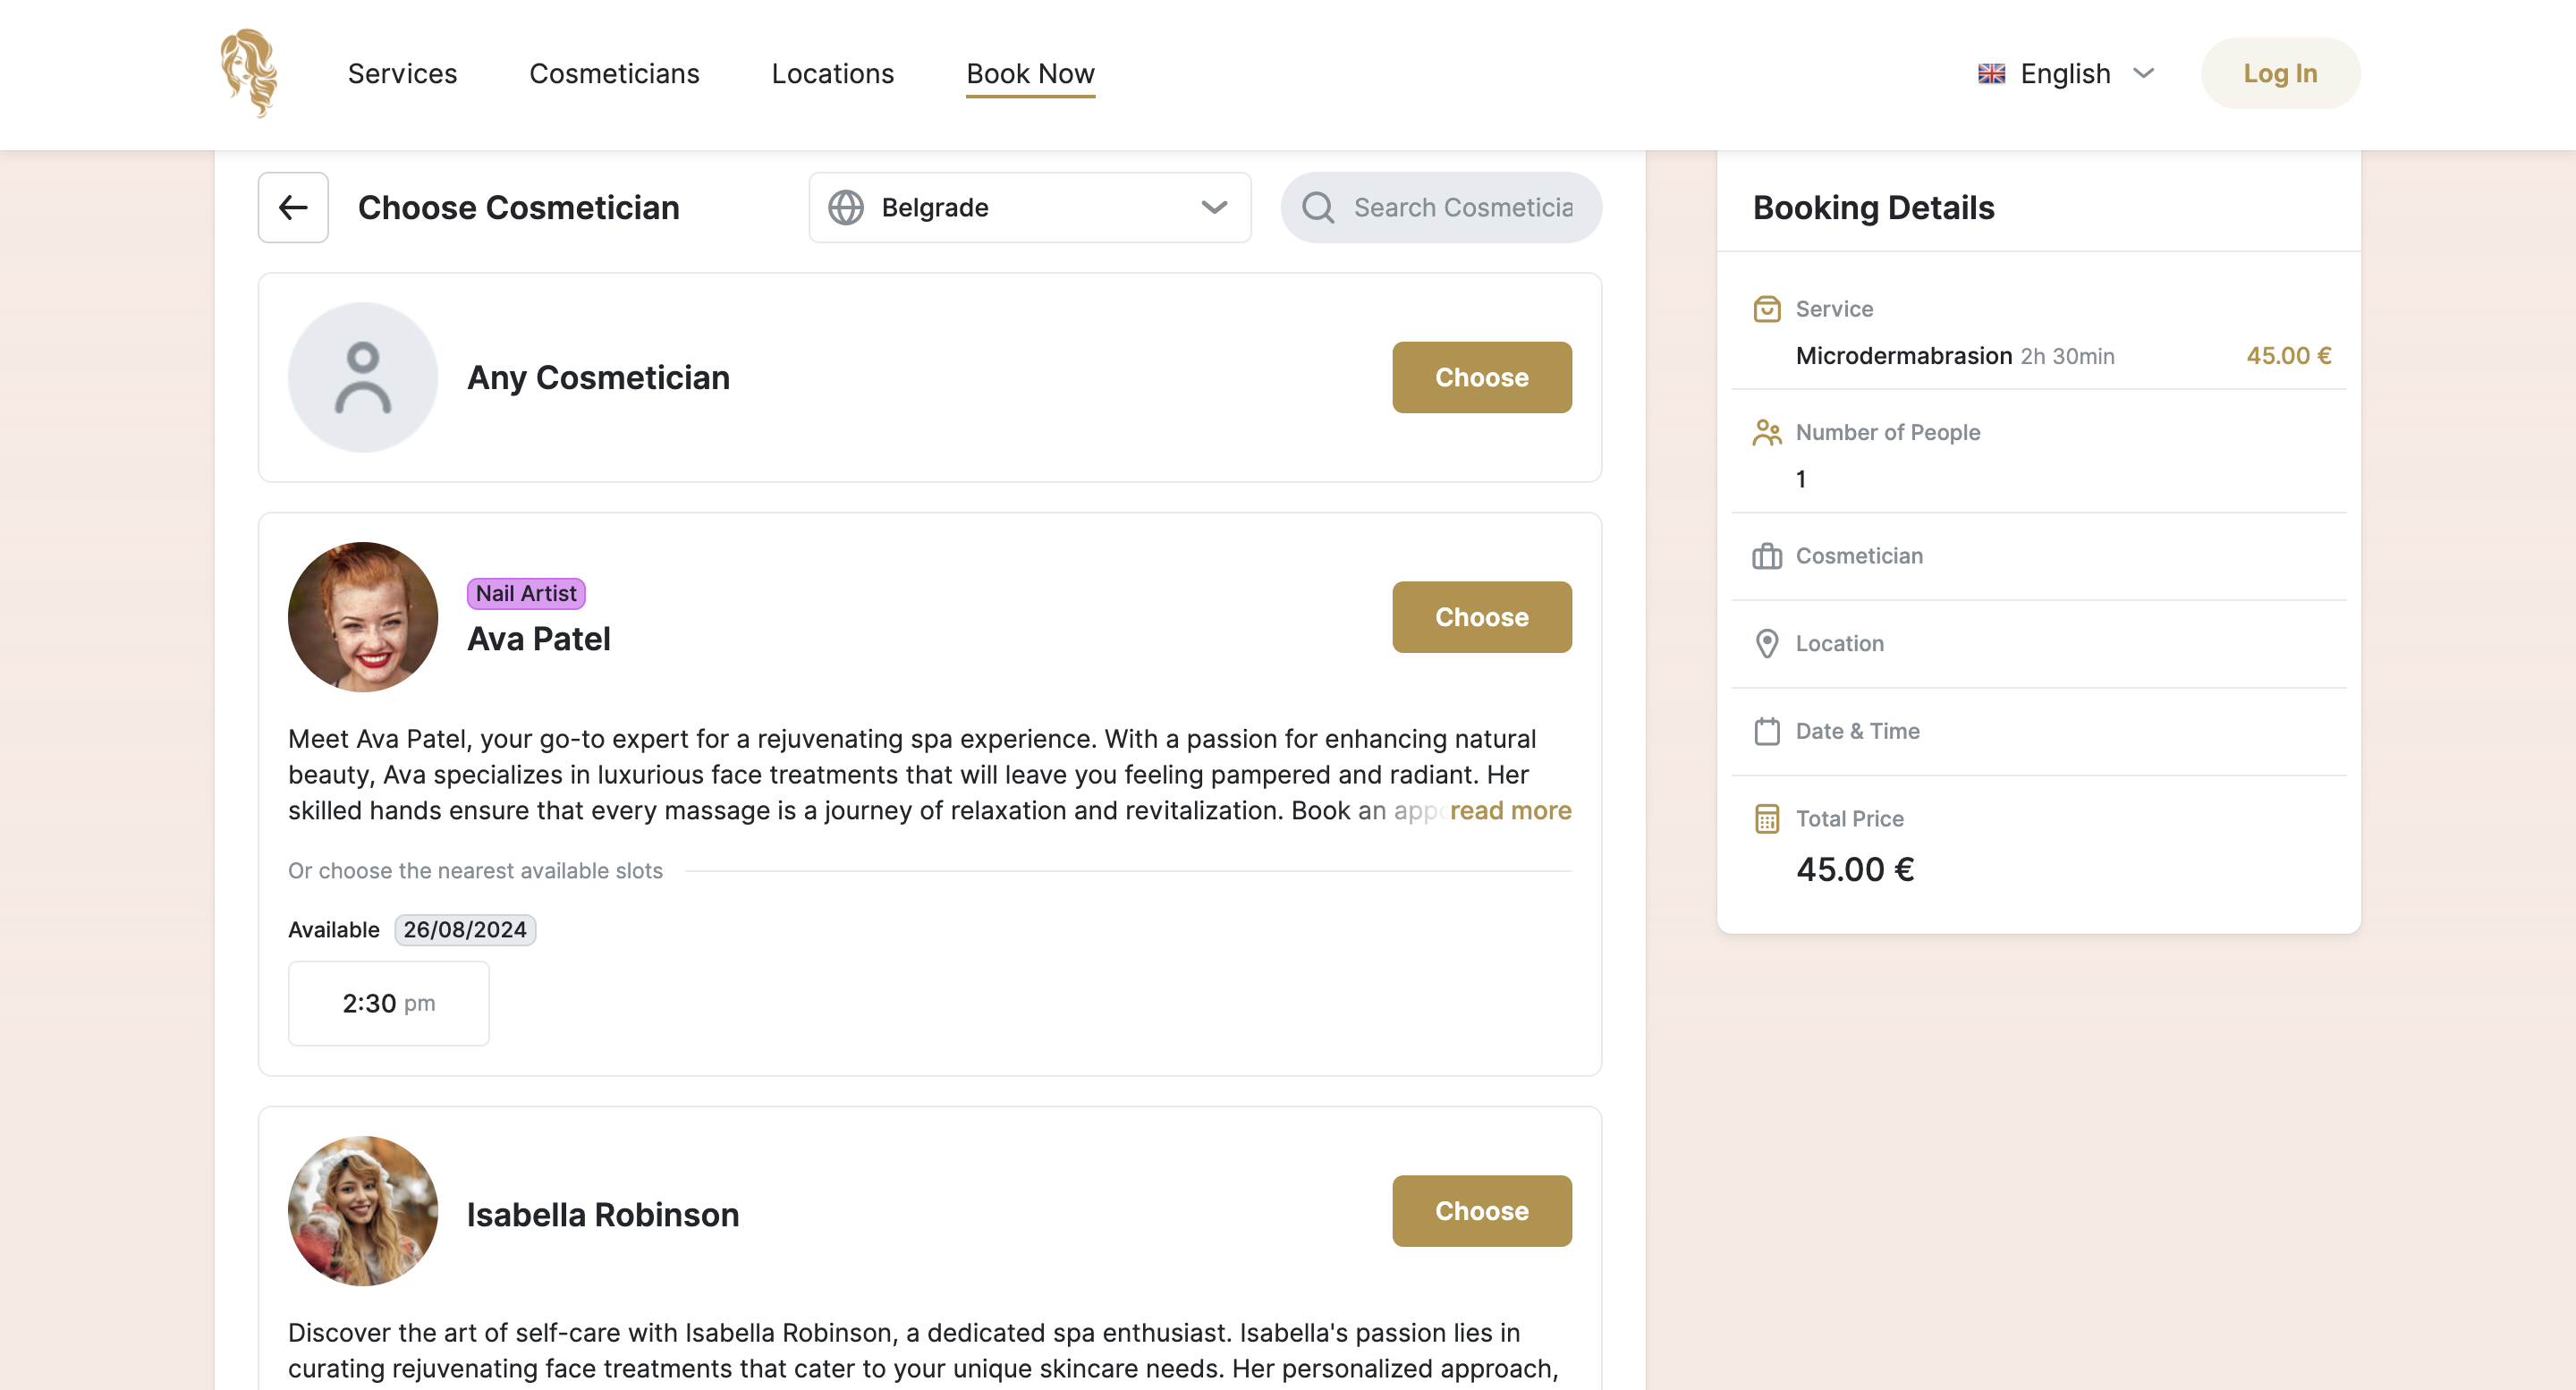
You can also see there's a short biography of the employee and an employee badge.
After the customer has selected a specific employee or any service provider, the booking process continues with the location selection and list of available days and time slots.
Additional Settings Regarding Your Employees
Besides what has already been mentioned, in the Employee edit settings, you can customize working hours, add special days, and days off for each of your employees. If you need help navigating this process, here is our guide to setting employee schedules.
Moreover, if you find it difficult to follow this guide, here’s a video version on how to create and manage employees with Trafft. Check out the additional materials if you want to gain a better understanding of each field in employee configurations.


