
Running a business across multiple locations has its own set of challenges, especially if you have to coordinate employees who work across various sites. But with Trafft, you don’t need to worry!
Let’s dive into how to create multiple locations on your Trafft booking page, and how to manage them.
How to Create Multiple Locations?
First off, make sure you’ve activated the Multiple Locations feature on the Features & Integrations page.

If you see the “Disable” button, you’ll know the feature is activated. If the feature is not activated, you will not see it on the left-side menu.
Click on the Location section on the left-side menu, then on the "+Add Location" button to bring up a new popup.
Location details
Now, it’s time to set up all the details.
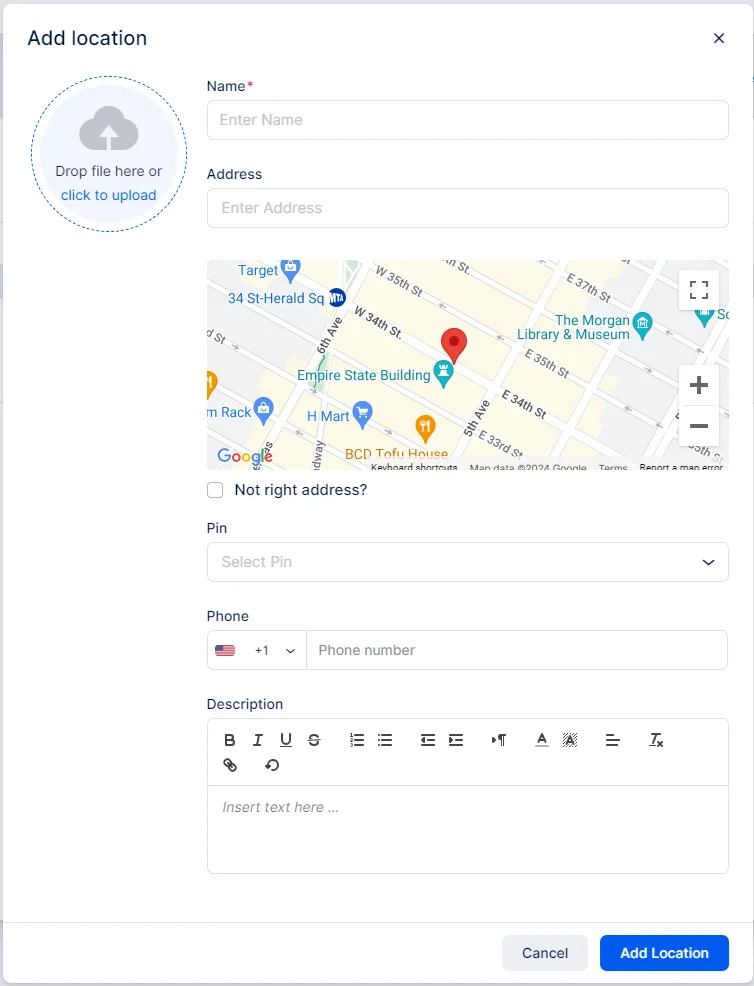
- Location Photo: Upload the main photo for this location. It will appear on the Locations page in the admin dashboard and the booking form. Click inside the circle to choose a photo or drag and drop it into the area.
- Name: Required field—cannot be skipped.
- Address: Enter the location’s address. It will be searched on Google Maps to set the exact pin. This map will show on your booking website’s Locations page. If you have multiple locations, all will be displayed on a separate page for customers.
"Not the right address?" – If Google Maps can't find the address, check this box to manually enter Latitude and Longitude.
- Pin: Choose one of the four pins to customize the map view on your booking website.
- Phone: Add a phone number for this location. Each location can have its own phone number displayed on the booking website.
- Description: Provide additional details about the location. This text will show on the booking form when customers select the location.
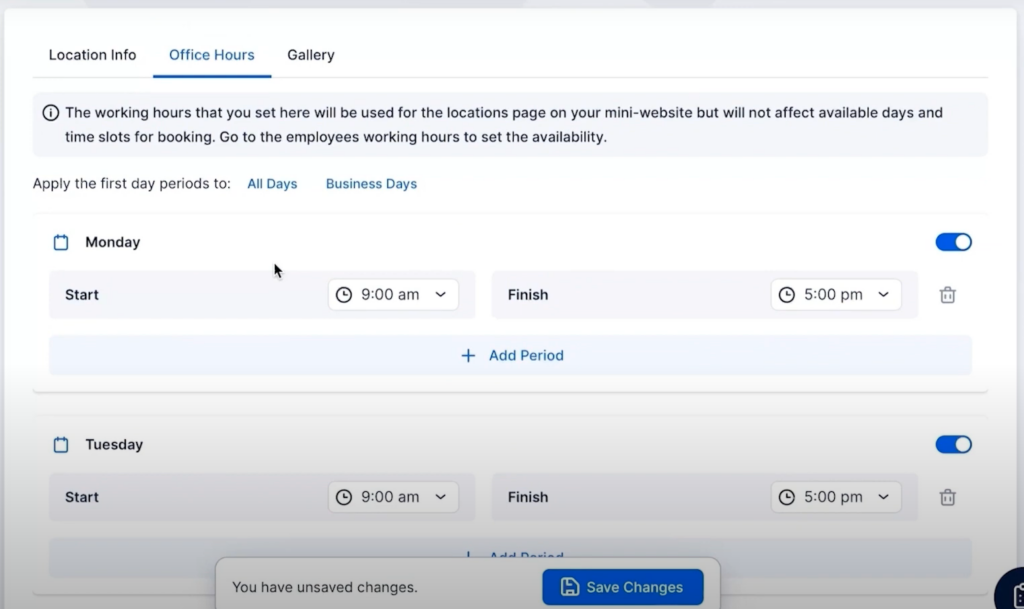
Working hours
Then, navigate to the Office Hours tab to set working hours for this location.
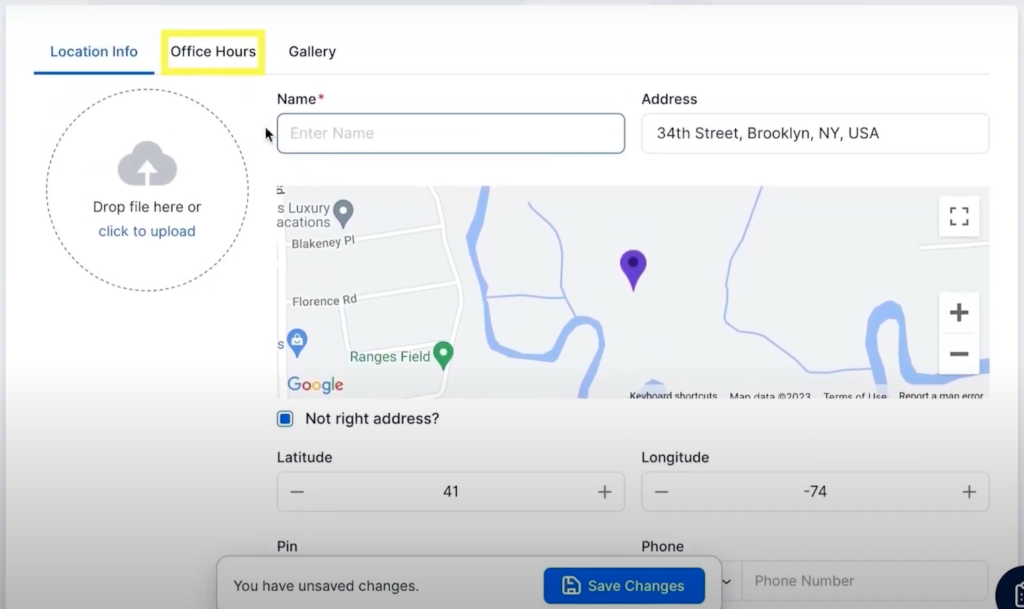
Keep in mind that these hours are not used for booking, but Trafft tracks employees’ working hours first and general working hours. Still, they will be displayed on the location’s page on your booking website.
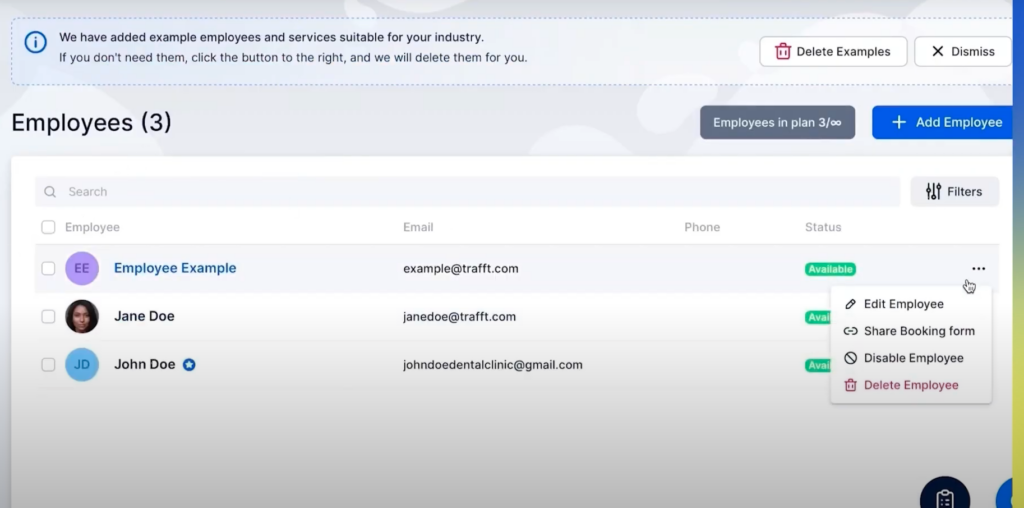
How to Connect the Location with the Employee?
For all of the locations you’ve just set up, you need to connect them with your employees in order to have them displayed on your booking page.
How do you do that?
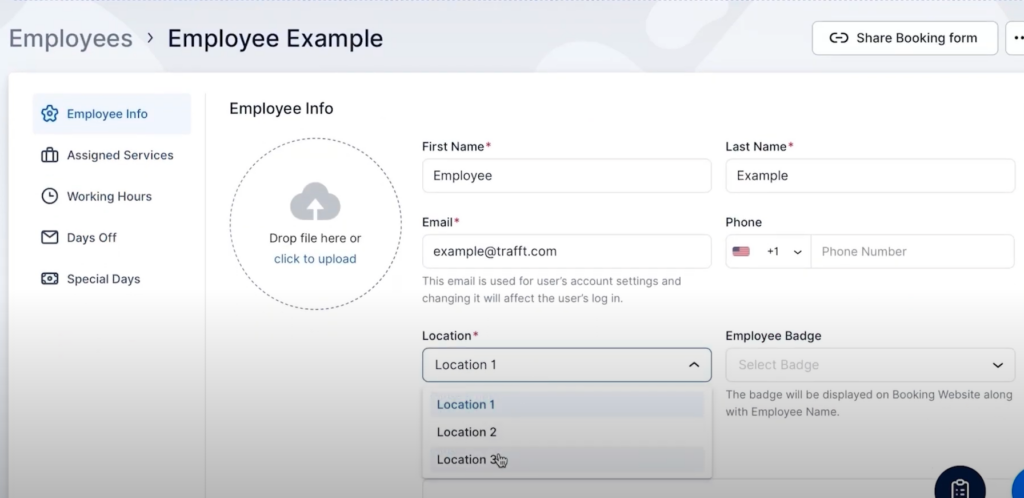
Navigate to the Employee section, choose one of the employees, and navigate to the "Edit Employee" button.
In the location menu, choose the location this employee works at. You can set only one default location for one employee.
But, what if you have an employee that works in two different locations during the week? You can also easily set this up.
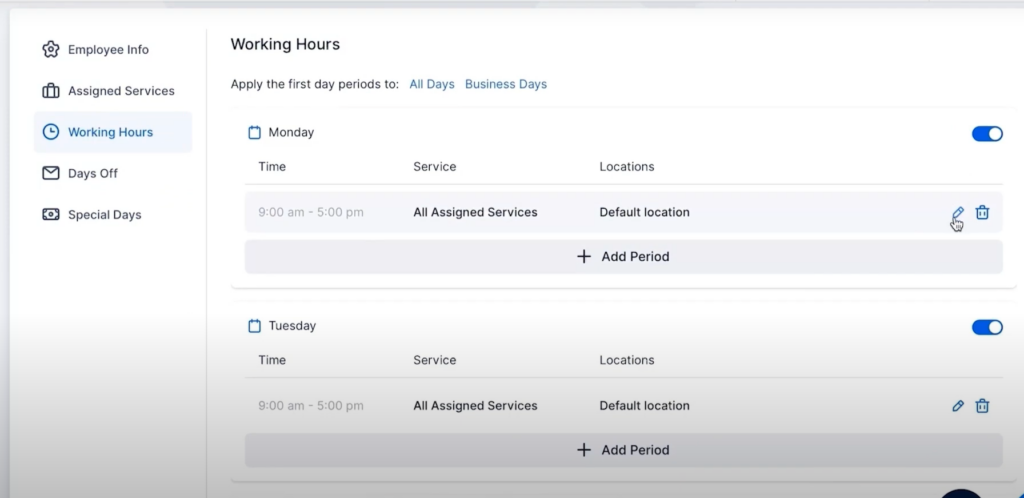
Simply choose the employee you want to edit, with the "Edit Employee" button. Then navigate to the Working Hours tab.
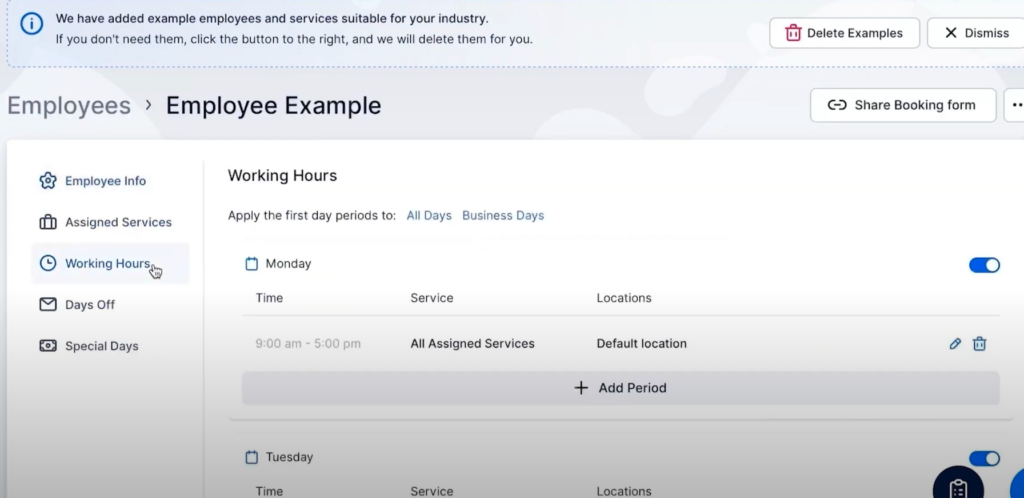
Let’s say this employee works on Location 1 on Mondays and Tuesdays. To edit this, start by clicking on the pencil button on the right.
You’ll see a popup for editing the location. Choose Location 1.
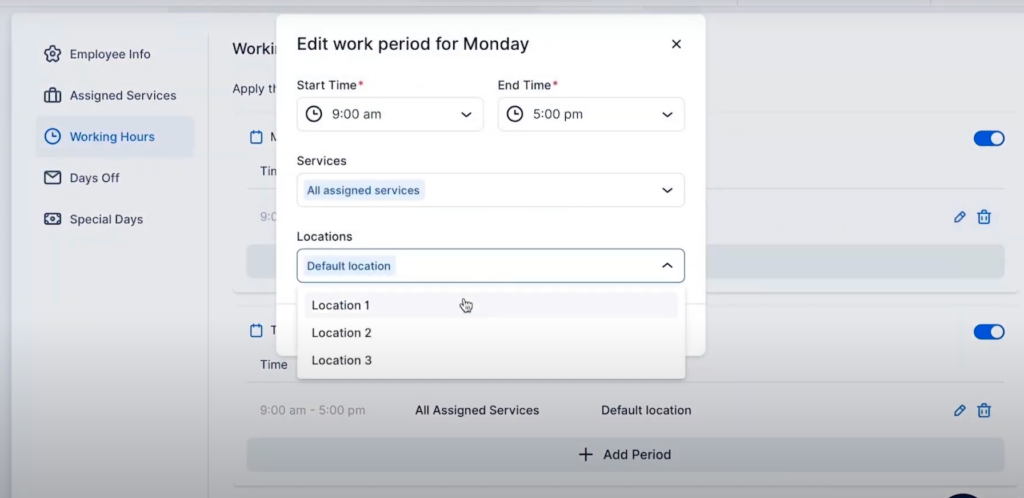
Do the same for Tuesday, and for the rest of the week, choose Location 2.
And, that’s it! You’ve just successfully created and managed locations for your employees.
Don’t forget to read more Trafft hacks:
- Trafft Hacks: How to Set Employee Work Schedules
- Trafft Hacks: How to Set Up Service Extras
- Trafft Hacks: How to Customize the Labels on Your Booking Form