The custom fields on your booking form can significantly enhance your services’ personalization. This way, you can offer a tailored experience to your clients and increase their satisfaction.
In this guide, we’ll show you how to easily add custom fields to your Trafft booking form, enabling precise customization that meets your specific business needs.
By the end of this article, you will be able to modify your booking system with added fields that capture information from your clients. By doing this, you will improve your booking process and service delivery.
Let’s dive into giving your clients an even better experience when booking a service!
Adding Custom Fields to Your Booking Form - A Step-By-Step Guide
Whether you're a cleaning service owner, consultant, or personal trainer, sometimes you need extra details about your clients—like if they have a dog that requires special cleaning equipment, specific questions they want to discuss, or their current fitness level.
Custom fields will help you gather all of this information.
On your dashboard, navigate to the ‘Customize’ section at the bottom left corner, then choose the ‘Custom fields’ card.
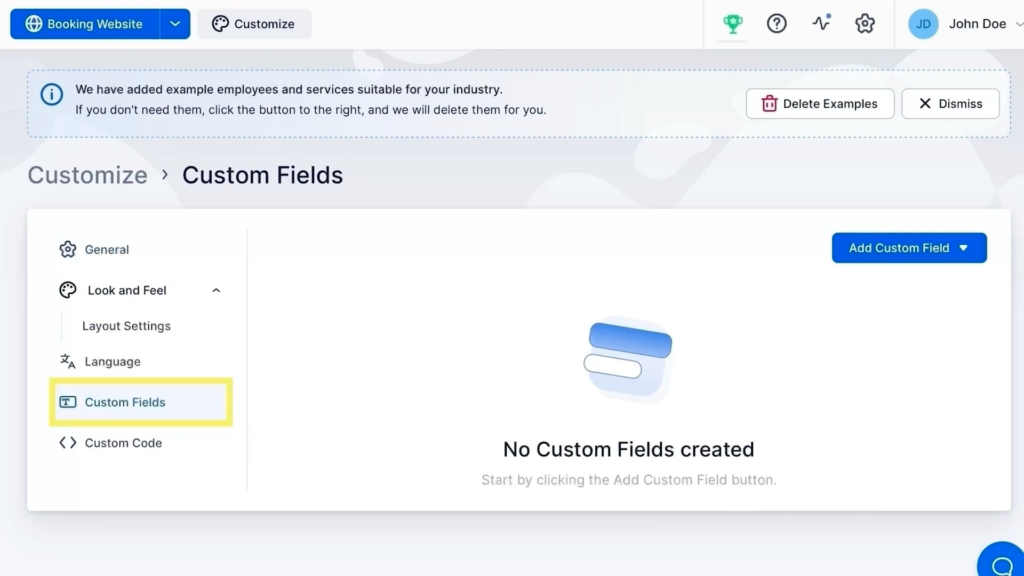
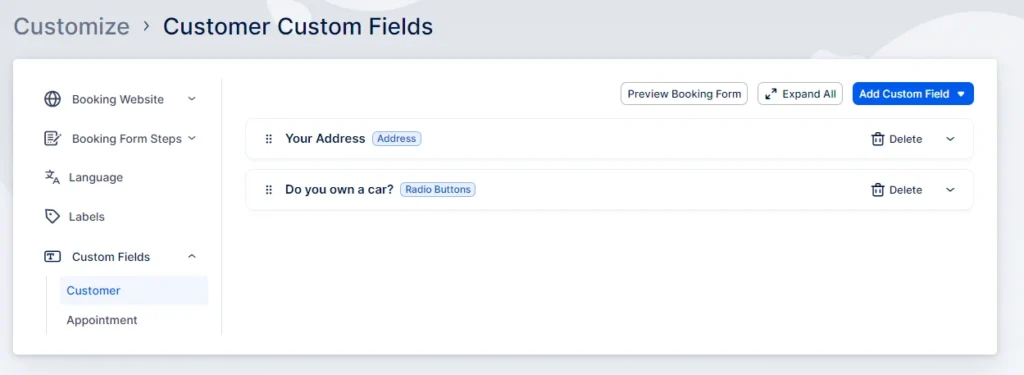
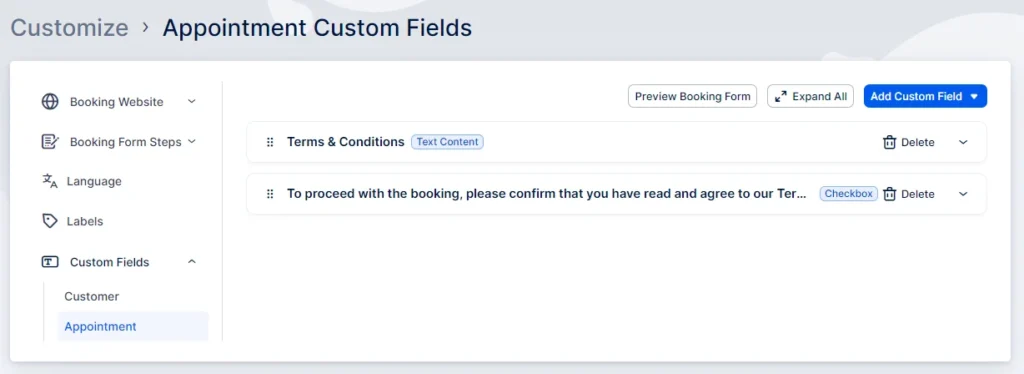
When you choose the ‘Custom Fields’ option, it will show two categories:
- Customer
- Appointment
The custom fields related to customers will be linked to individual customers, while the ones related to the appointments will be associated with the specific bookings they make (and will be available for every booking).
Clicking the ‘Add Custom Field’ button on the right will display a dropdown menu with different types of custom fields for you to select from.
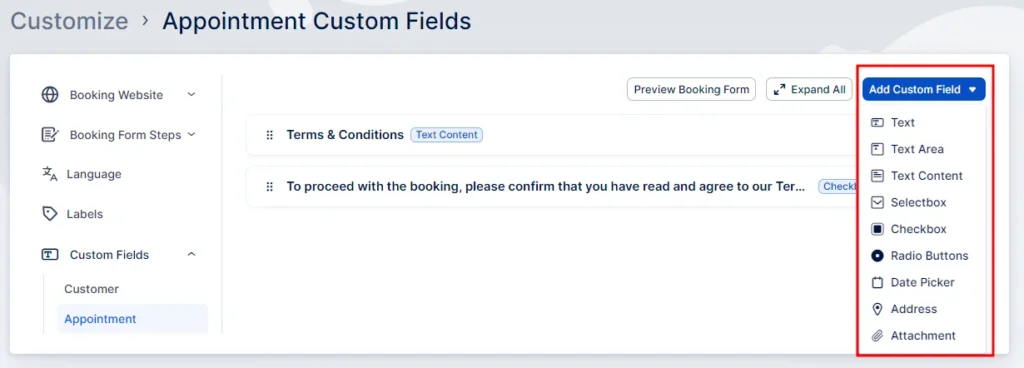
You have several input types to choose from:
- Text: A field designed for short texts, such as descriptions, limited to 255 characters.
- Text Area: For longer entries, up to 1,000 characters.
- Text Content: Displays text such as instructions or messages.
- Selectbox: A dropdown menu with a list of predefined options.
- Checkbox: Allows multiple selections from various options.
- Radio Button: Users choose one from mutually exclusive options.
- Date Picker: A calendar widget to pick specific dates.
- Address: Integrates with Google Maps for accurate address input with autocomplete suggestions.
- Attachment: Enables file uploads to bookings, with a maximum size of 20MB and support for various file types such as .jpg, .gif, .png, and .pdf, among others.
How to Fill out Custom Fields
When adding custom fields to appointment bookings, you can set up the following options:
- Label: Name or title of the field.
- Placeholder: Text displayed in the field before entry (if applicable).
- Services: Choose the services where this field appears.
- Required Toggle: Decide if the field is mandatory or optional.
- Field Size: Control the field's size on the booking form.
- Display in New Row: Option to display the field on a new row.

For fields like select boxes, checkboxes, or radio buttons, you'll also specify the choices available to customers.
Similar settings apply to customer-related fields, with the main difference being the visibility option. Here, you decide whether the field is visible at all appointments or just the first one.
After setting up, these custom fields appear at the final stage of the booking process and are included in the Customers section where you can view or edit them.
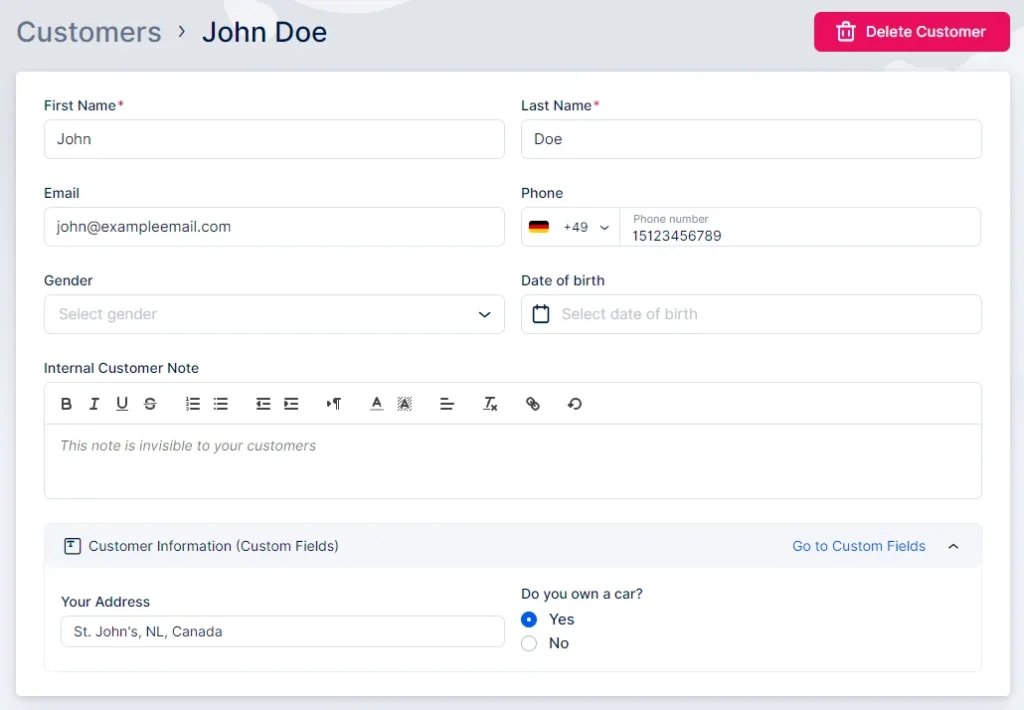
They also show up on both the Calendar and Appointment pages and can be incorporated into notifications. However, remember that fields not selected for all services won't appear in default or custom notifications meant for "all services." If these fields are essential for certain services, create specific templates for them.
When creating custom fields, it's crucial to identify the key information you need from your clients to streamline the booking process and enhance service delivery.
Prefer a video tutorial?
Watch out step by step guide for adding custom fields!


